Bushcraft and Survival training – More than just skills and tips for the unprepared stay

As Australians, we love the idea of getting out into the bush and being at one with nature. But venturing out can be a dangerous pastime if you don’t know what you’re doing and are not prepared.

You never know when you may be placed in a lost or stranded situation for which you have not planned or an urban emergency crisis that takes you out of your comfort zone. Many people do not consider ‘what could go wrong’ and are, therefore, unprepared both mentally and physically for such situations. This, in turn, can leave them poorly equipped to deal with a challenge of this type. The better prepared you are, the less affected and vulnerable you will feel, helping you to react properly and make better decisions when you need to.

Learning wilderness survival and bushcraft skills such as fire making and management, water procurement, shelter building, tree and plant uses, navigation, camp craft or how to use signalling devices, can greatly improve your chances of surviving and being rescued in the unfortunate event of something going wrong such as becoming lost or injured in a remote area or a vehicle breakdown. Learning these life skills can also greatly benefit people caught in an urban emergency or crisis which takes them out of their usual comfort zone.

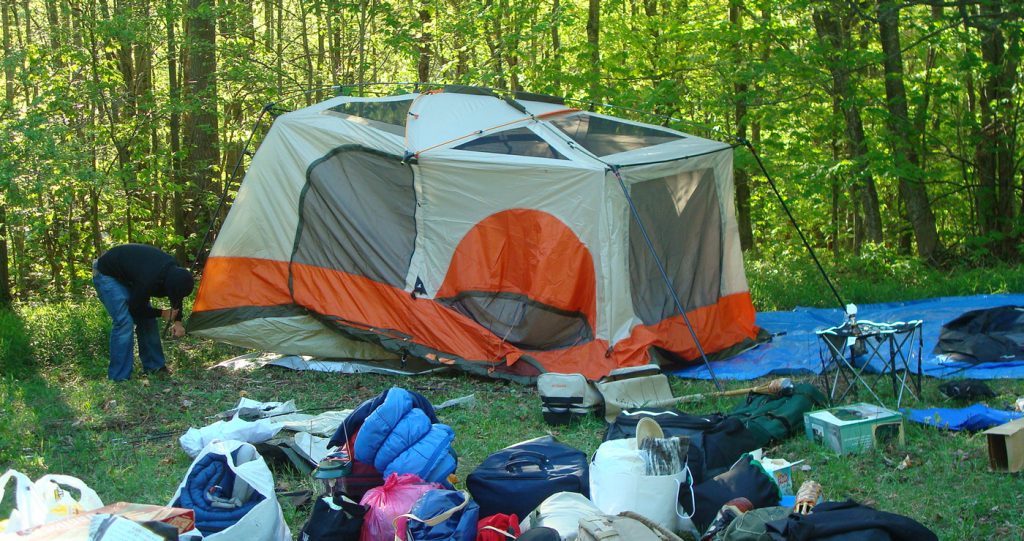
In recent years, and especially since the Covid pandemic, vehicle camping or “glamping” to be more accurate, has become a huge thing in Australia with more and more people gaining access to remote areas via the use of their 4WD’s. This has been both a good and a bad thing as it has enabled more people to get out, see and enjoy more of our large beautiful country but bad in the sense that people have become too overly dependent upon the ridiculous amount of unnecessary equipment, gadgets and paraphernalia that goes with it, totally insulating themselves from any real interaction with nature. You just have to take a look at the shelves of Australian camping stores to see the plethora of unnecessary luxury equipment that now fills them. This over dependence on equipment and gadgets, coupled with a non existent knowledge of bush skills has led to a number of fatalities in our outback and non urban areas and it will continue to increase as people simply don’t know what to do once things stop working or they find themselves lost without their fancy gadgets and technologies that they are so dependent upon.
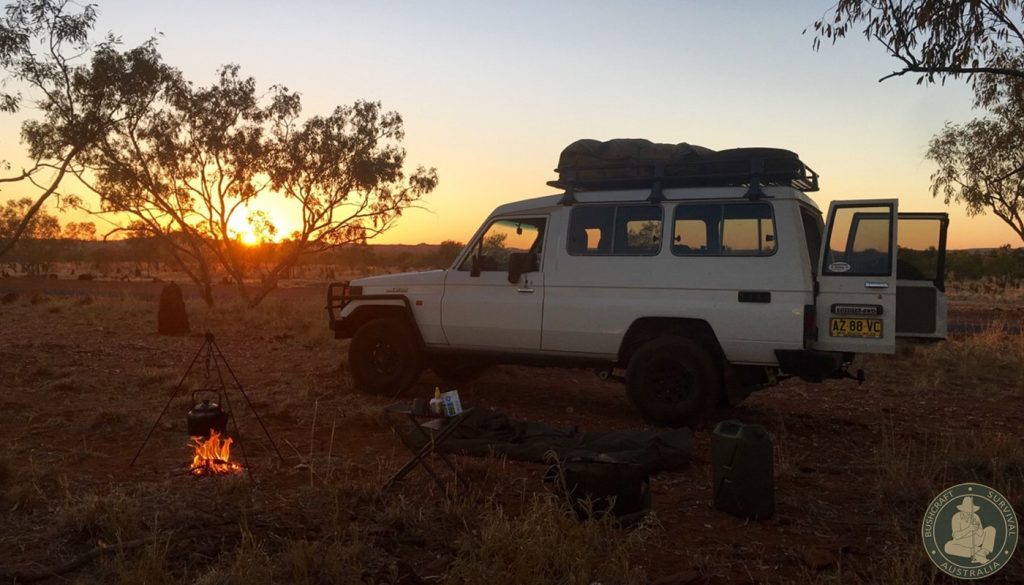
4WD camping with “minimal equipment” allows you to interact with the environment without totally insulating yourself from it

This increase in 4WD camping without any outdoor knowledge and skills, has also led to an increased number of our beautiful places being trashed and left in an appalling state. Embarrassingly, far  too many Australians do not know how to clean up after themselves or know how to respectfully go to the toilet in the bush, burry their waste and  burn their  toilet paper (if it is safe to do so, taking it with them if  they cant) leaving no trace they were there.
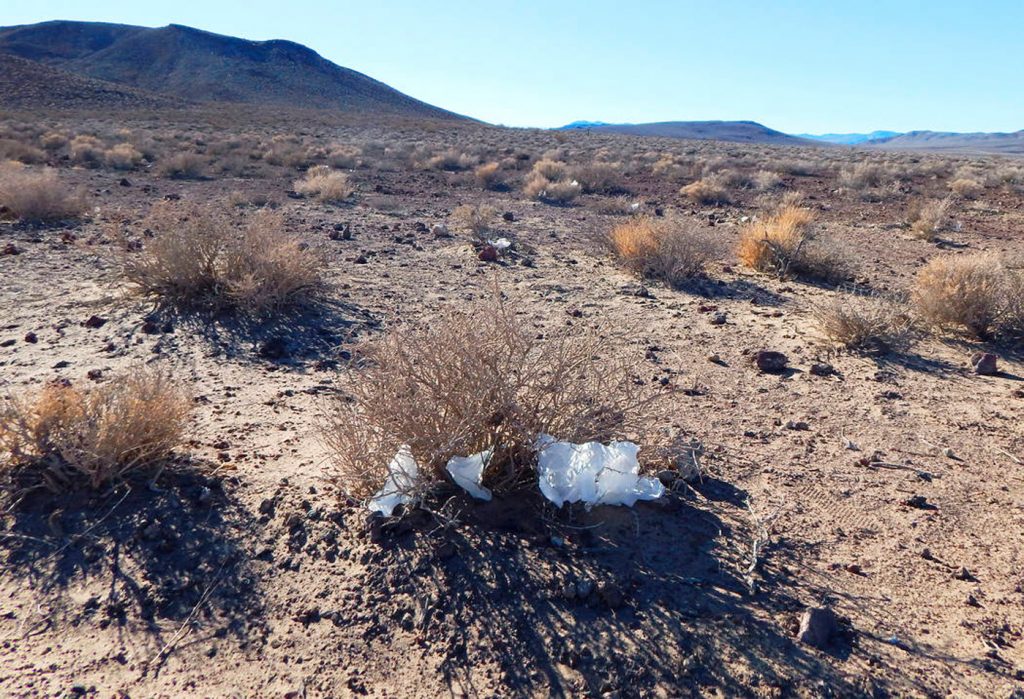
An alarming number of Australian’s don’t know how to respectfully go to the toilet in the bush and clean up after themselves!

This is a social problem and one of the reasons we are seeing so many increased rules and laws preventing people from visiting and interacting with many of our wild places. Is it because people are lazy, ignorant or just don’t care or because of a complete lack of  relevant outdoor education and environmental stewardship which should be taught at school but isn’t?

This same attitude and over reliance on equipment without any knowledge or skills, was the thing that led many of Australia’s early explorers to their deaths, such as the ill fated Burke and Wills expedition who took over 20 tonnes of equipment and provisions with them but had no knowledge of the land, any bush skills or any respect for traditional aboriginal wisdom, thus perishing as a result! That’s natural selection as far as I’m concerned. Regrettably, these two fools made it into the history books as well known Australian explores. There is even a range of camping products named after them! A travesty indeed!

The opposite is true of John McDouall Stuart who travelled very light, only taking with him essential equipment and relying on his knowledge of the bush, his skills and respect for traditional knowledge. He was successful and probably Australia’s best explorer.​

All the gear but no idea”…everything including the kitchen sink!

Unfortunately, many people only see learning survival skills as something “they have to learn just in case something goes wrong” and don’t realise that a lot of the skills learnt in survival training and it’s very different parent subject “bushcraft”, are fun and interesting in their own right and instil a deep respect for nature and the environment. Many Australians also consider themselves to be “self proclaimed experts” when it comes to bush skills, however in reality, nothing could be further from the truth with the vast majority of Australians not being able to light and maintain a fire correctly, know how to make water safe to drink, have an appalling knowledge of the trees and plants around them, or don’t know how to use a compass or find South using the Southern Cross!
Many people also lack the basic knowledge and skills to handle an urban emergency or crisis in which the power has gone out and supplies are low. The mass panic buying of toilet paper and other items during the Covid pandemic clearly illustrates this.

Survival / Bushcraft / Camping

What’s the difference?

There are significant differences between survival, bushcraft and camping and most people don’t realise what these differences are.

Survival

Survival training is what the military teaches our soldiers, pilots and seaman in order for them to stay alive in a remote or hostile environment, long enough for them to be rescued or effect self rescue. During World War 2, there was the real threat of pilots being shot down almost anywhere in the world, so the need arose for survival manuals with universal principals that could be applied in any environment.

Survival training is designed to teach serviceman and servicewoman a variety of necessary skills in the shortest possible time. These skills include learning the survival priorities of first aid, clothing, shelter, fire, location, water, food and navigation which can be applied to different environments. Many civilian activities and extreme sports such as mountaineering, climbing, hiking, cross country skiing etc require survival type training relevant to their chosen activity to be undertaken in order to participate in that activity safely.

Survival type training is typically focused around a 72 hour emergency situation where something has gone wrong, be it a vehicle accident, plane crash, natural disaster, a war zone or someone becoming lost in the bush etc.

Survival training is primarily equipment focussed or improvising with equipment in order to get out of that particular situation and back to “civilisation” or safety as fast as possible and in any way possible with little or no regard for nature or the environment in the process. Ethics go out the window as it’s an emergency situation.

The word “survival” became popularised in the 80’s with the “Rambo” type movies, the fit for purpose “survival knife” and the misconceived idea that man needed to “fight” nature and the elements in order to survive at any cost! This has led to a spate of reality based TV shows in recent years that over-dramatise this underlying fear based narrative of man “against” the hostile environment…some good, some not so good and some absolute rubbish!

These shows although popularising outdoor pursuits and sparking an interest in the “survival world” which is a positive thing, have been focused primarily on entertainment and drama in order to secure ratings, rather than on educating the public about realistic skills and best practice.
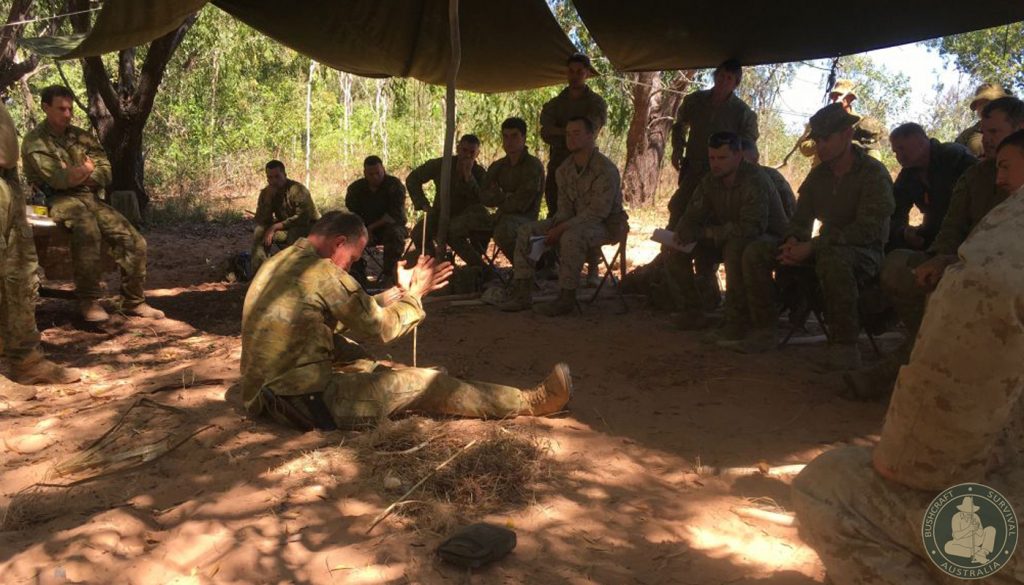
The author teaching soldiers on an army survival course how to make fire using a traditional friction fire method known as the hand drill

Bushcraft

Bushcraft focuses on maximum use of knowledge and skills with “minimal” reliance on equipment. Bushcraft is the parent skill that all survival training comes from and has a genuine direct relationship with the land and a deeper connection to nature.

Bushcraft draws from the knowledge and skills that traditional cultures across the world have used to survive and live comfortably in the wilderness for thousands of years.

The etymology of the word “bush” is not Australian as many Aussies believe but likely to have Dutch roots. The term bushcraft originated in the 1800’s in the new world British colonies (America, Canada, Australia, New Zealand and Africa) and evolved from the terms “colonial craft”, “bushmanship” and “woodcraft” which were used to describe the wilderness living knowledge and skills that traditional cultures had already been using for thousands of years and that the new settlers, explorers and colonists had to learn and adopt in order to travel through and survive in the new world.

Bushcraft is all about going into the bush with minimal equipment and manufacturing everything else you need from what you find around you. It requires a detailed knowledge of the plants, trees, animals and the natural world that surrounds us, thus contrasting to the absurd amount of unnecessary equipment, gadgets and lack of knowledge that modern camping has come to be.
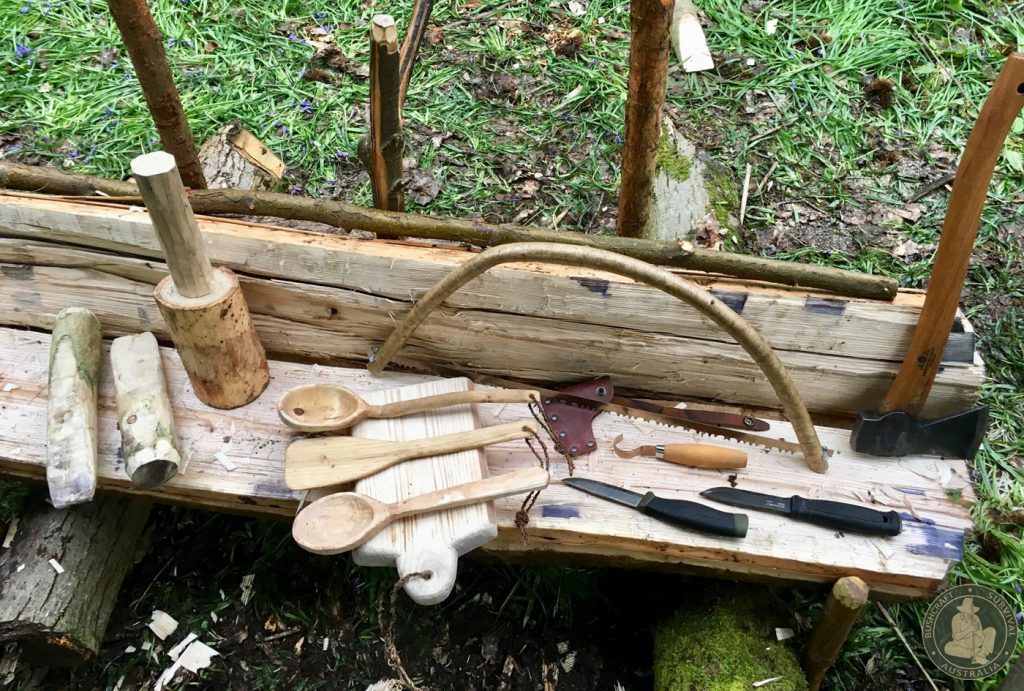
With a little skill and a cutting tool, you can make everything you need in the outdoors

Bushcraft and survival overlap in terms of their desire for self-reliance but move away from each other in their desire for connection and relationship to the natural world. They both have two different ethical standpoints!

In practise we can move from one to the other as they have very similar skill sets but ethically and philosophically bushcraft and survival are different and quite oppositional.
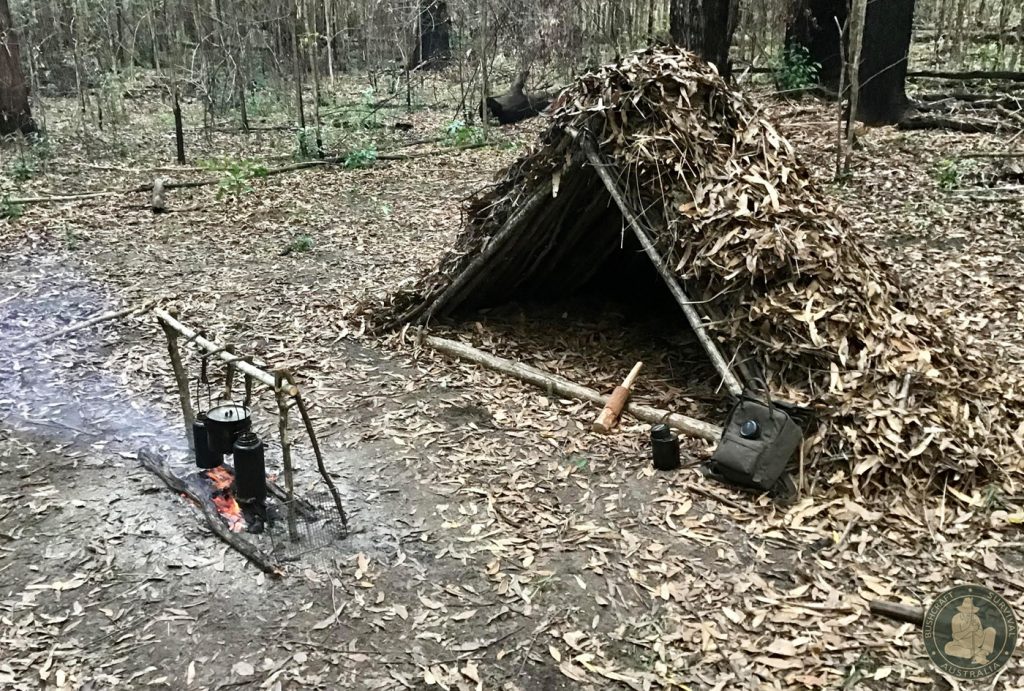
Having the skills and knowledge to make what you need makes you more self-reliant and is incredibly rewarding

Camping

The term camping comes from the military heritage of campaigning, which can be traced back to the 1500’s. The Latin word Campus, “open field or space for military exercise” and the French words camp, “place where an army lodges temporarily” or champ “a field”, eventually evolved to non military activities. The rise of recreational camping and hiking in the 1960’s diverged away from the skills based Woodcraft and Bushcraft ethic of taking only minimal equipment into the wilderness such as a knife, wool blanket and tarp and producing everything else, to people taking too many modern technologies and gadgets into the woods and being completely reliant upon that technology, such as modern camping stoves, tents and high tech luxury equipment.
If something goes wrong, you have no independence or self-reliance beyond the reliance on that technology. Too much
Aldo Leopold (1887-1948) described Woodcraft as “the working knowledge of the land” and camping as “how to work technology to live on the land”. He remarked that, “the rise of camping pads us against the bumps of nature”. In other words, the more equipment you have and depend on to make you comfortable, the more insulating your experience will be, lessening your participation and interaction with nature.

This all is not to say that someone who studies bushcraft does not take with them into the wilds modern equipment, on the contrary, “essential” technology is embraced where needed but it is not overly relied upon so that if that particular item was to be lost or stop working, the person with some bushcraft knowledge would be able to manufacture a solution from nature.
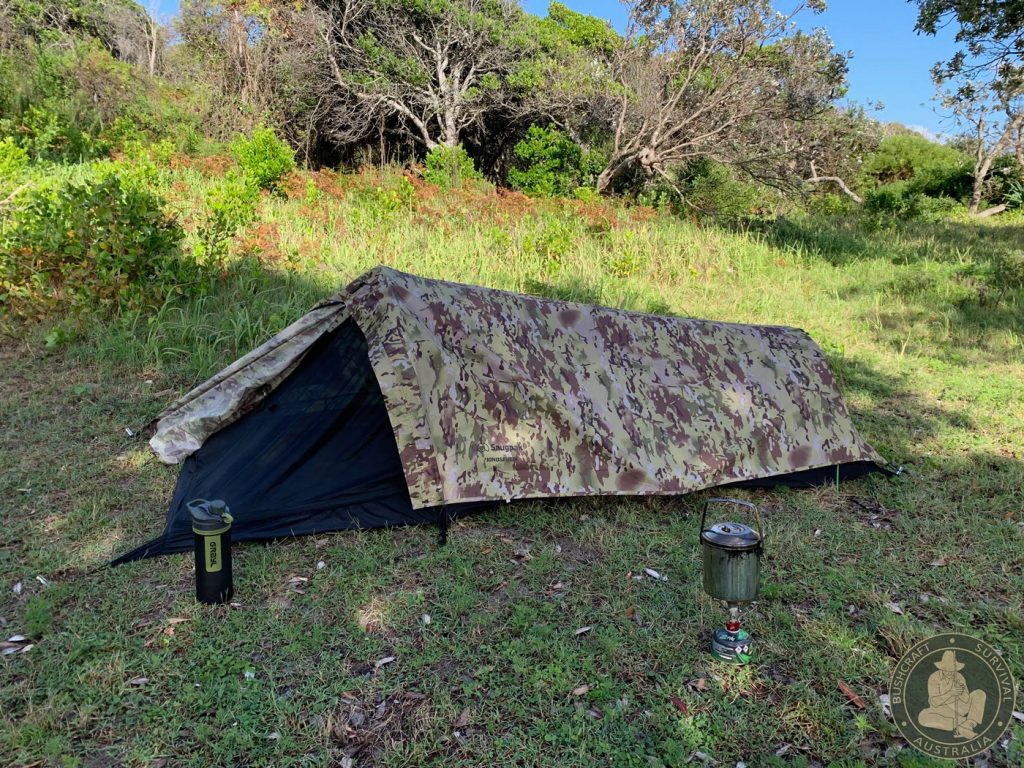
Minimalist camping using a lightweight tent and cooking stove

The benefits of nature

There has been a lot of recent research on the benefits of being out in nature and the well-being and health gained from that. The recent Covid pandemic has highlighted this. Even visually looking at pictures of natural environments has proven to be therapeutic, calming and relaxing.

Despite this realisation of how beneficial being out in nature is,  there is very little mentioned about “how” to do this and actually “experience” these natural environments.

Its not just about going for a walk or drive outside and using nature as a backdrop. It’s about actually participating in nature and “doing things” in nature rather than just walking through it and looking at it! It’s what we do when we are in there that is important.

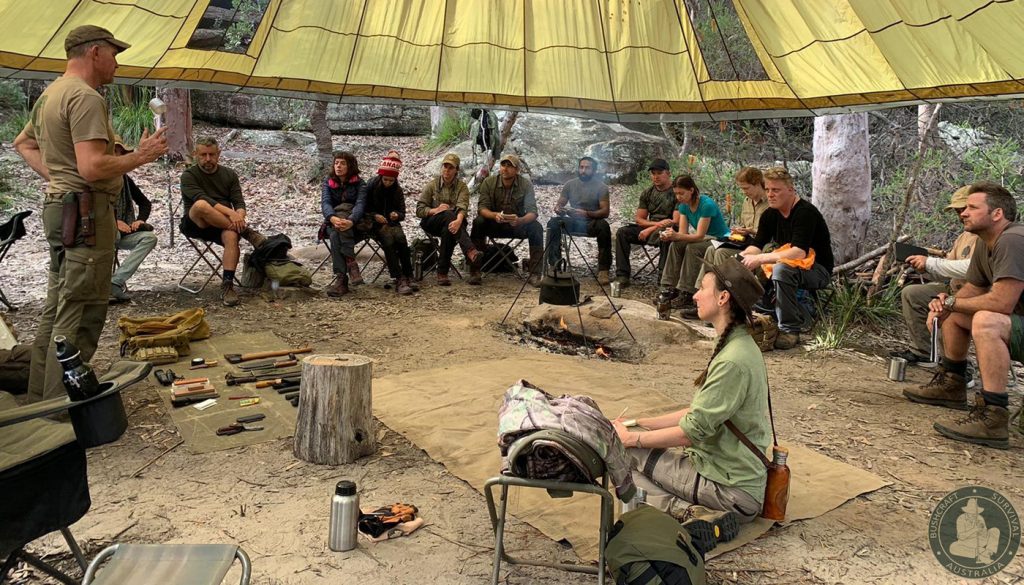
As a bushcraft teacher, its encouraging to see the deep satisfaction and therapeutic effects that students gain from being out in nature and interacting with it physically, mentally, psychologically and spiritually. They feel enriched by the experience and at the end of a course many do not want to leave and want to stay and carry on learning.

The subject areas in bushcraft such as fire making, cordage making, shelter making, plant identification and uses, natural navigation, water procurement, camp crafts, indigenous cooking etc helps us to find our way back to old knowledge, the environment and creates a bridge to indigenous knowledge that once upon a time we all used to draw from.
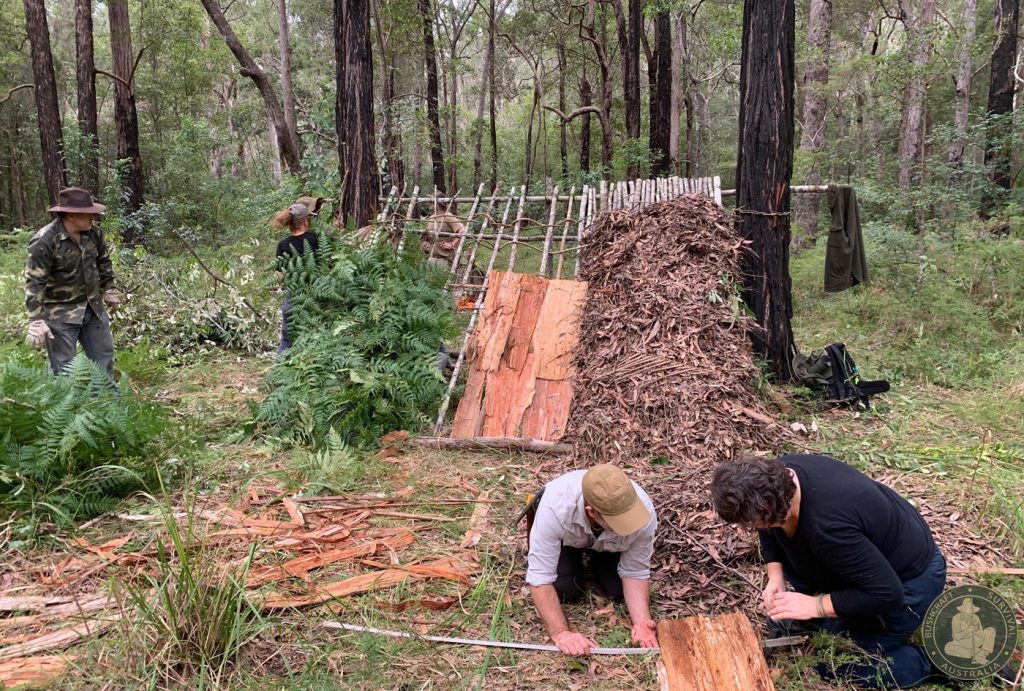
Students on a course constructing a Natural Shelter using various materials

The study of bushcraft creates an understanding of how we live within the environment and is done in a respectful way. It is immensely rewarding and important for all of us , particularly the younger generation as it teaches many valuable and practical holistic life skills. It develops self-confidence, self- reliance and helps us gain an understanding of traditional cultures and a deeper respect for nature and the environment (our home) which ultimately helps us truly value and look after it!
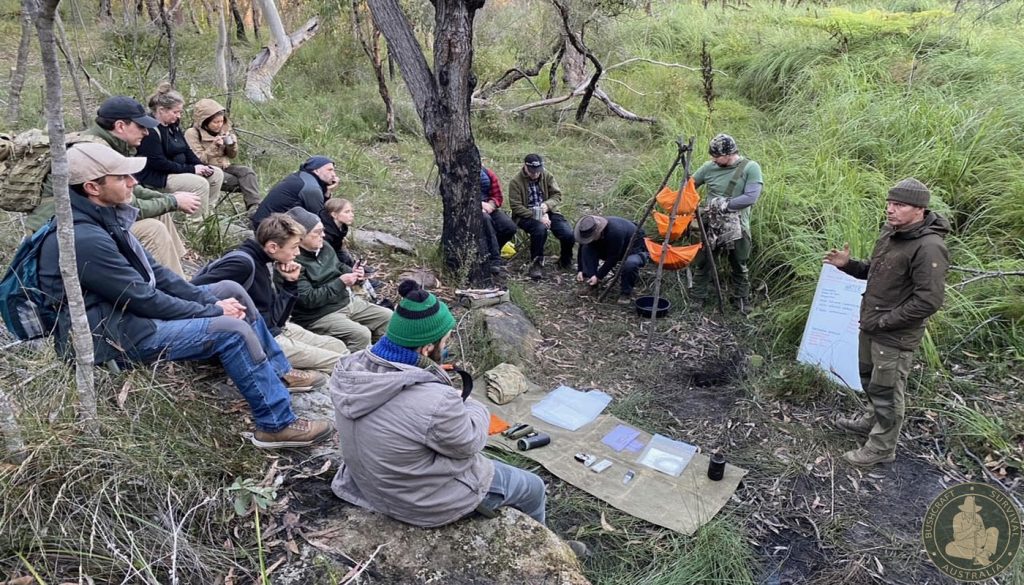
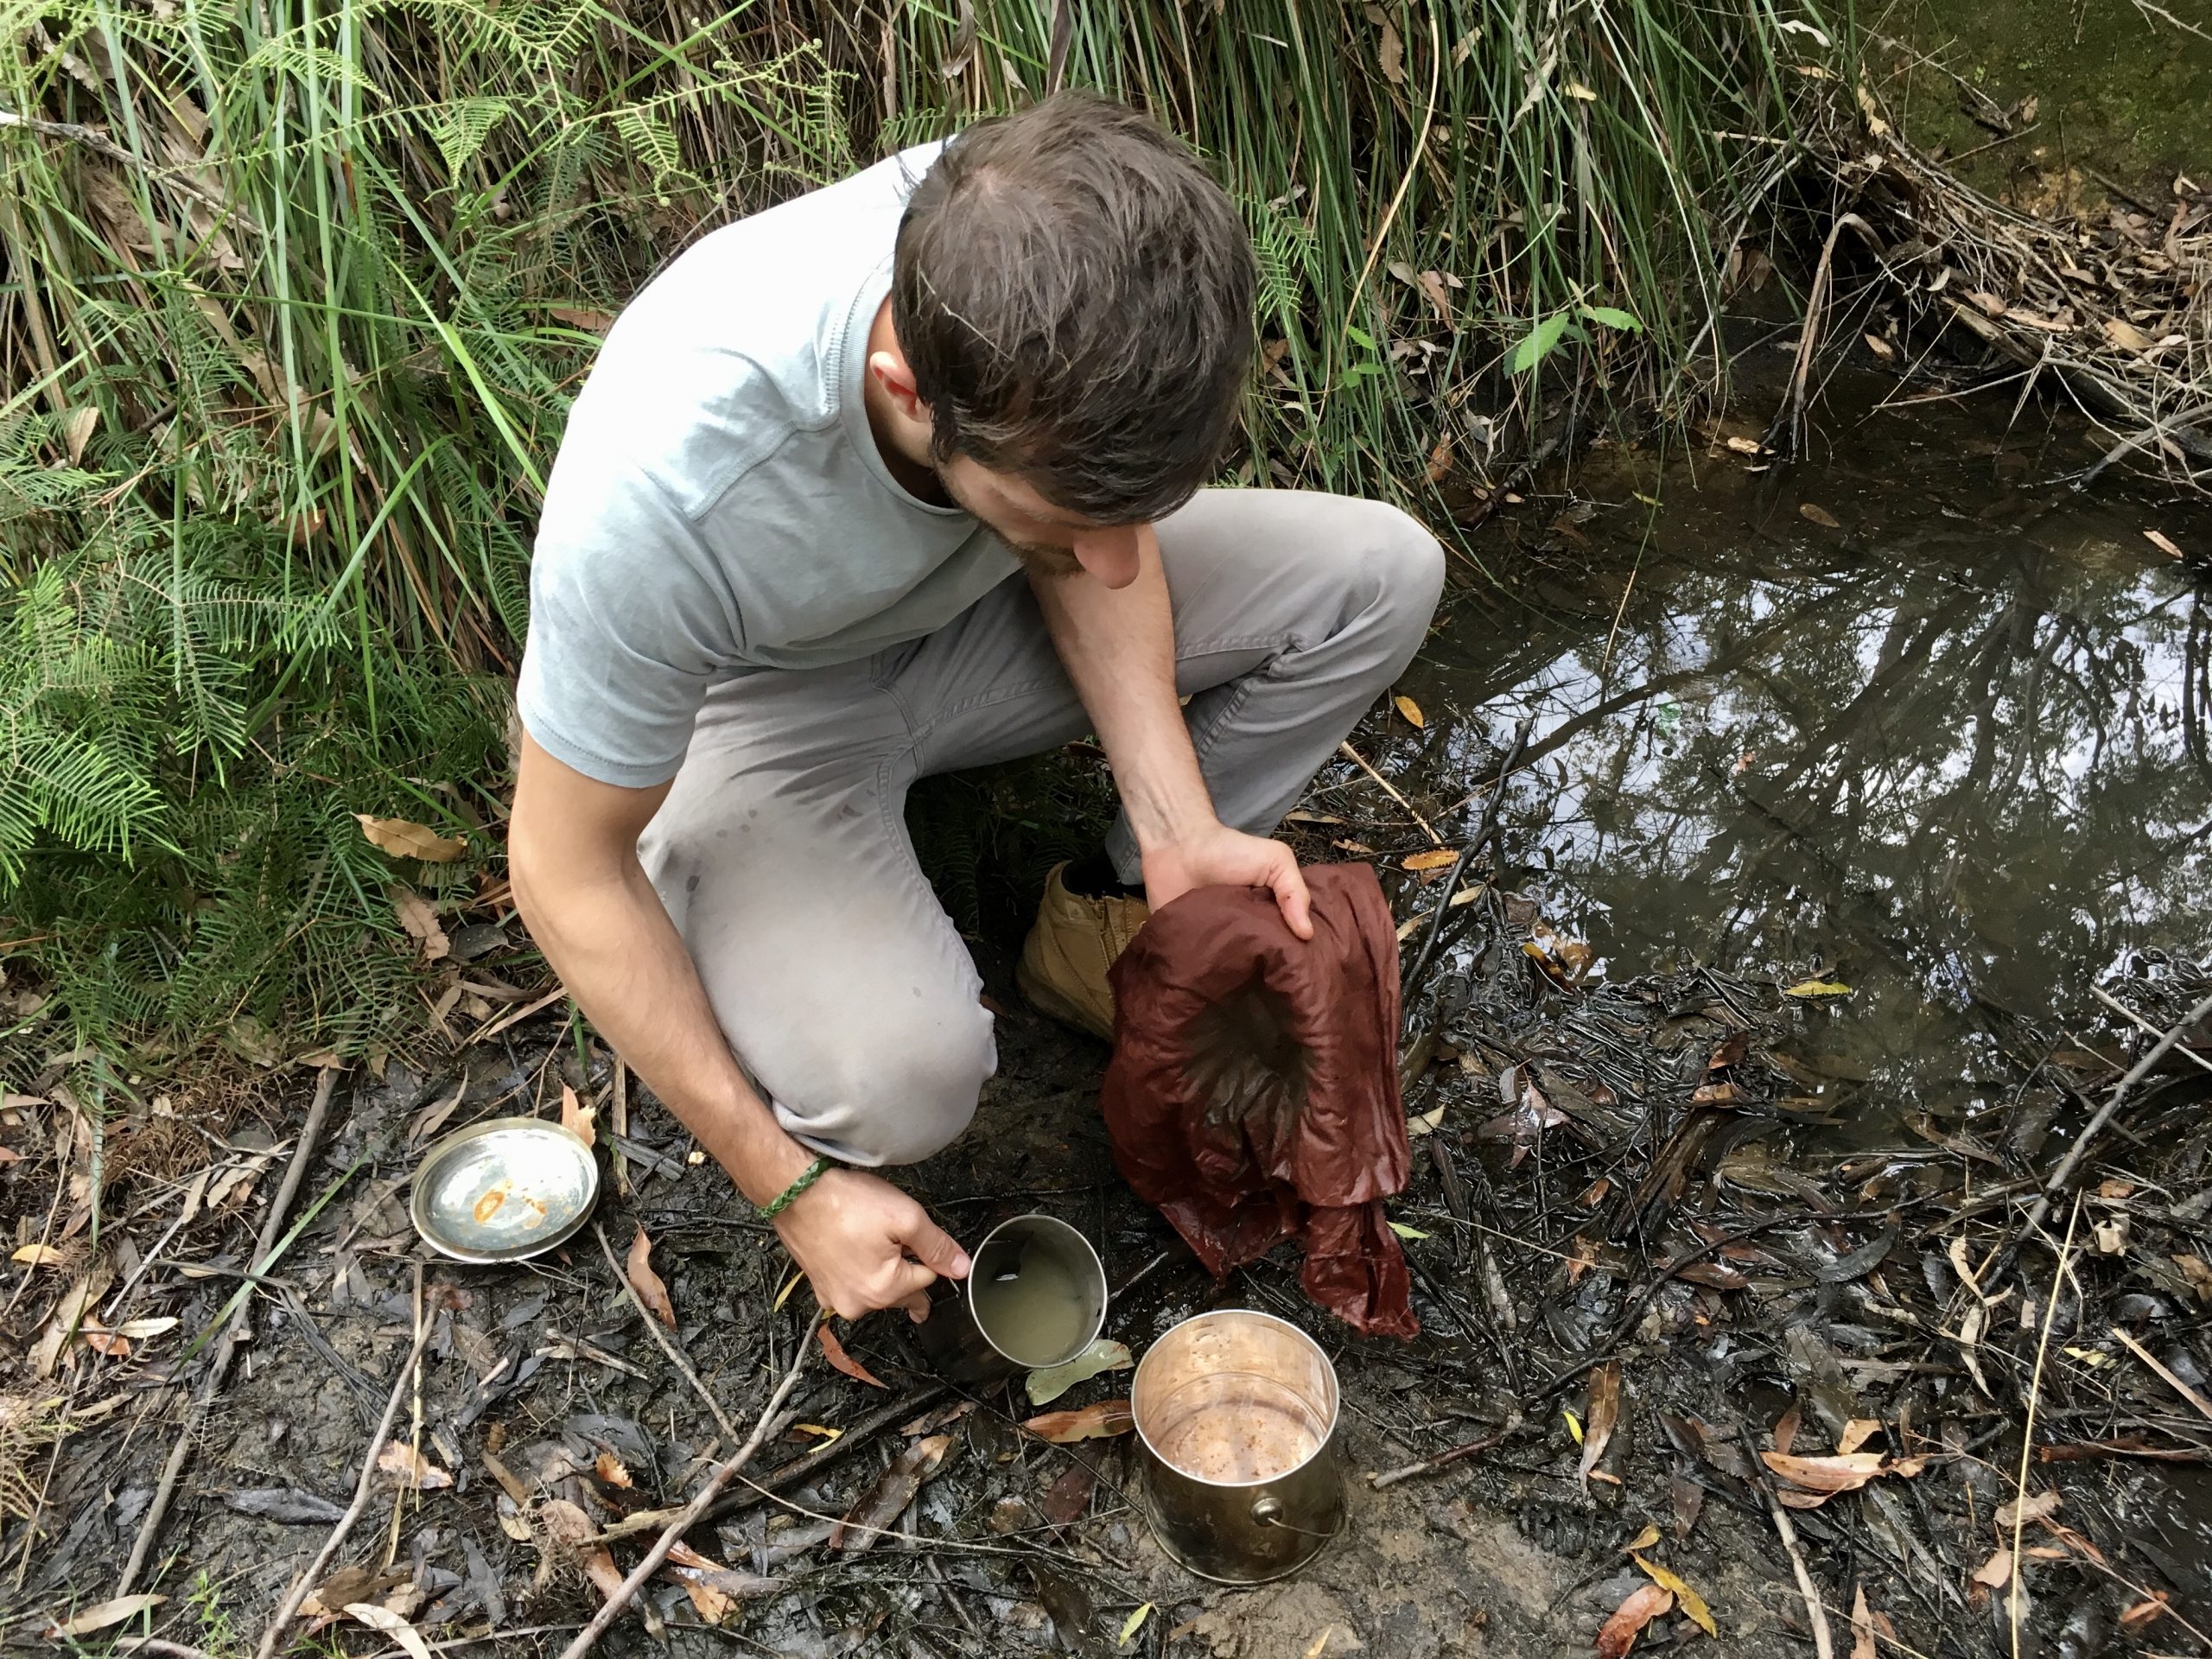
Students learning how to find and procure water safely in the bush

Bushcraft Survival Australia offers courses in bushcraft, survival training and outdoor education from basic to advanced levels, suitable for all ages. View courses here.
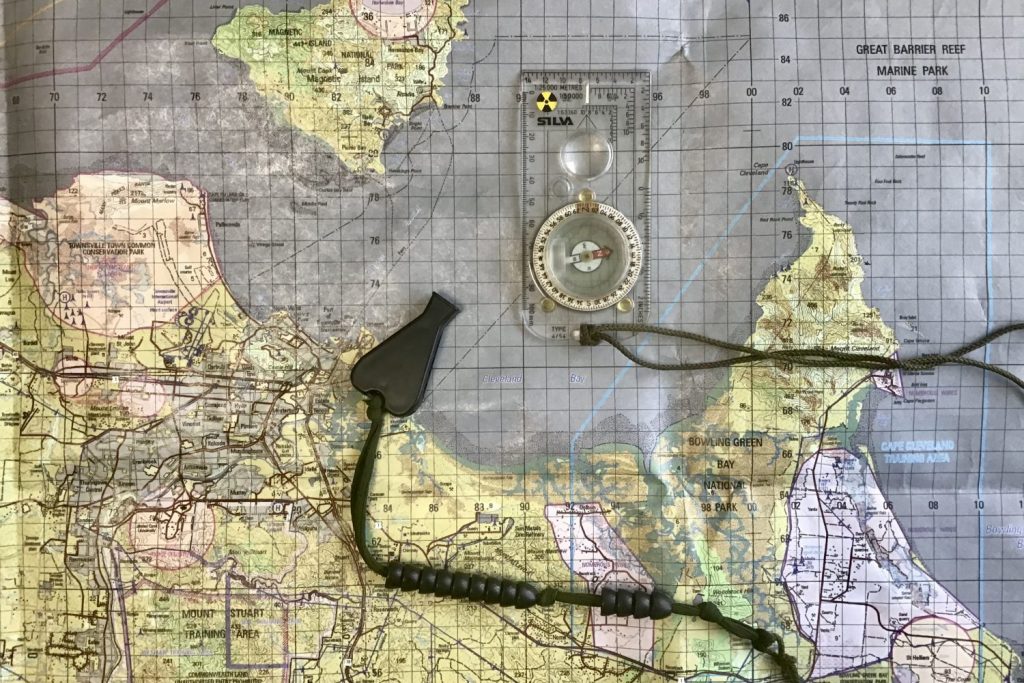
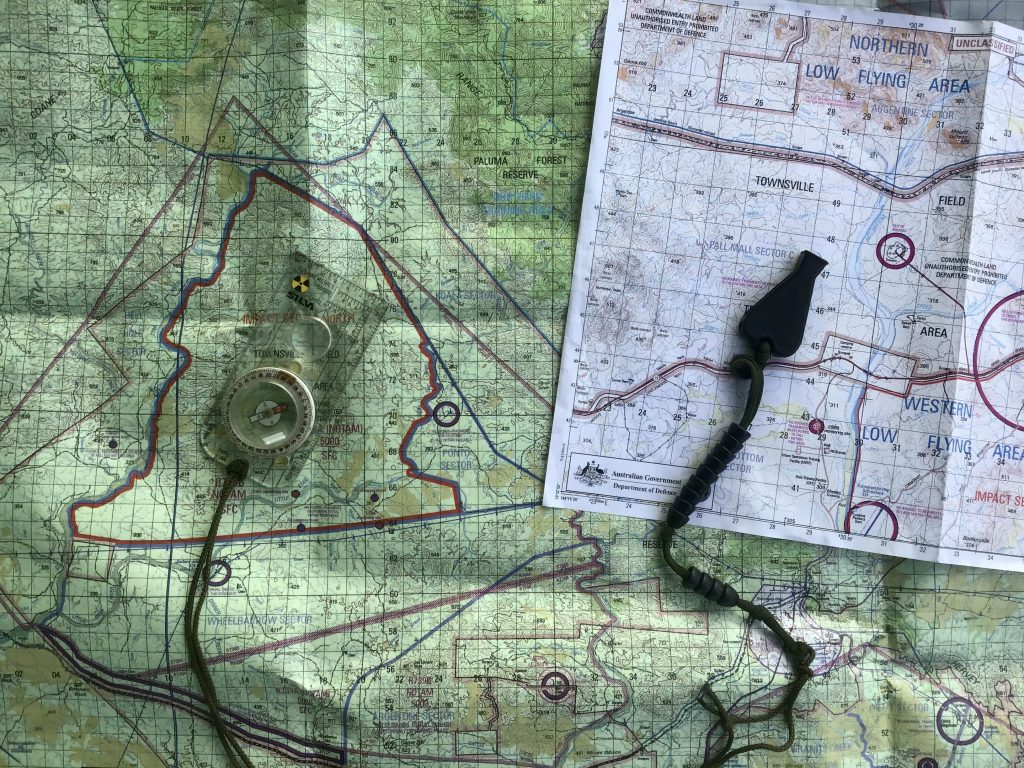
Navigation and finding your way… a critical skill

In this article we will be taking a broad look at one of the most important skills for any outdoor enthusiast, traveller, adventurer, hiker, sailor or soldier, and that is navigation and being able to find your way.

From the day we start to crawl, we begin to construct a mental picture of where things are and how to get to them. As we grow up, the distances we travel from our immediate surroundings become increasingly greater, and therefore the importance of being able to find our way back again also grows.

Since ancient times, man had to navigate to find food, water, shelter and resources. The ability to find his way to any given place and more importantly back again was, and still is, a critical skill.

Natural selection dictated that those animals and humans that were unable to work out a way of getting to where they needed to be in order to survive did not contribute to the next generation’s gene pool.

What is Navigation?

Navigation can be defined as the process or activity of accurately ascertaining one’s position, then planning and following a route or course either by land, sea or air to your objective.

There are two general methods of navigation;

Navigating or finding your way with the use of instruments, tools and technology (Modern navigation) eg. map and compass or GPS (Global Positioning System), or navigating and finding your way using nature (natural navigation) without the aid of tools or instruments eg. using the sun, stars, moon, plants, weather, animals etc.

Both ways are not mutually exclusive and should be used in conjunction with each other.

The importance of being able to navigate and find your way

The ability to navigate across country by day and night is an essential skill that must be mastered. Many survival situations begin from people making navigational errors, or not being able to read a map or compass in the first place. In a survival situation you will be faced with many tough decisions. You may have to decide whether to stay where you are and await rescue, or move to an area that offers a better chance of survival and rescue. Your ability to navigate effectively, whether by using a map and compass or by using natural navigation, play a major role in your decision-making process.

Map and Compass

Before you set off on a trip or adventure, you should have at least a basic understanding of how to read a map and use a compass. Your ability to correctly assess a map of the area you intend to visit will allow you to make informed decisions while preparing for your trip. If you understand the area and terrain, your chances of getting lost will be greatly reduced.

Being able to use a map and compass will enable you to plan the safest and most appropriate route, locate water, shelter and areas that will allow you to use your signalling aids properly. If you are proficient with a map and compass, you’ll have no cause to worry about getting lost or straying off track and will be free to enjoy your outdoor experience. Using a map and compass correctly is a separate skill set in and of itself and far too involved to cover in this short article, so we will take a look at some key areas in another issue. Some of the many sub-areas to be studied and understood include;

Map: mapcraft (being able to relate the map to the ground and the ground to the map), map scales, the map’s marginal information (legend, contour lines, north point diagram, grid magnetic angle), grid references, measuring distances, orientating the map, plotting bearings

Compass: using a compass roamer, taking a bearing, converting a bearing to a grid bearing and vice versa, magnetic declination, back bearings, walking on a bearing, resections, pacing and aiming off.

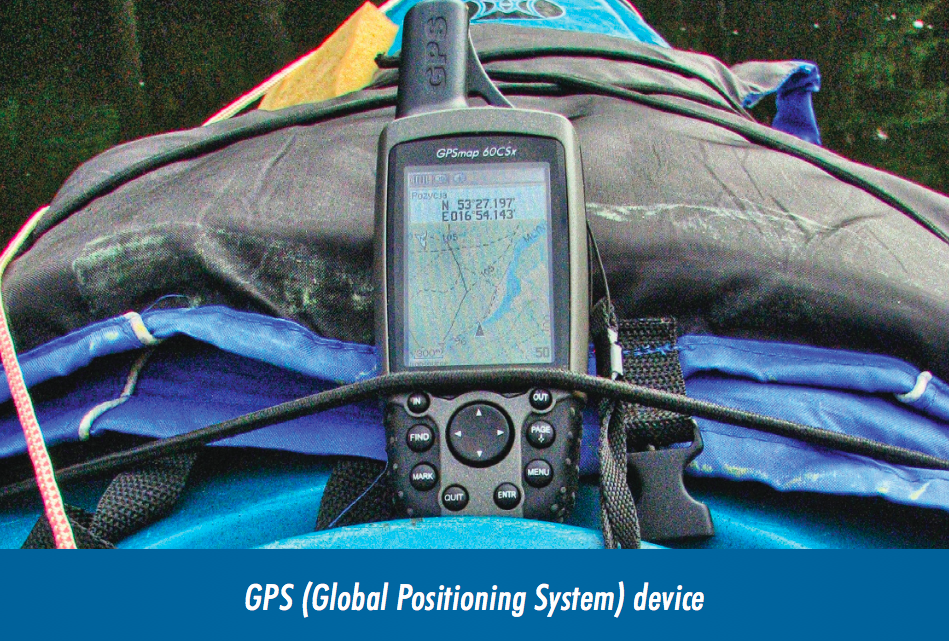
GPS (Global Positioning System)

GPS is a global satellite-based navigation system consisting of 24 orbiting satellites that provide location, velocity and time synchronisation to a GPS receiver anywhere on or near the earth where there is an unobstructed line of site to four or more GPS satellites.

GPS is everywhere – every time you use Google maps, or ask Siri for directions, you are using the GPS. Sadly, people these days are becoming increasingly lazy and are far too dependant upon technology, so they don’t know what to do when it stops working. GPS should be used as a backup navigation method and NOT be relied upon as the sole means of pinpointing your position, or for navigation. Learn to navigate with a map and compass and use GPS (if needed) as an aid to check your position. This is how we use it in the military. Never depend on technology and equipment that relies on batteries, especially in a survival situation, as both of these can fail!

The Three Norths

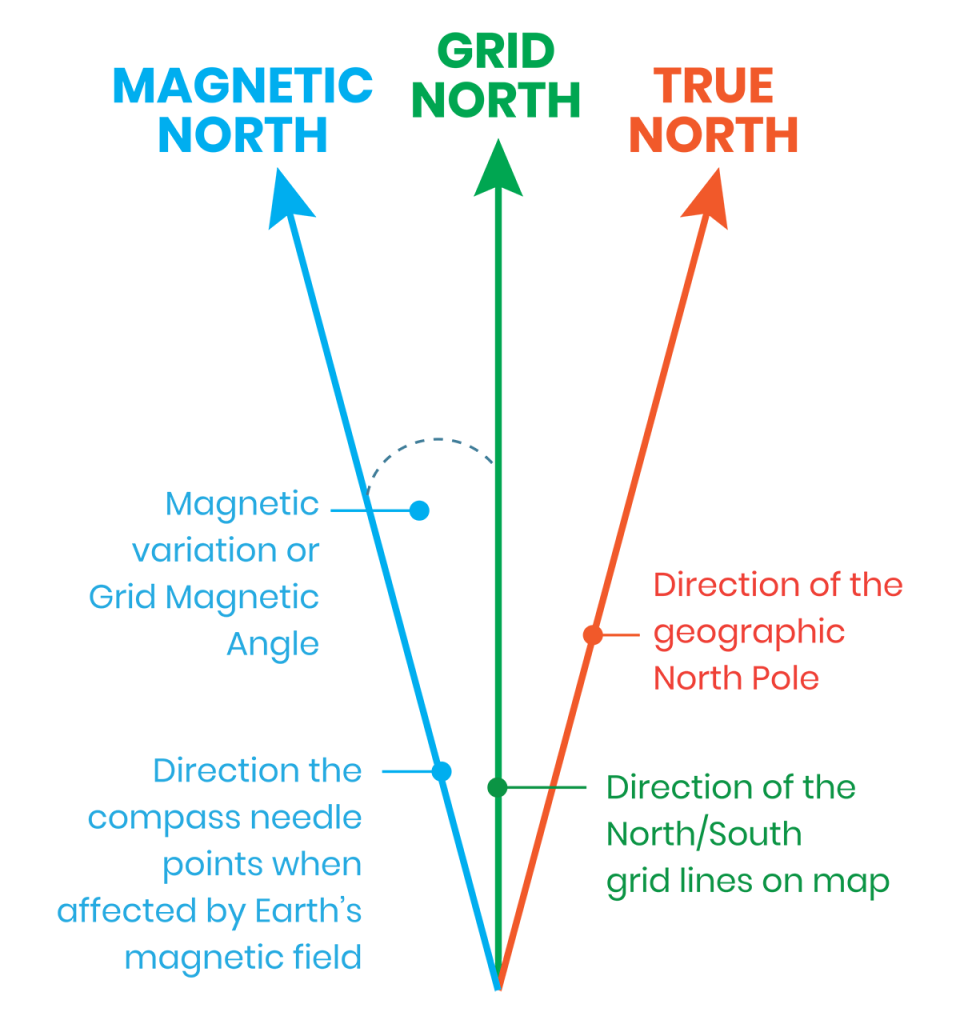
Map legends refer to north in three ways; true north, grid north and magnetic north.

True North is the direction of the geographic north pole. Lines of longitude converge towards each other at the North and South Poles and are known as meridians. These lines are not parallel.

Magnetic North indicates the direction the compass needle points when it is affected by the earth’s magnetic field. The magnetic pole is not the true north pole. There is a variation between true north and magnetic north at any place. This difference is known as magnetic variation.

Grid North is the direction in which the north/south grid lines point towards the top of a map. They are parallel, unlike the lines of longitude using true north which are not. The variation between grid north and true north is called grid convergence and the angle between GN and TN is known as the grid magnetic angle. This needs to be calculated when using a map and compass.

Natural Navigation

Natural navigation is the art of finding your way by using nature. It is a process of observation and deduction involving the rare skill of being able to determine direction without the aid of instruments or tools, and only by reference to natural clues including the sun, stars, moon, land, sea, weather, wind, plants and animals.

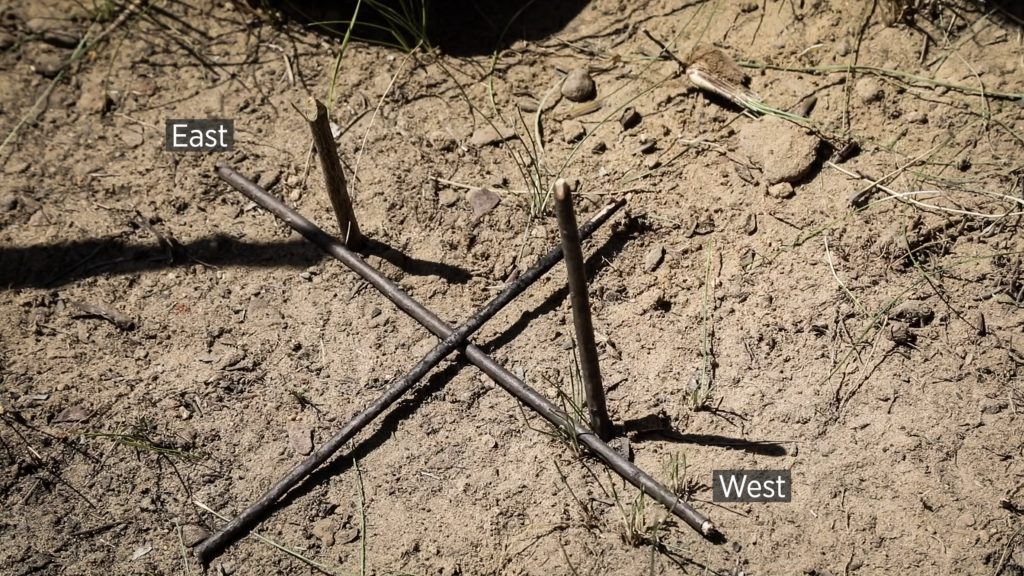
FINDING DIRECTION USING THE SUN AND A SHADOW STICK

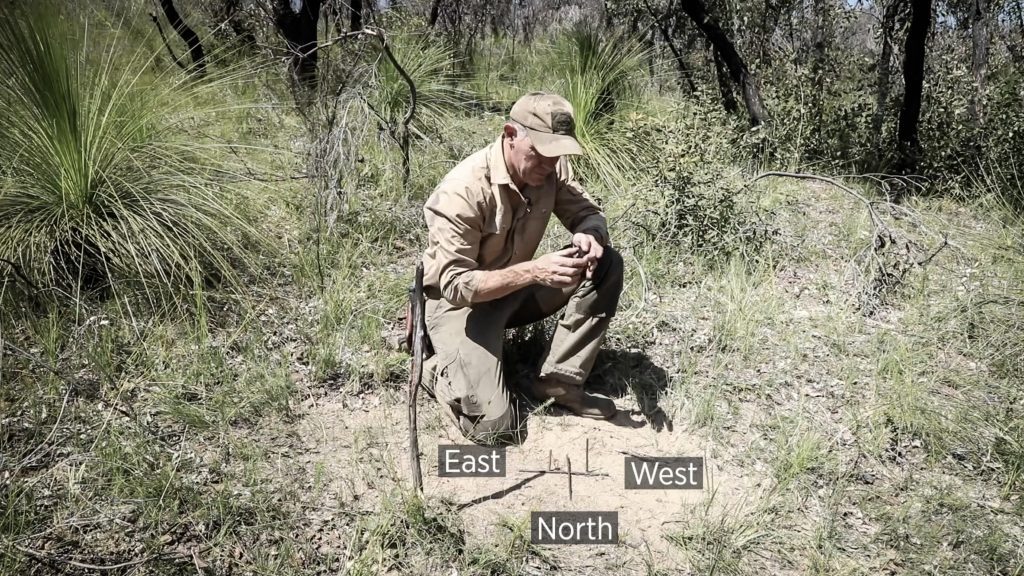
The sun moves across the sky from east to west (right to left in the southern hemisphere) in the northern part of the sky (below the tropic of Capricorn) at a rate of 15 degrees every hour. If you place a “straight” one metre long stick vertically in a flat area of ground that is in the sun, a shadow will be cast by the stick.

Mark the end of this shadow with a small stick or stone – this first marker will be your westerly marker. Wait a minimum of 20 minutes and the shadow will have moved. Mark the new shadow tip with another small stick or stone.

By joining these two markers together with another straight stick, you will produce an east/west line. North and south will be 90 degrees to this.

The longer you wait, the more accurate this will be. If you were to mark the changing shadow tip over the course of a whole day, you would find that depending on the time of year you’ll either get a long straight line created by the markers around the two equinoxes (21 March, 21 September), or a curved line around the two solstices (21 June, 21 December).

WATCH THE VIDEO HERE

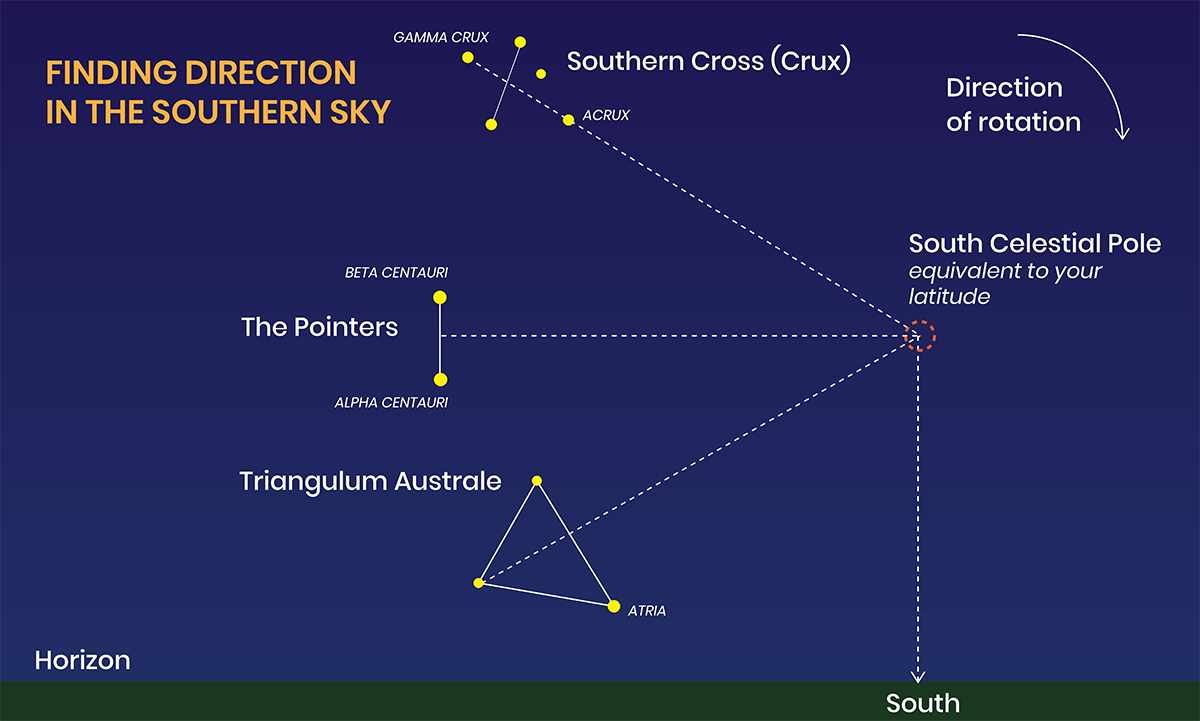
FINDING DIRECTION USING THE SOUTHERN CROSS AND THE POINTERS

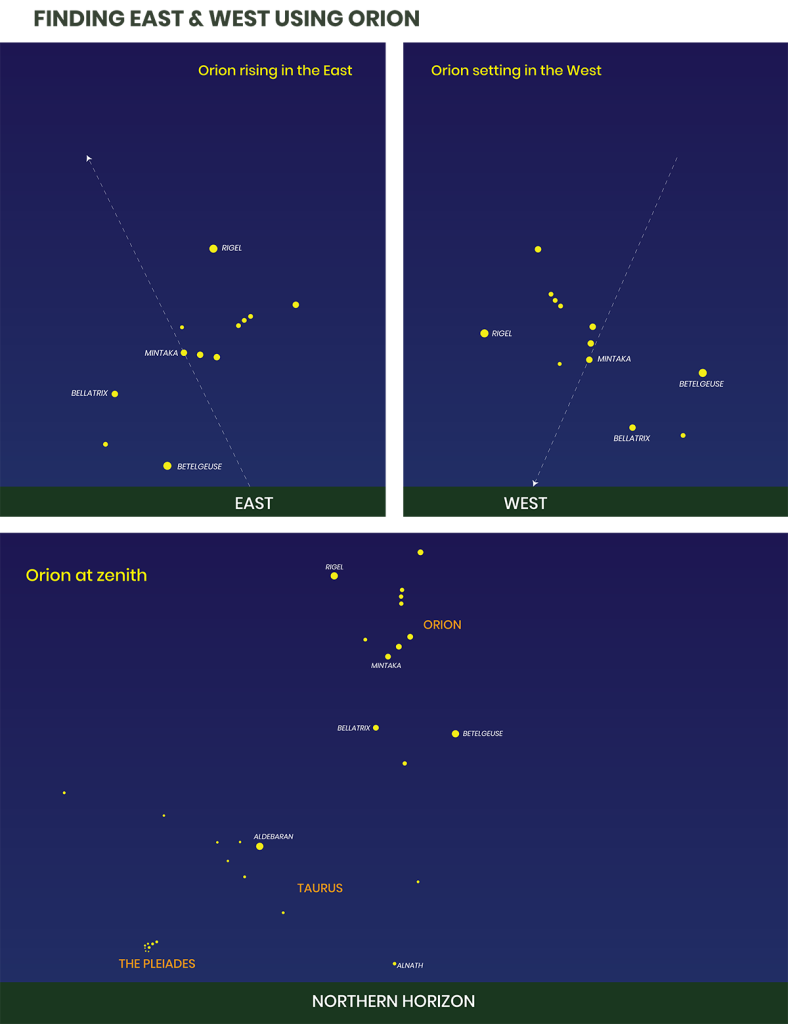
Due to the rotation of the earth, all celestial bodies rise in the east and set in the west. If you are looking east, stars will appear to rise upwards. If you are looking west they will appear to fall downwards. If you are looking south, the stars will appear to move to the right and circle clockwise around the south celestial pole, and if you are looking north they will appear to move to the left and circle anti-clockwise around the north celestial pole (which we can’t see in the southern hemisphere).

In the southern hemisphere we don’t have a star that marks the position of the south celestial pole like the north star (Polaris) does in the northern hemisphere. In order to find the south celestial pole and therefore find south, we need to guesstimate this position using two well-known constellations, the Southern Cross and the Pointers.

Locate the Southern Cross and draw an imaginary line along the long axis of the cross (crux) and continue it out. Now locate the two bright Pointers, draw an imaginary line between these two stars, and at the centre of this line draw another imaginary perpendicular line, continuing it out until it joins the imaginary line from the southern cross. The intersection of these two lines marks the Southern Celestial Pole, where all the nearby celestial objects will appear to rotate around it in a clockwise direction. To find south, simply drop a line downwards to the horizon.

The angle between the horizon and the south celestial pole is also equivalent to your latitude.


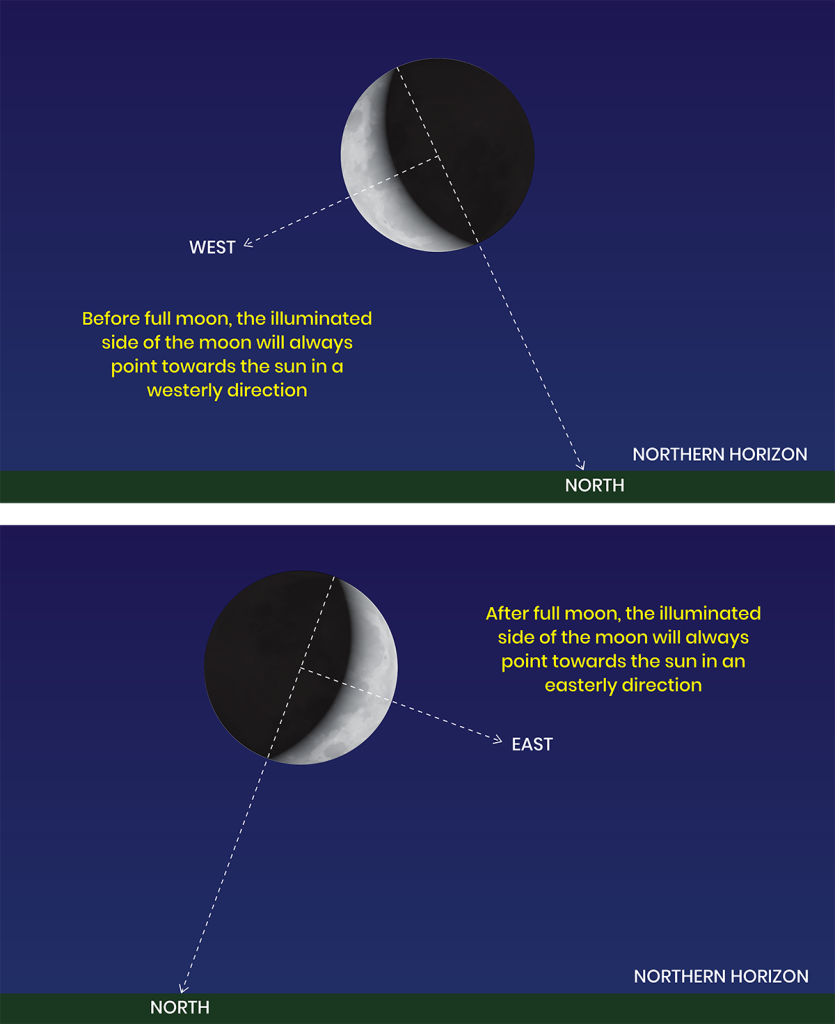
FINDING DIRECTION USING THE MOON

The moon also rises in the east and sets in the west, however due to its orbit around earth and the earth’s orbit around the sun, the moon lags behind the sun 12.5 degrees (50 minutes) each day. To use the moon effectively, you need to understand the various moon phases.

Put simply, the sun and moon are together in the same place in the sky at the new moon, so you can’t see the moon at this time. After 7 days, the moon is a 1⁄4 moon (almost 90 degrees behind the sun). At full moon (14 days) it is 180 degrees behind the sun (that’s why it is bright and full), 3⁄4 moon is 270 degrees behind, and then we have a new moon again at 28 -29 days where the sun has caught up with the moon and the cycle begins again.

The illuminated side of the moon always points in the direction of the sun. In the southern hemisphere, before full moon, this will always be the left side of the moon pointing to the sun in the west. After full moon, the illuminated side of the moon will be the right side of the moon pointing to the sun in the east. If you join the tips of a crescent moon with an imaginary line and continue that down to the horizon, this will point in a northerly direction in the southern hemisphere. The sun will therefore be 90 degrees to this line.


“Maps/Compasses and Natural Navigation are not mutually exclusive and should be used in conjunction with each other”

Planning

Before you venture into an unfamiliar environment, ensure you have a good quality compass made for your geographic region. You should also have reliable topographic maps in different scales of the area you are visiting, carefully research the type of terrain you will be encountering, and investigate the best method of travelling safely and efficiently across it.

Simply checking the weather forecast before you go will also allow you to evaluate conditions and make informed decisions before you travel. The ability to assess your situation and modify your plans means that you will be able to avoid many potential survival situations.

In later issues we will look more specifically at navigation using map and compass, and take a closer look at natural navigation.

Cordage – something you should never be without

In this article we will be looking at the last of the top 5 essential items you should have with you when you venture into an outdoor environment, and that is cordage. We will look at why it is so important to have with you, types of man made cordage and how to make it from natural resources if you find yourself without it.

Why is cordage so important?

String or cordage is one of the most important resources we can carry with us into the wilderness. We can use cordage to make temporary repairs to equipment and clothing, to fish and make traps, negotiate obstacles such as cliffs or rivers and improvise items for use in camp.

Everything you wear, live in, carry or travel in has something that is holding it together. That could be nails, bolts, screws, clips, ratchet straps, Velcro or modern thread.

In a wilderness environment without modern manufactured items, cordage in the form of  string, rope or twine would be and has been used for thousands of years to bind, fix, sew or hold things together.

So having some form of bombproof cordage with you when you venture off into the outdoors is an absolute must.

Modern Cordage

We tend to take cordage for granted today as it is so readily available.

Two of the best forms of modern cordage to have with you in a wilderness environment are parachute cord and bank line.

Both of these forms of cordage are plied cordage, that is, cordage that is not braided and capable of being broken down into smaller fibres.

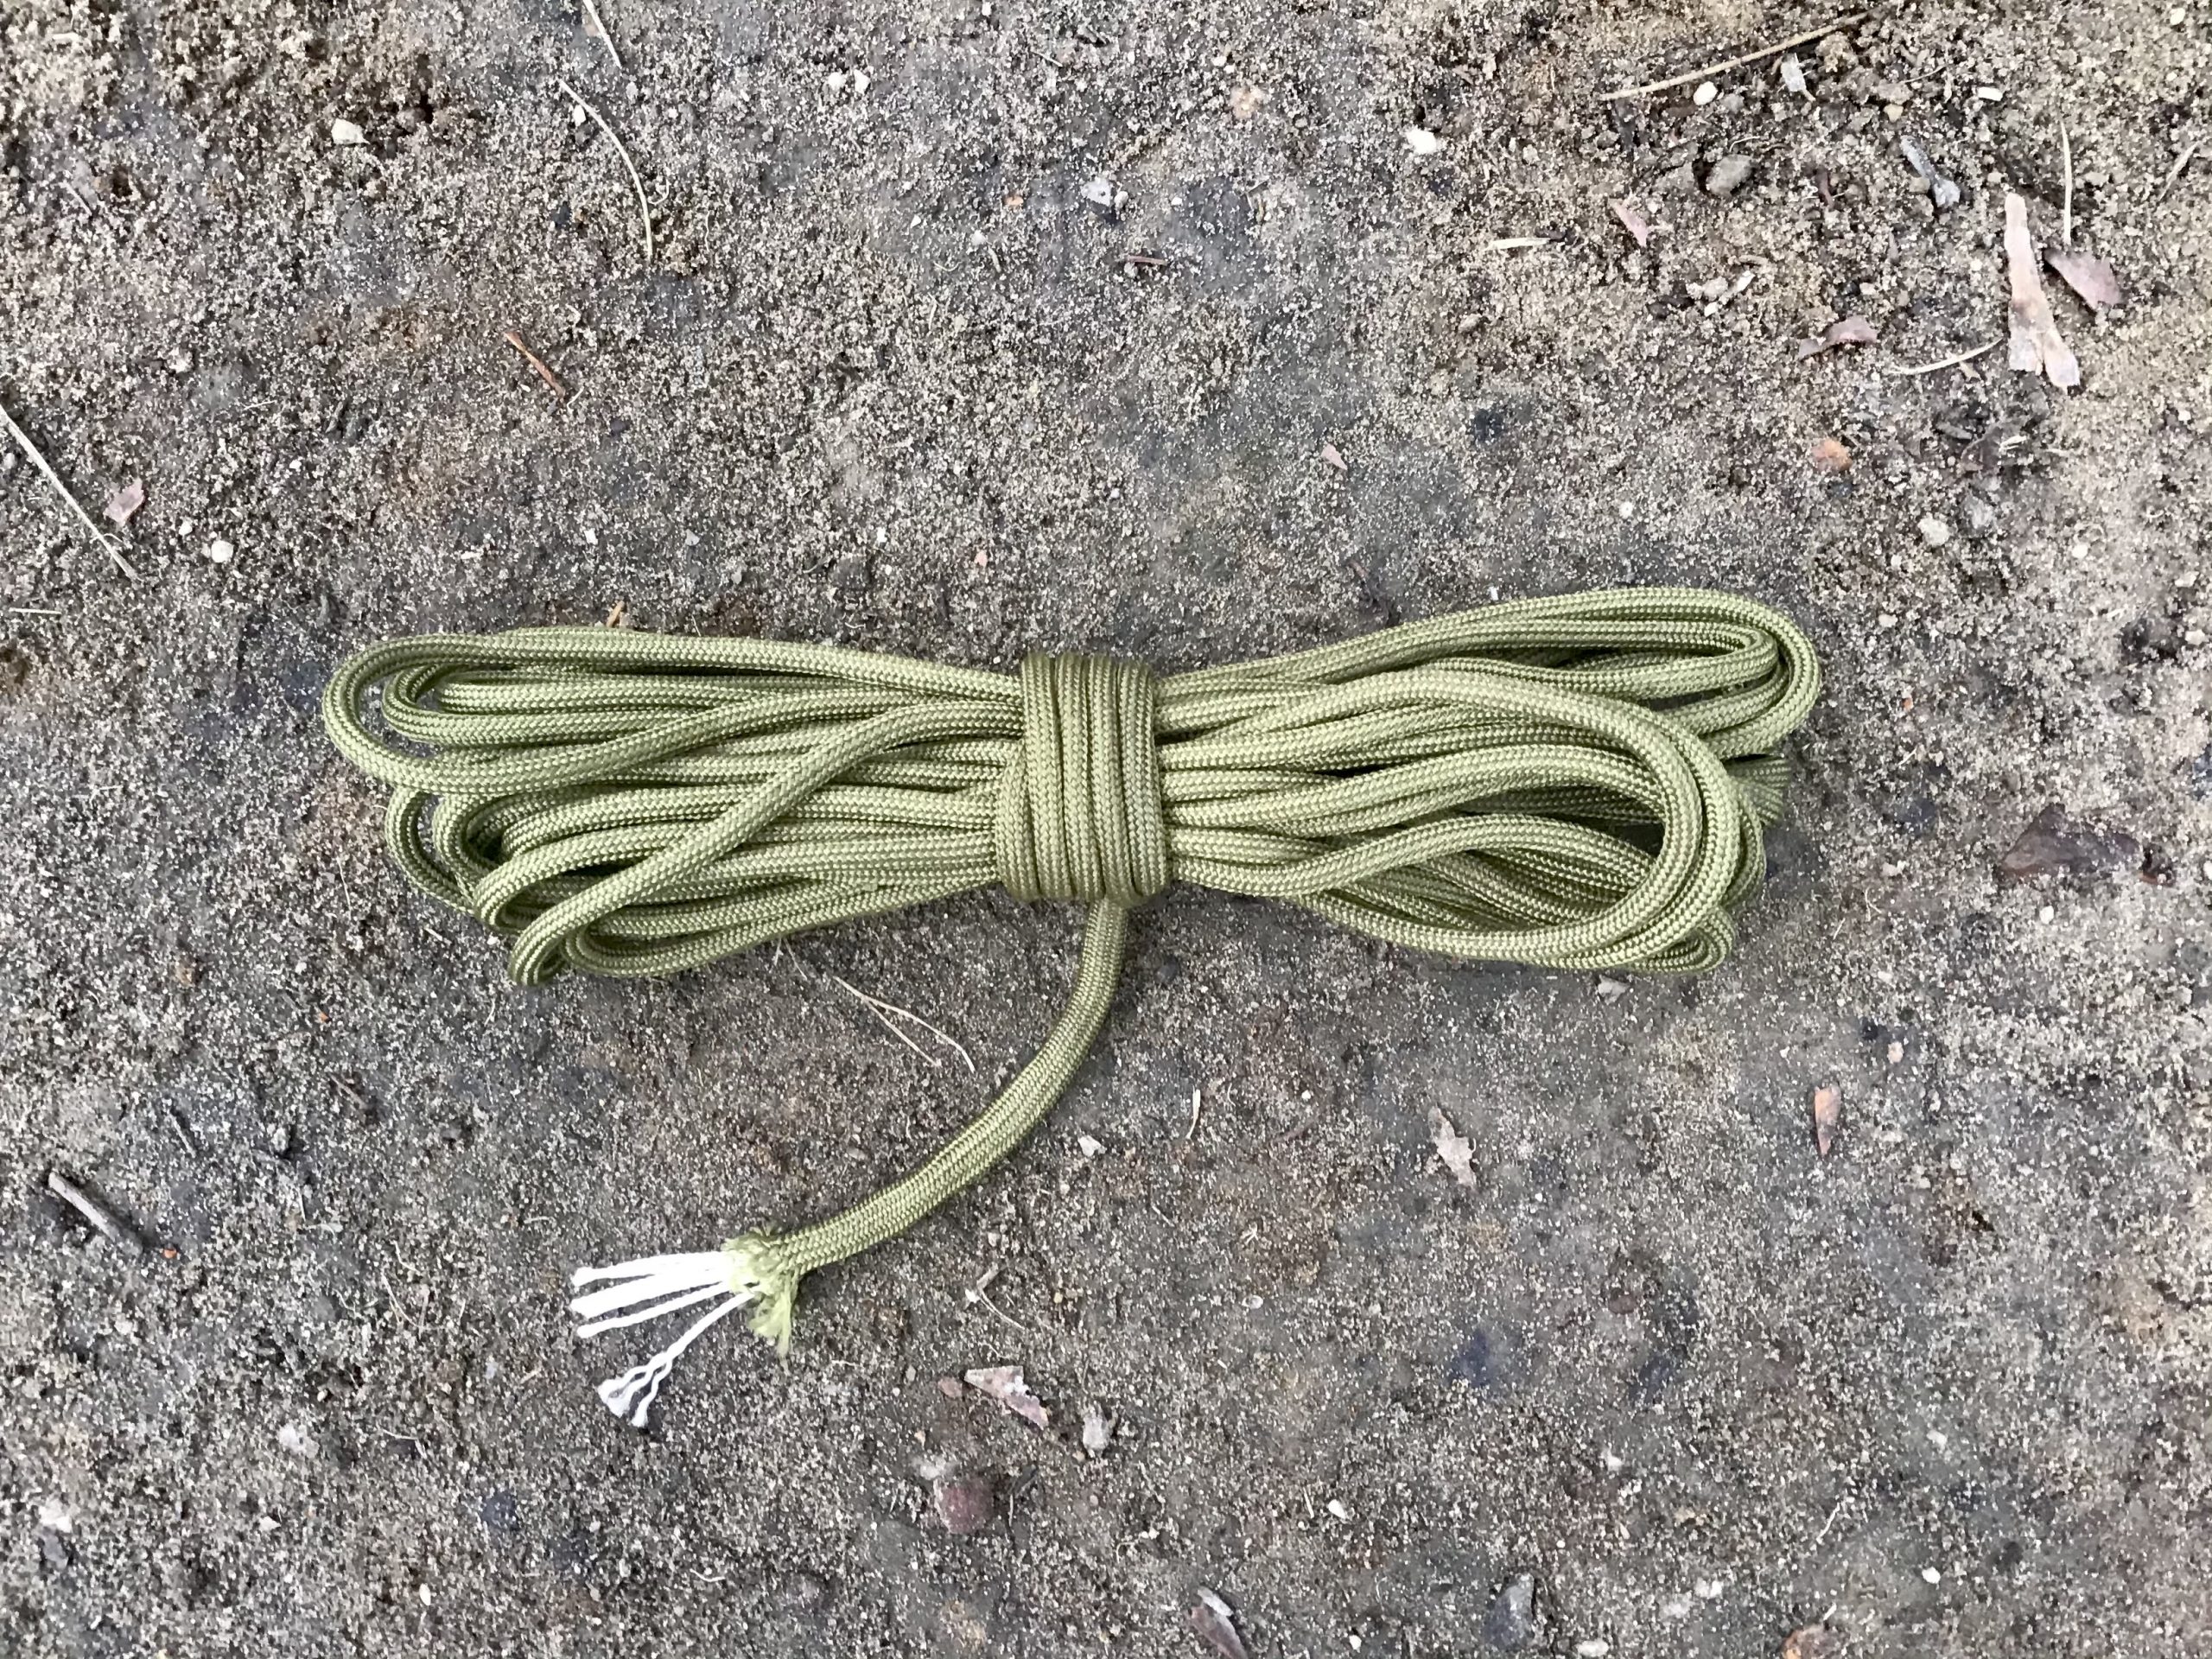
Parachute cord, also known as Paracord consists of a nylon outer mantle and 7 x 2 ply inner strands. Combined this produces a tensile strength of 550 pounds and is used as the suspension lines on military parachutes, hence the name 550 Paracord.

Having a 20 foot hank of Paracord allows you to have a versatile super strong length of cordage that is able to hold an average grown mans weight and be used to suspend tarps, hammocks and other uses requiring weight bearing cord.  The inner strands can be used individually or further broken down to produce trap making material, fishing line, sewing thread or used for whipping or lashing.

550 Parachute cord with 7 inner 2 ply strands
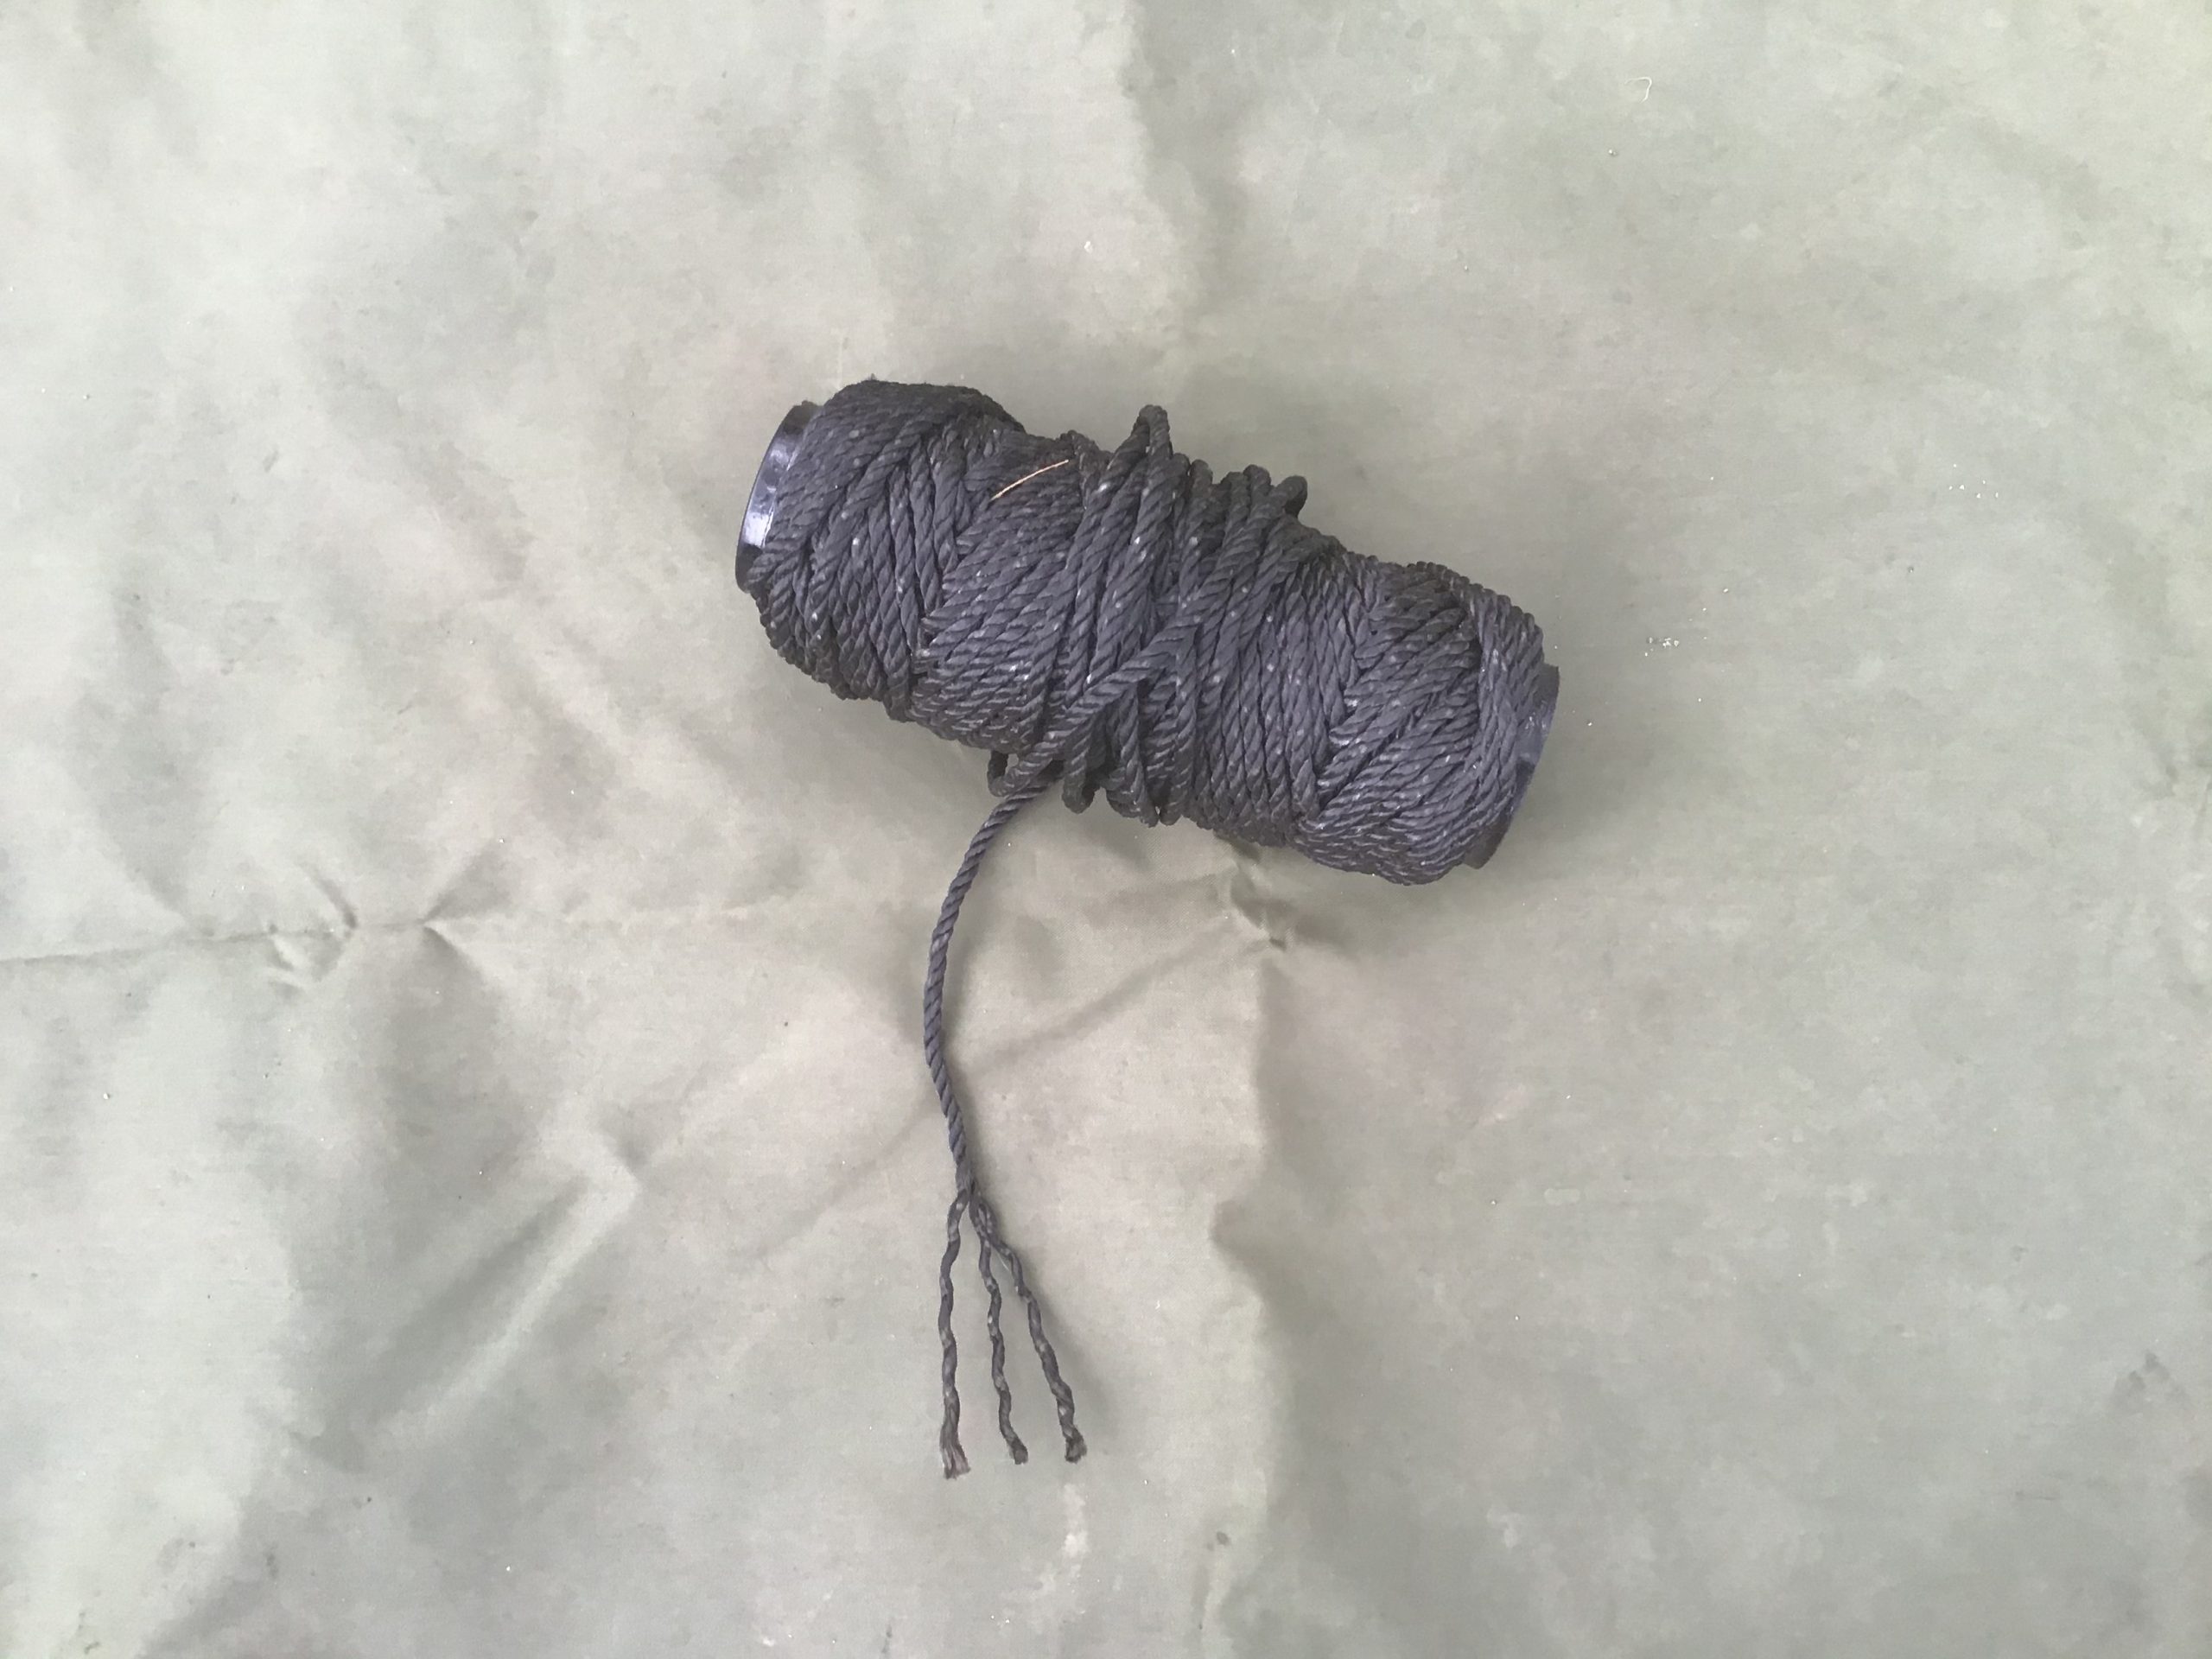
Bank line, also known as mariners bank line or tarred bank line is a 3 ply black nylon cordage similar to tennis court netting that is exceptionally strong, is UV resistant and comes in a variety of different diameters.

Its ability to be broken down to smaller fibres as well as being tarred and waterproof makes it ideal for binding, lashing and a myriad of other bushcraft uses.

Small roll of #36, 3 ply bank line

Having a 20 foot hank (looped bundle of cord) of either Paracord or 3 ply backline is an important necessity to any outdoor kit.

Knots and Hitches

Going hand in hand with cordage is the ability to tie various knots, hitches and lashings. Knowledge of a wide variety of knotting techniques will enable you to tie knots for a variety of different purposes. There are literally hundreds of knots but having at least a minimal knowledge of the important ones is essential. Some of those include the: reef knot, bow line, sheet bend, timber hitch, clove hitch, figure 8, adjustable knot and slip knot to name but a few.

Many people are put off from learning knots and have a mental block when it comes to them. One of the reasons for this in my opinion is because we live in a world now where there is almost a gadget for everything and people have become lazy and lost the ability to carry out simple life skills. Gadgets exist where there should not be gadgets!

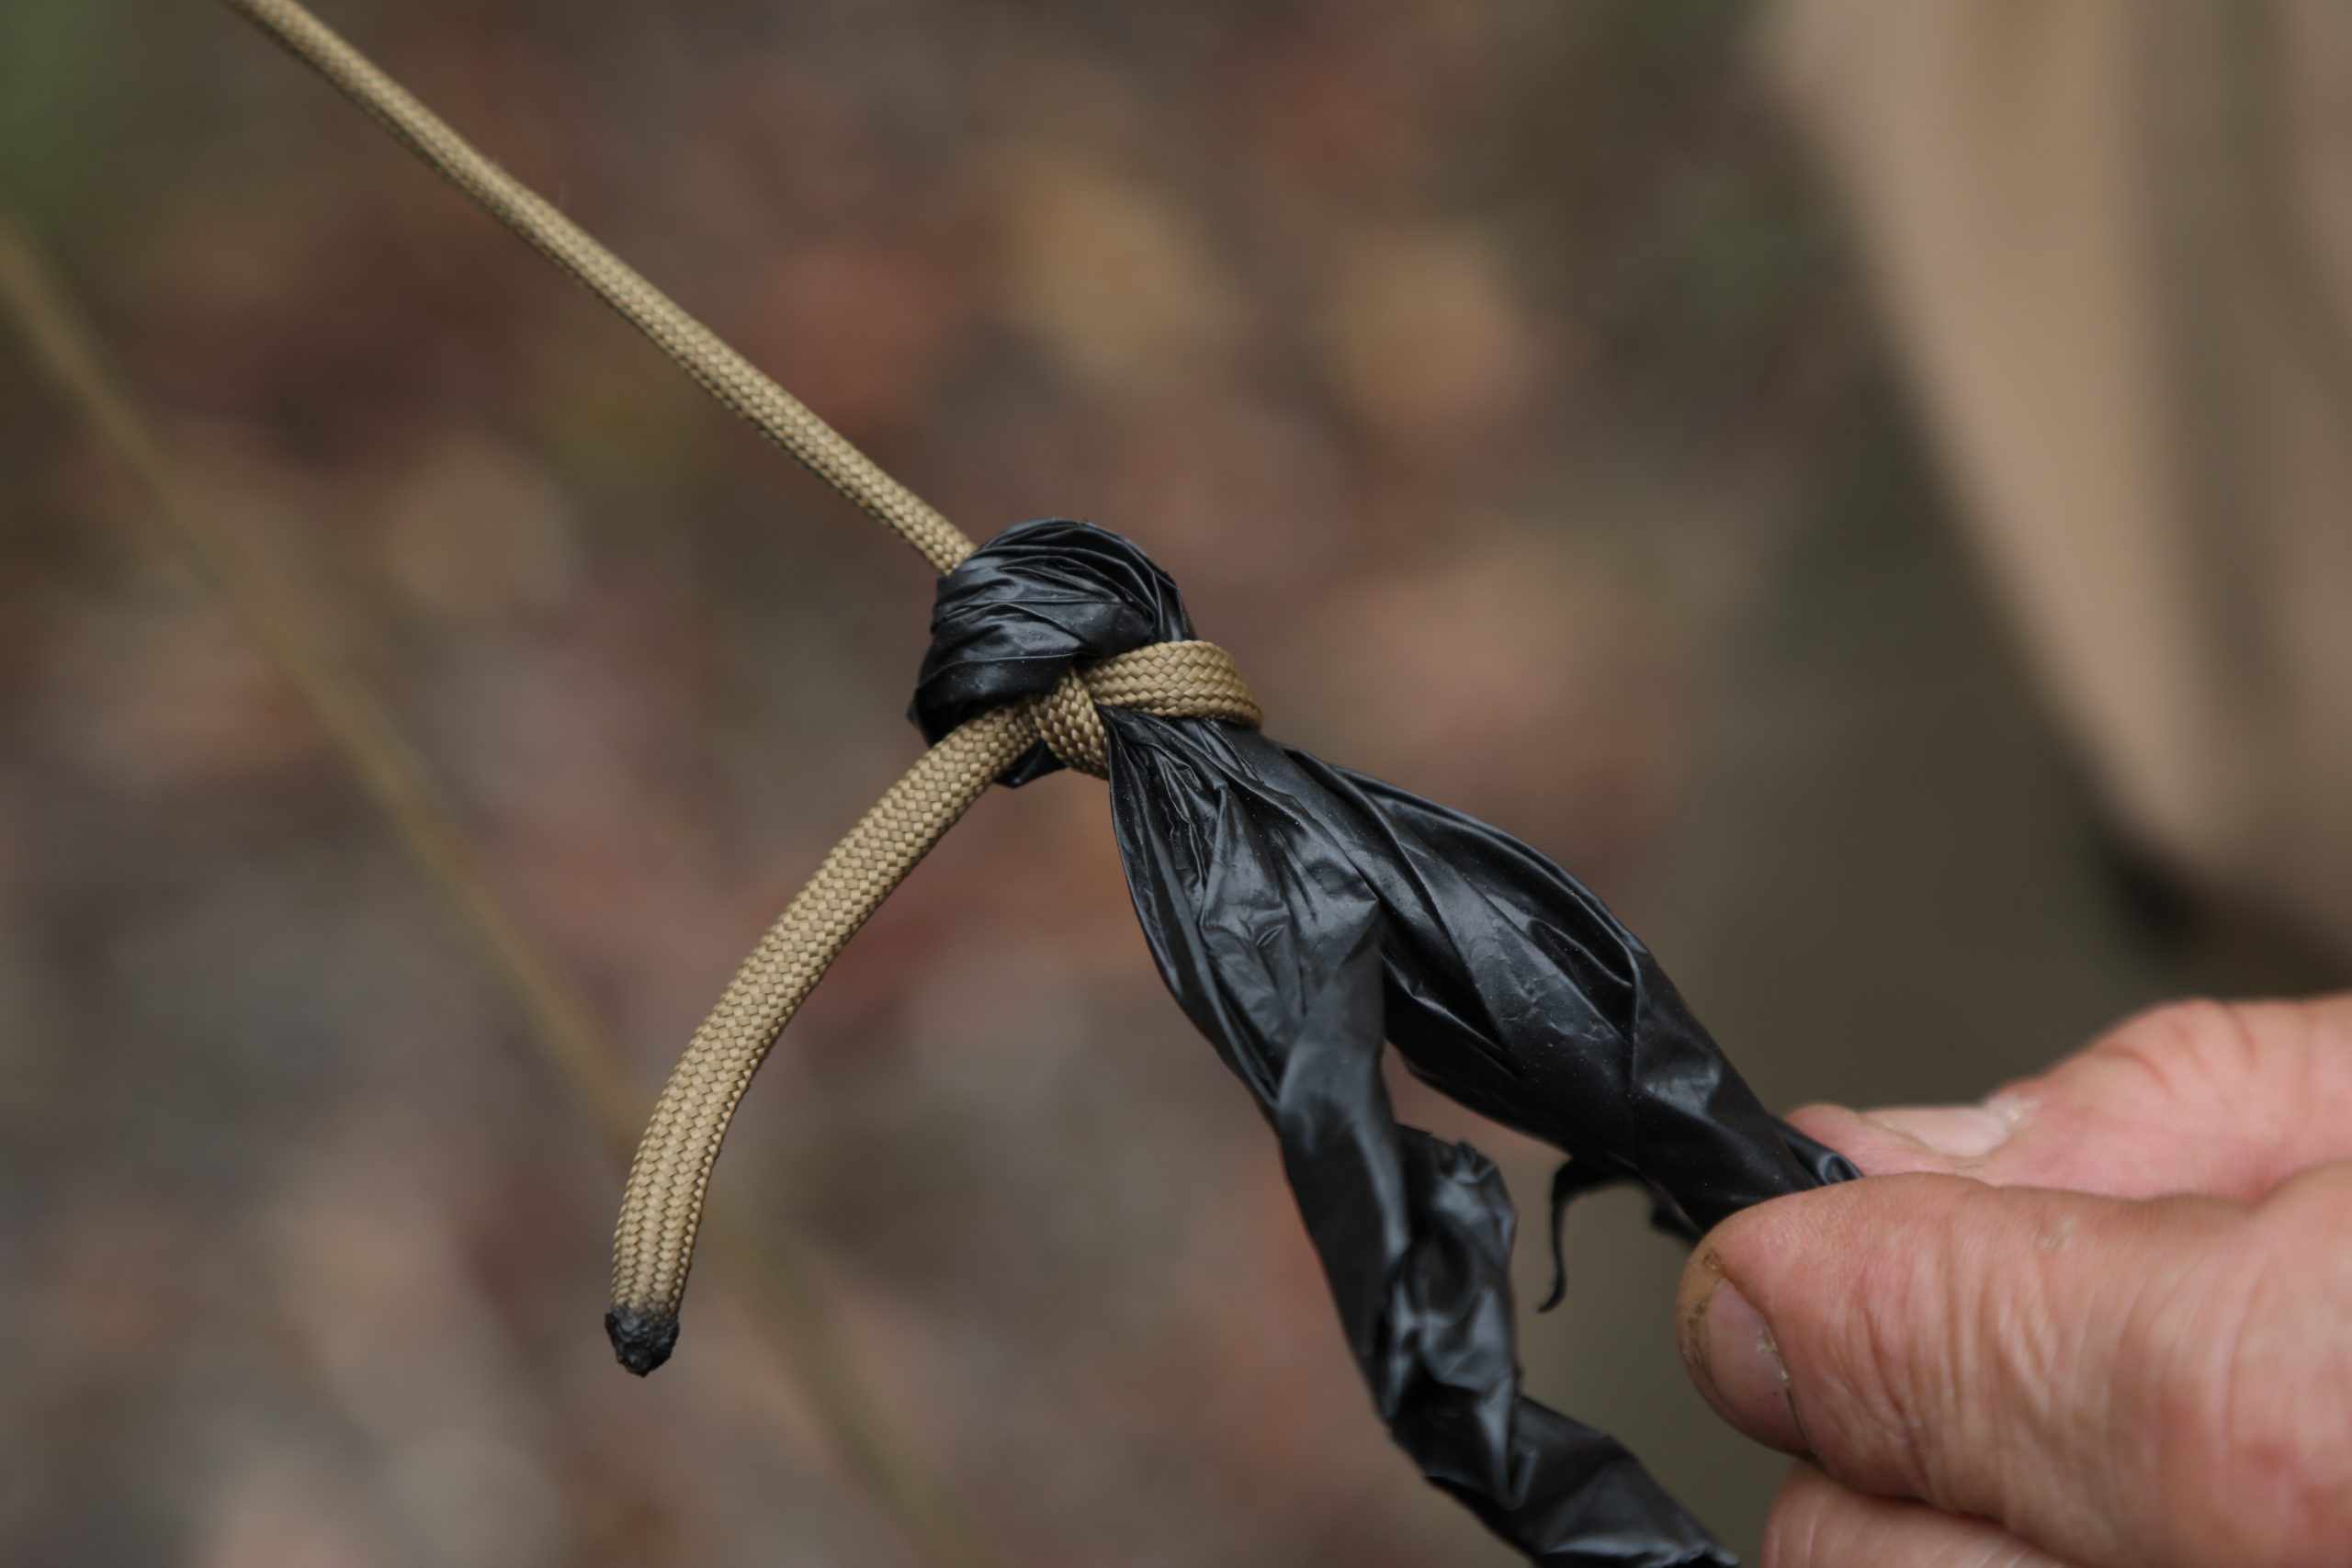
Sheet bend on plastic

Sheet bends used to secure the corners of an emergency garbage bag shelter. A bush button using a clove hitch is used in the centre.
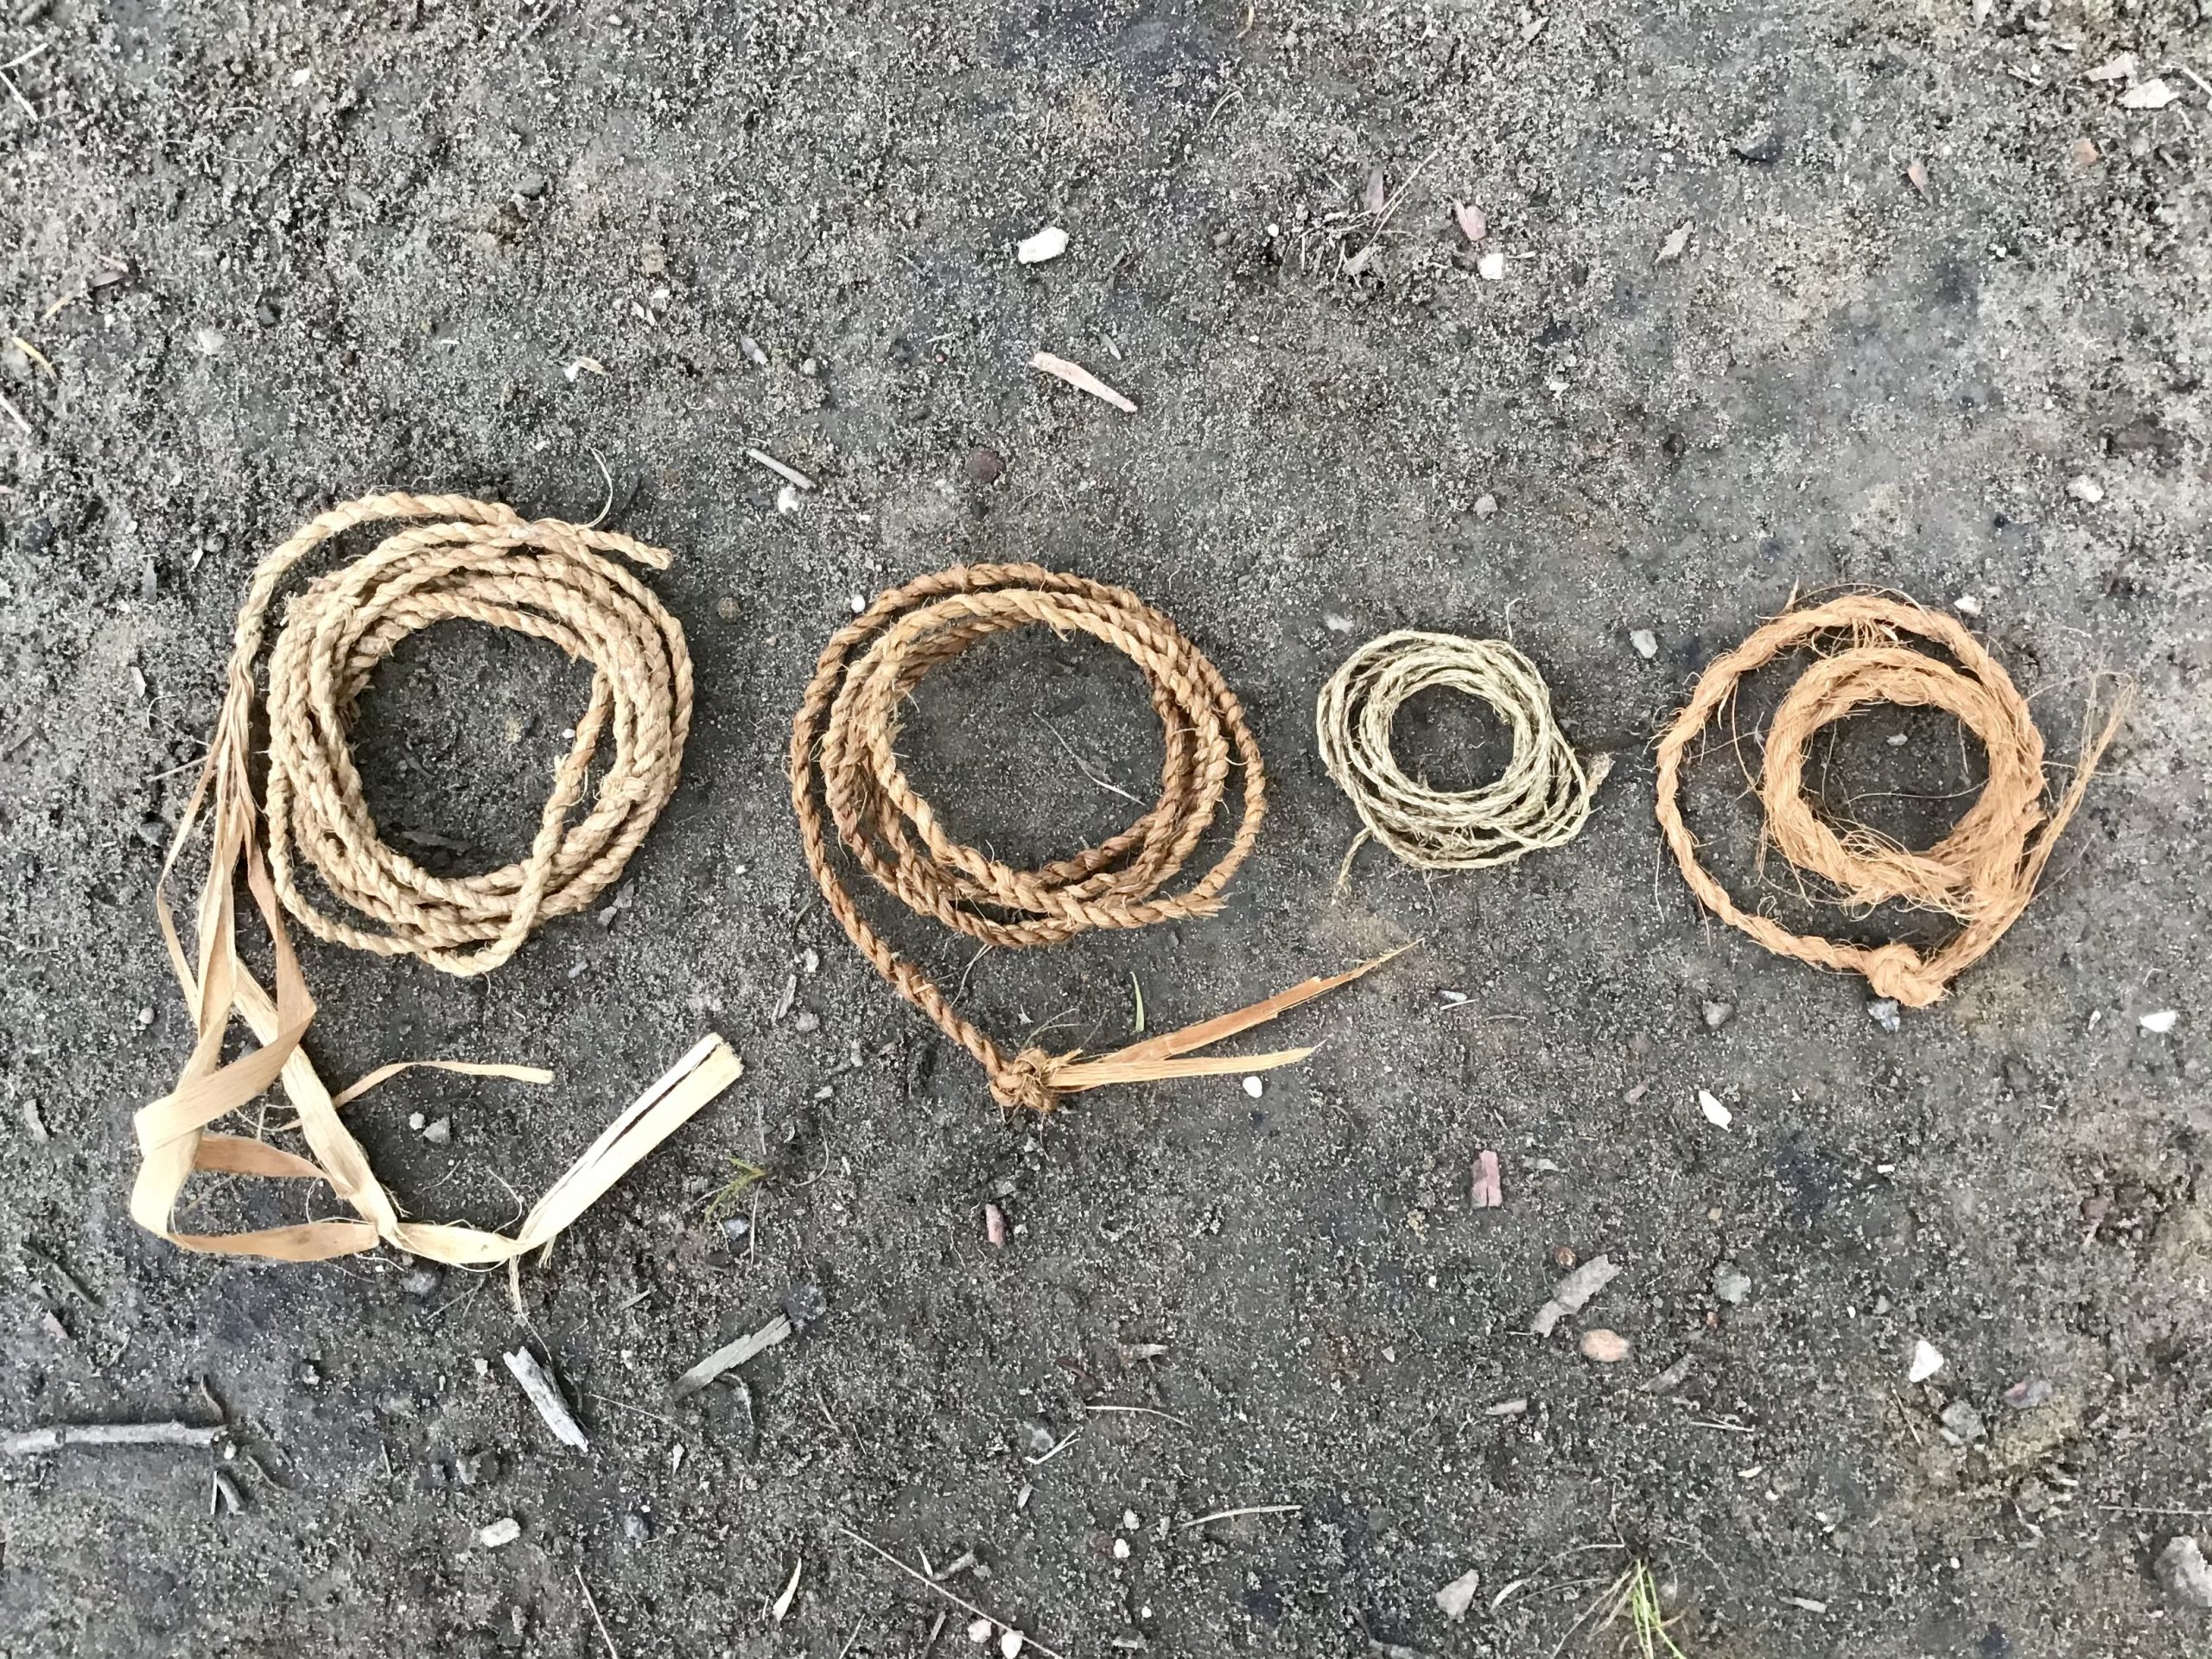
Natural cordage and bindcraft

Having the ability to be able to make cordage from the resources you find around you is an important bushcraft skill for anyone who spends time in the outdoors.

Being able to make cordage not only allows you to produce it if you find yourself without it (lack of preparedness) but it allows you to be able to conserve your manufactured cordage and save it for when you really need it.

Good quality natural cordage can be made from a variety of sources:

  • Plant Fibres such as the outer fibres of stinging nettle (Urtica sp.) and native raspberry (Rubus parvifolius), leaf fibres and husks of many palms (Livistona sp.) or the semi dried leaves of spiny headed mat rush (Lomandra longifolia).
  • the inner bark of many trees such as coastal hibiscus (Hibiscus tiliaceus), Kurrajong (Brachychiton sp.) stringy bark (Eucalyptus tetrodonta) and willow (Salix sp.).
  • the shallow long roots of many pines and eucalypts can be split down to make strong lashing material
  • making withies involves twisting small pliable saplings so that they are flexible and retain their longitudinal strength, creating a strong bush wire.

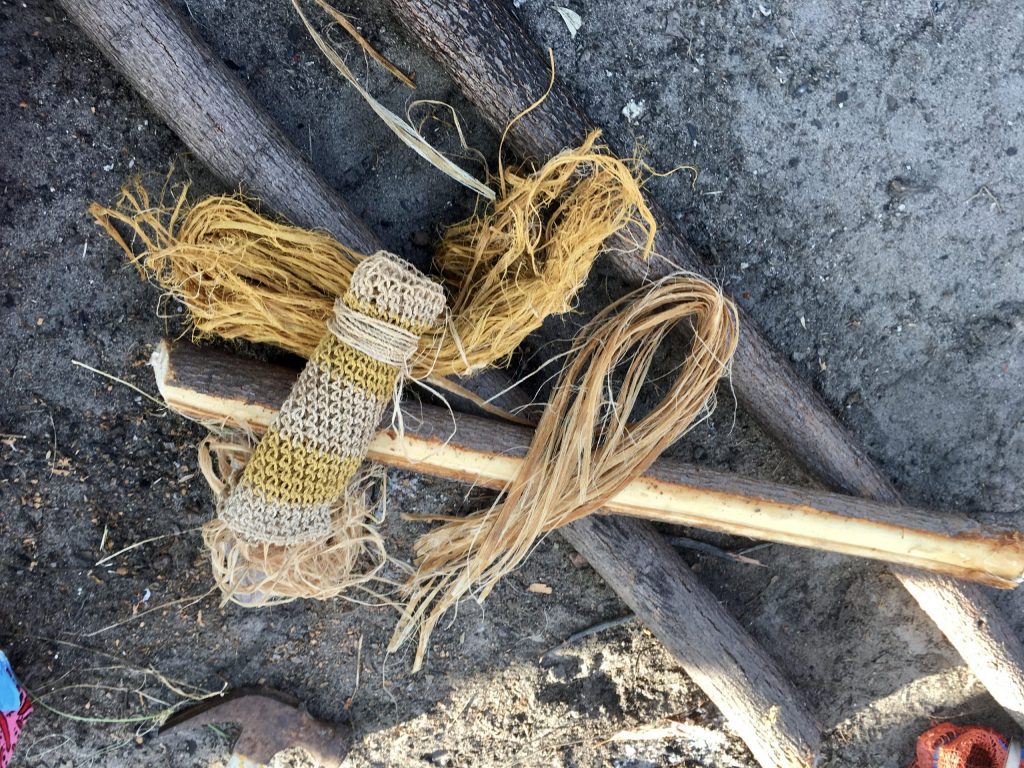
Cordage made from the inner bark of coastal hibiscus, sweet wattle and the fibres of sand palm and coconut husk.
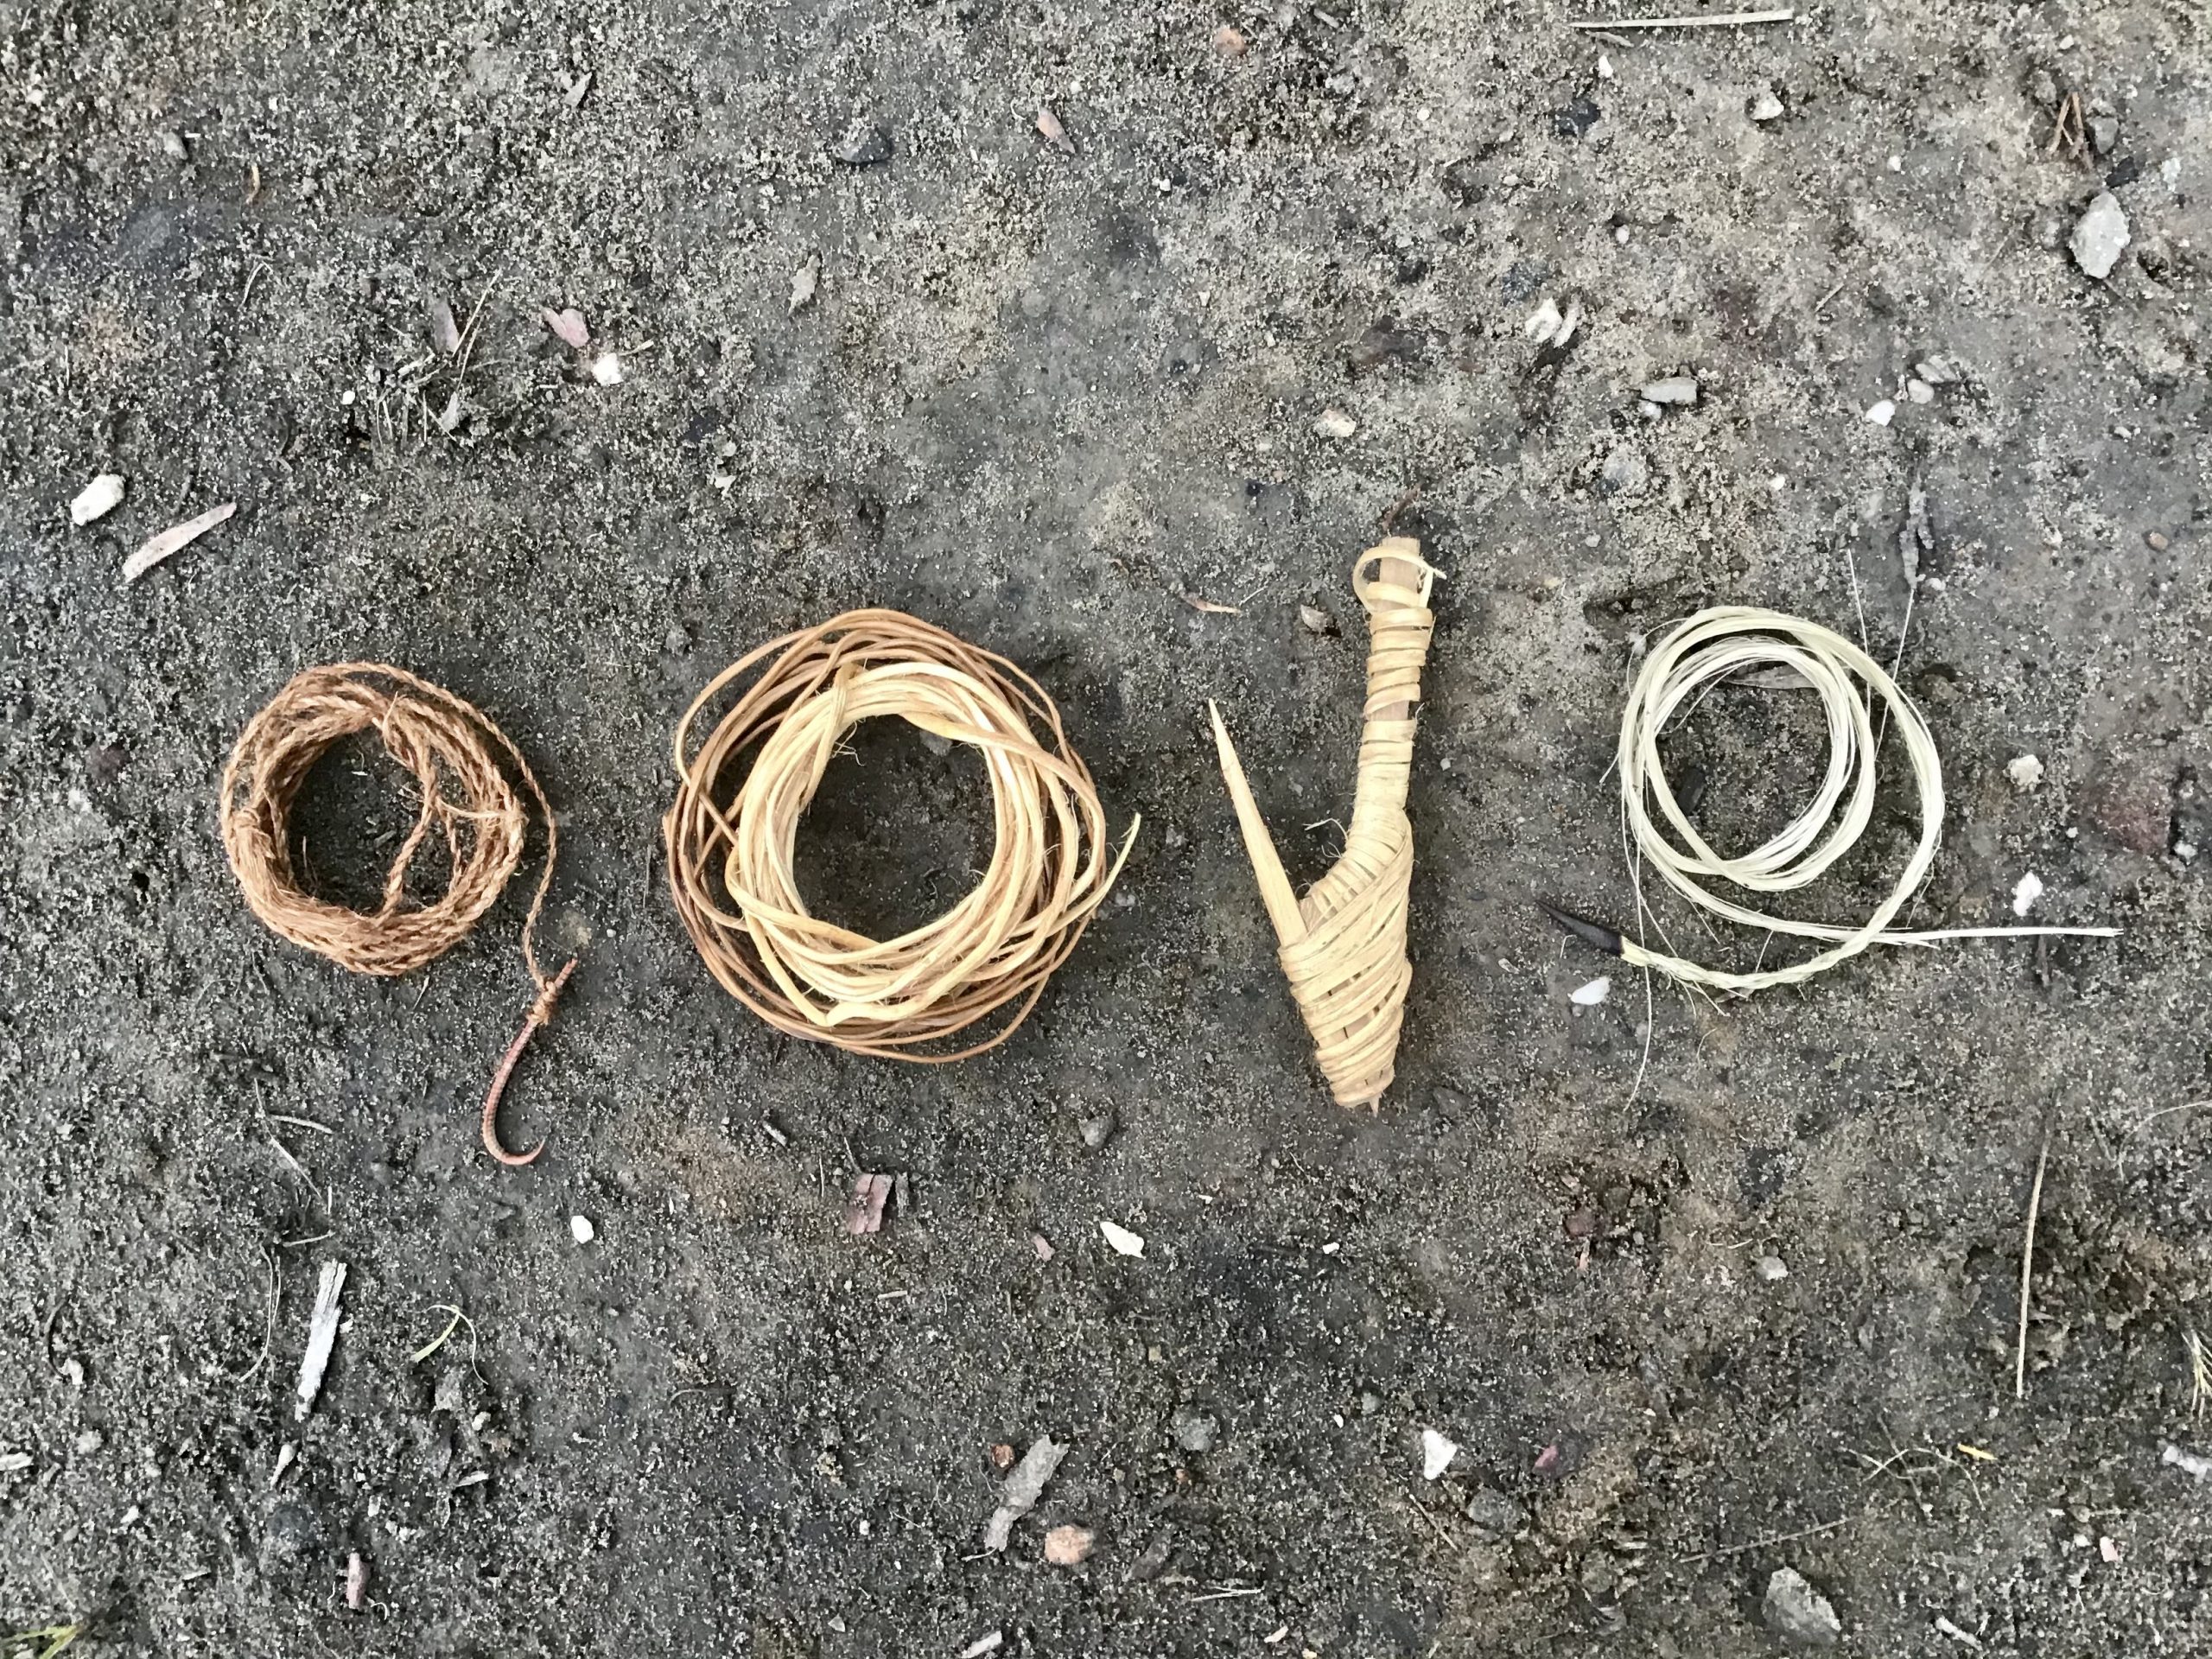
Fishing twine made with dogwood fibre and fish hook cactus, spruce roots, halibut hook lashed with split spruce roots and sewing thread and needle made from the fibres of an Agave leaf.
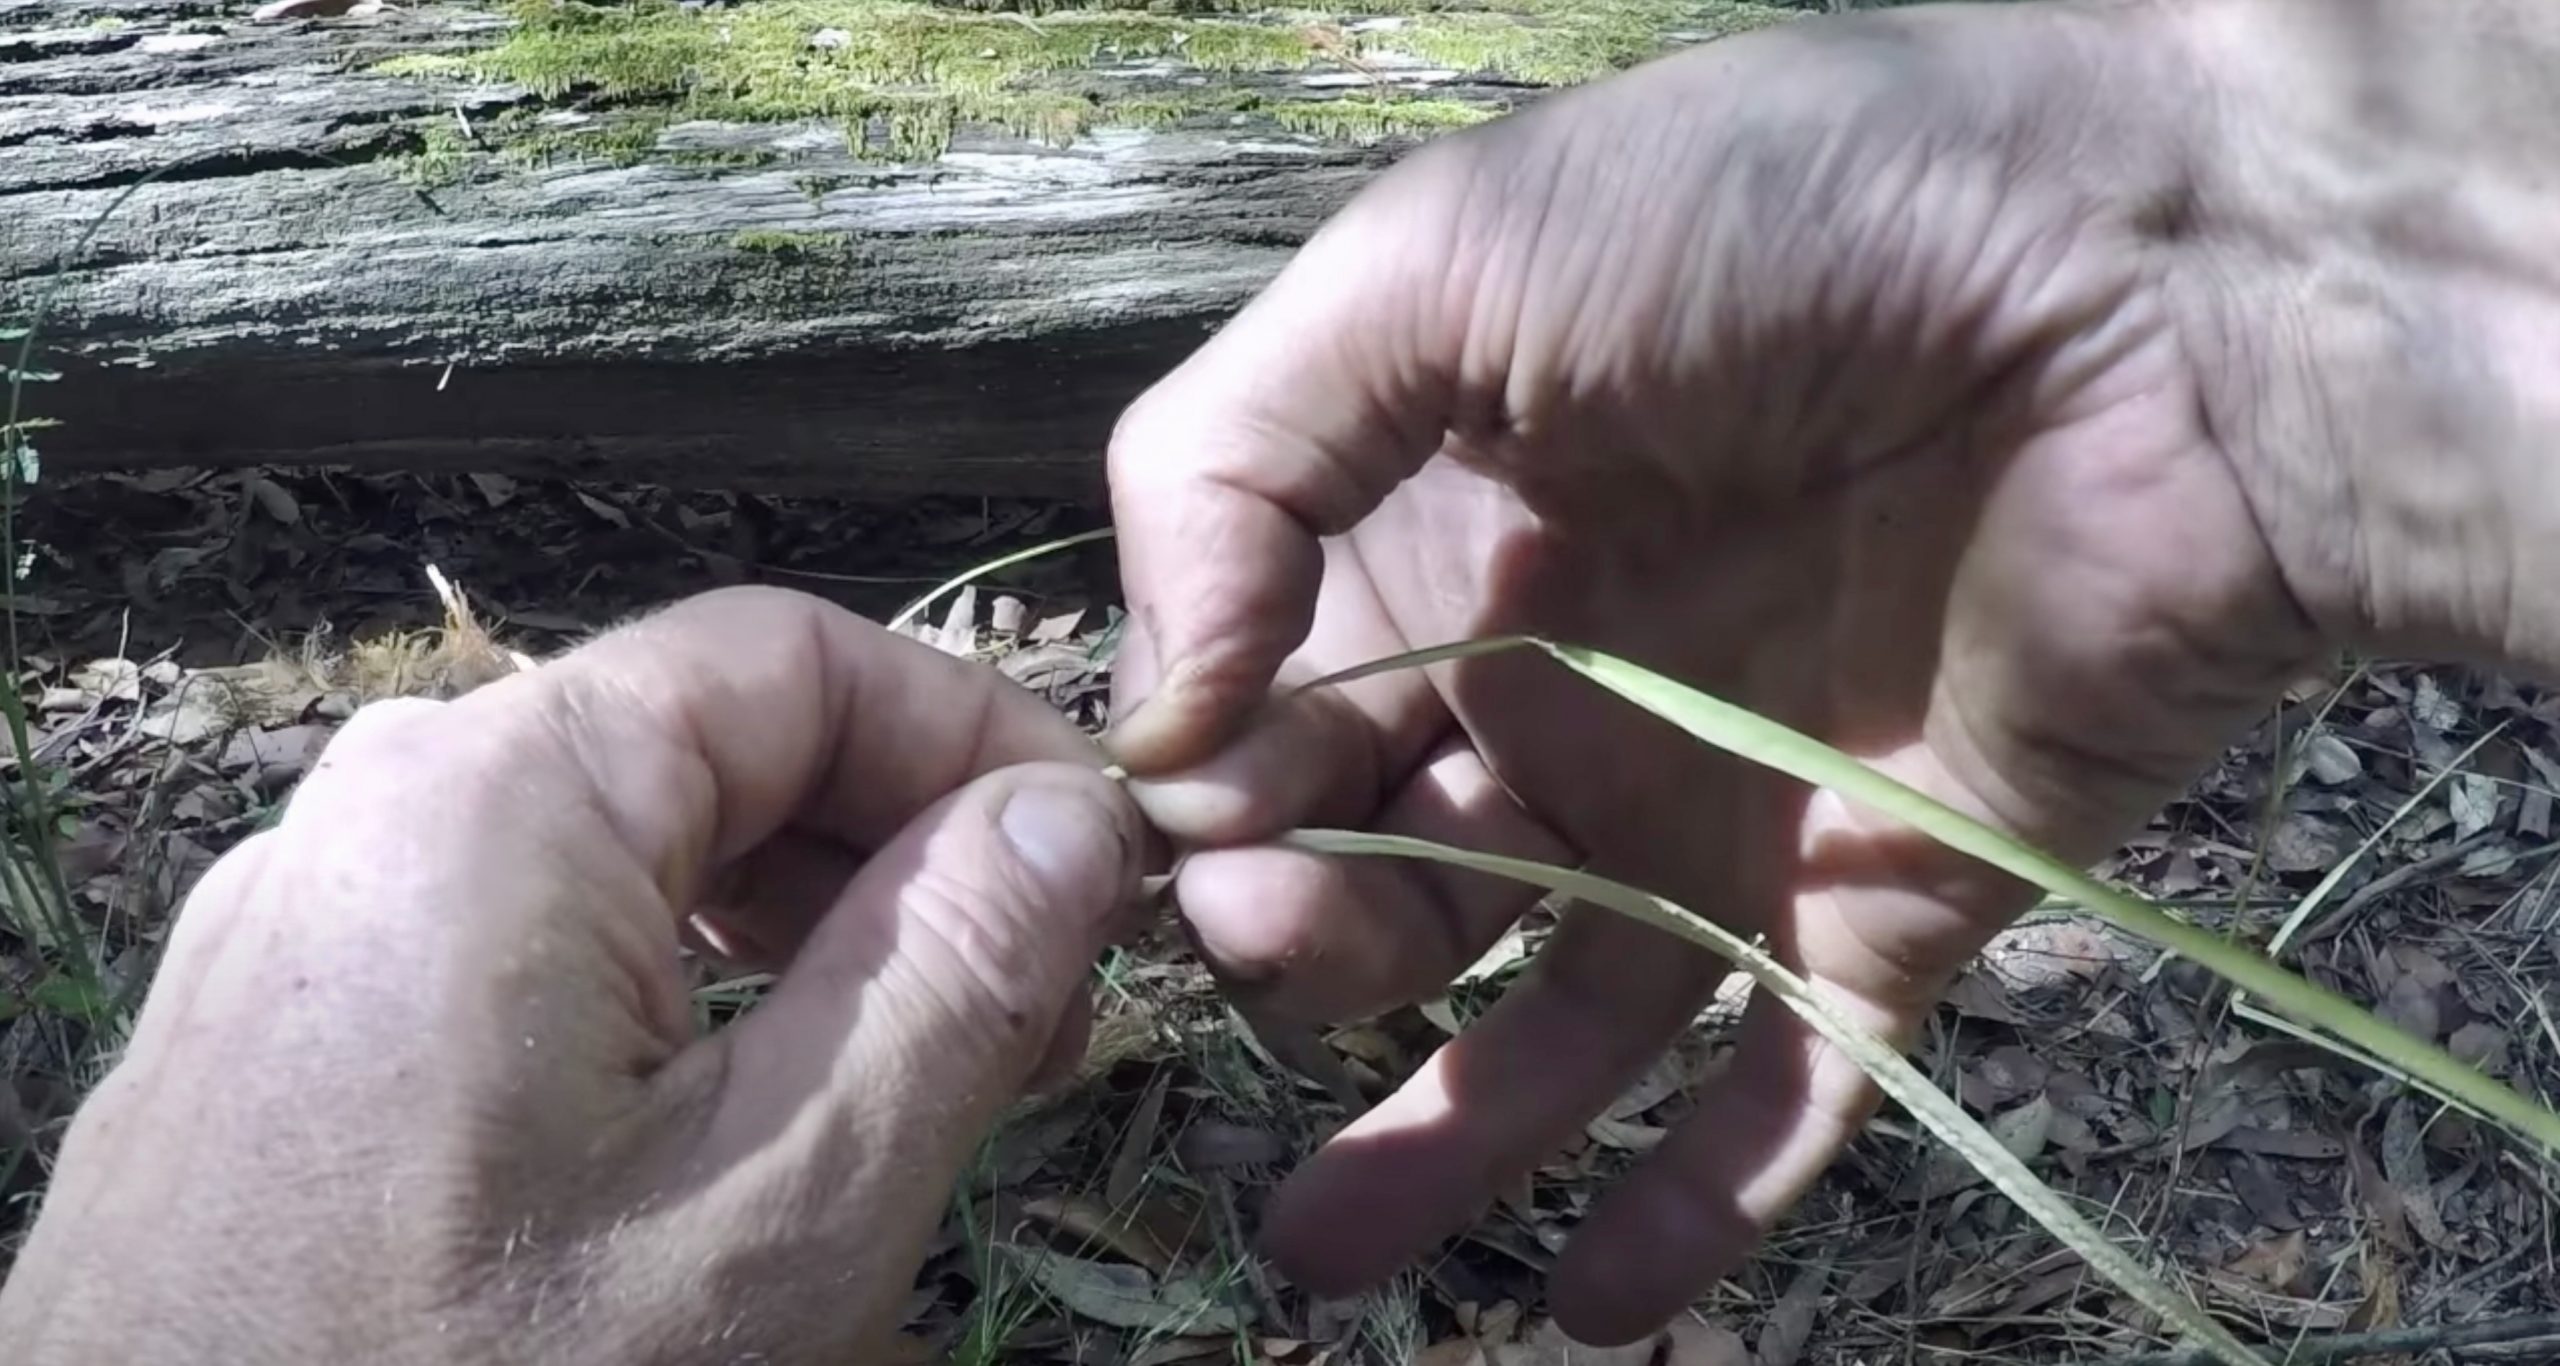
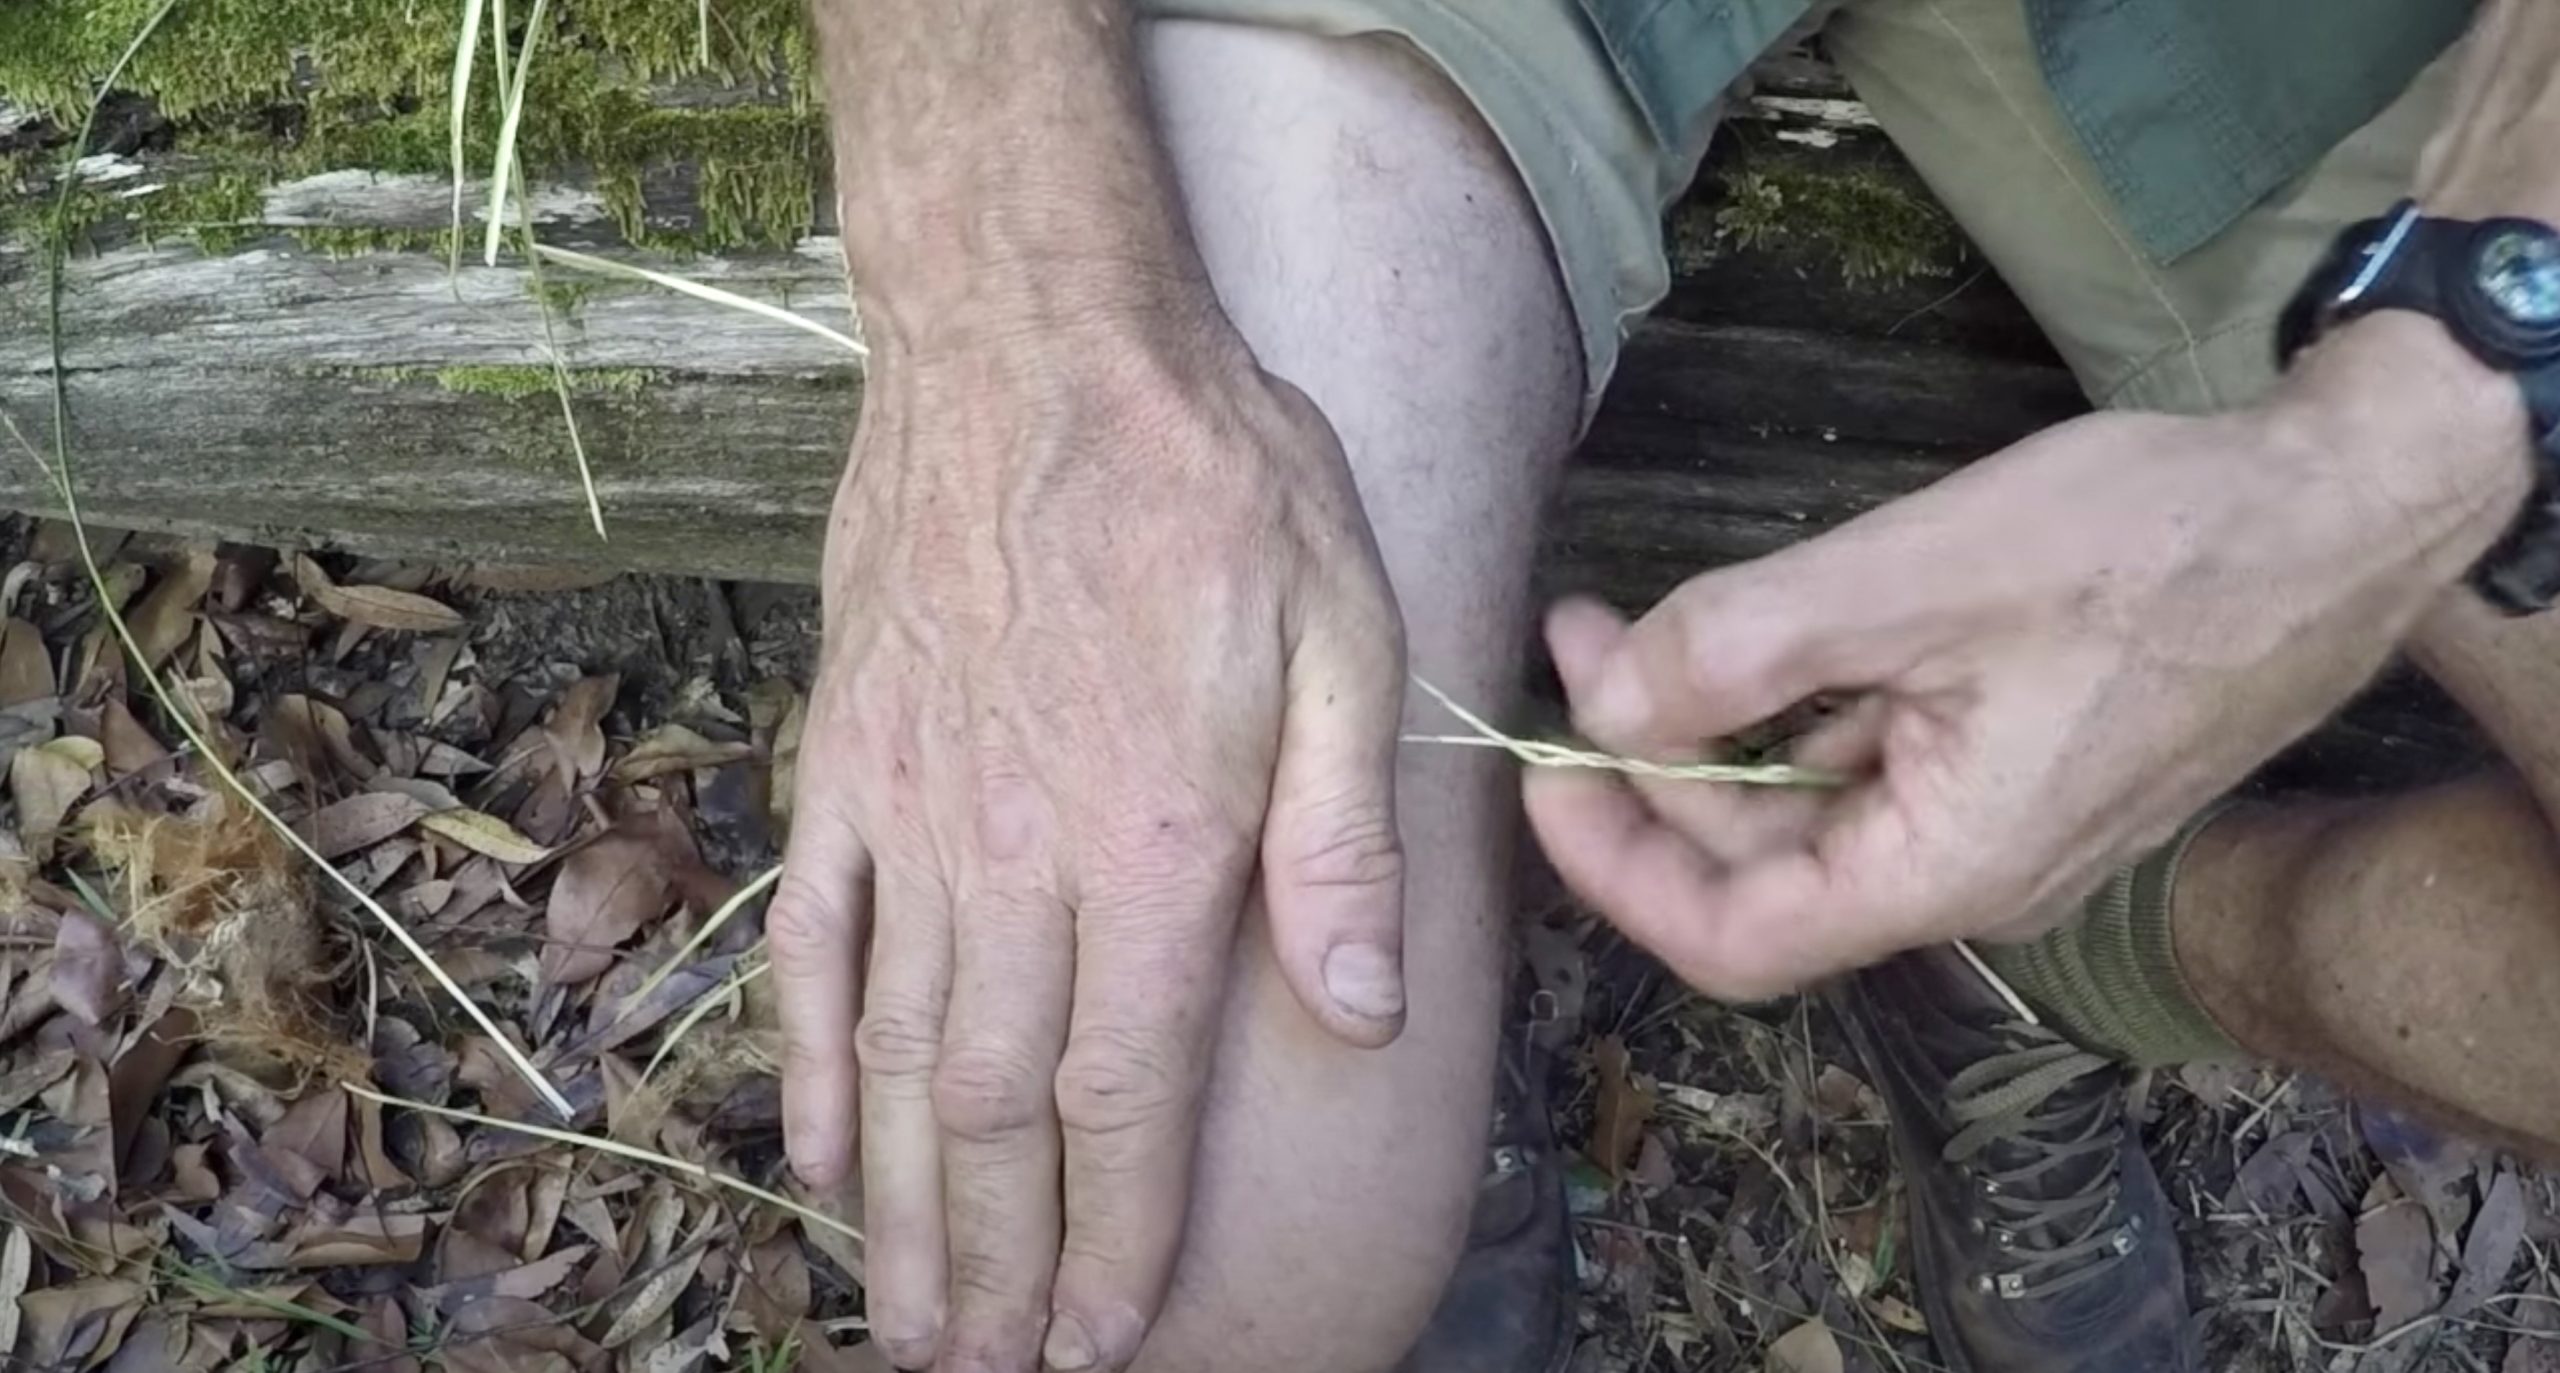
There are many methods of making 2 ply cordage, two common methods are the reverse twisting method using your fingers and thumbs and the rolling method which involves rolling the fibres along your thigh or leg.

Once 2 ply cordage has been made it can either be used as it is or platted with other lengths of 2 ply cordage to make rope.

Twisting method

Rolling method

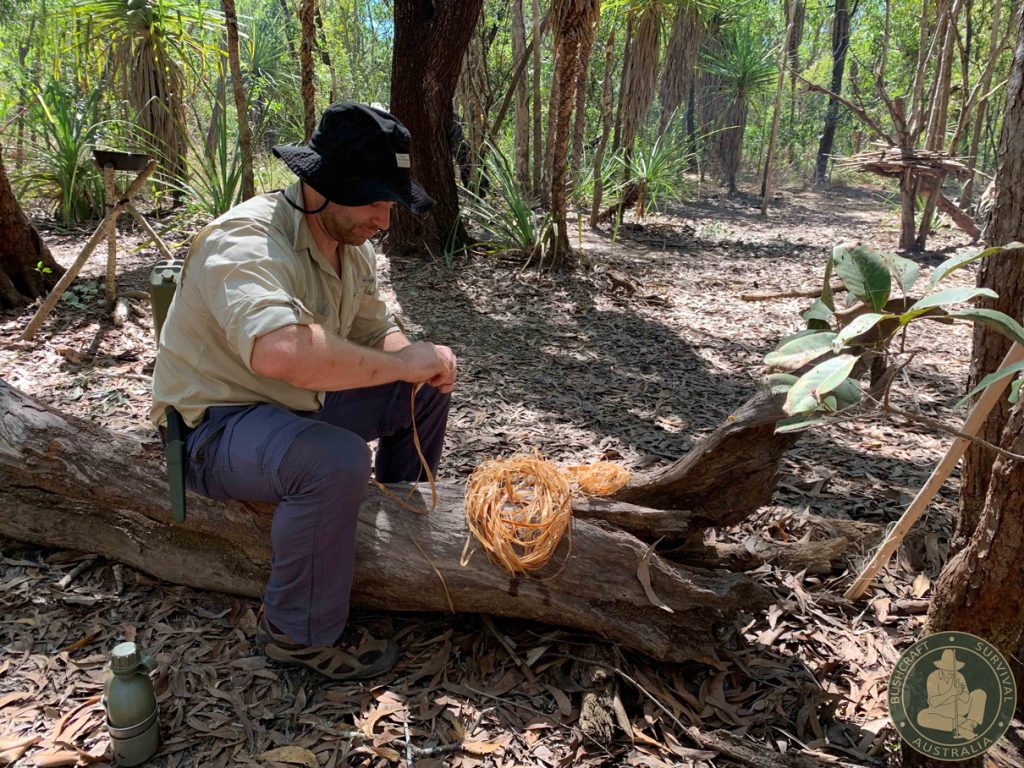
Bushcraft Survival Australia - Cordage makingA student on a bushcraft survival course learning how to make natural cordage
To see a demonstration of these two methods of making natural cordage please visit our Youtube channel to watch this video: Natural Cordage (Part 1)

“Being overly reliant on any man made equipment in an outdoor environment is a dangerous thing. Sure, having good quality “essential” modern equipment is very important, but not having the knowledge and skill to improvise and manufacture your own alternatives from nature should you find yourself without them is foolhardy and unfortunately very common, especially here in Australia”

Water Acquisition and Purification

In this blog we will be looking at the importance of water in an outdoor environment, water intake and dehydration, a few ways of sourcing it, the 5 water contaminants and a few different methods of purifying it to make it safe to drink. We will also look at why having a metal container as part of your kit is so important.

Water Intake

The rule of 3’s (a flexible guideline) tells us that after first aid (3 minutes without air) and shelter (3 hours without shelter) that the next priority of survival is water (3 days without water).

On average, the human body can only last for up to 3 days without water, however in a hot and humid environment such as northern Australia this could be much less!

In a temperate environment the human body will use up to 2-3 litres of water per day just in normal bodily function (not doing anything) and 3-5 litres per day in a hotter climate.

If you were moderately active in a temperate environment you would need to drink 3-5 litres per day and up to 10 litres in hotter climates. Your clothing and exertion levels will also affect your water requirements.

If you are low on water, it is a common misconception that you need to sip your water in order to conserve it. This is NOT the case. If you only have a finite amount of water and you sip it over long periods, your vital organs including your brain will not get the water they require.

The loss of just 2 litres of body fluid without replacing it will impair your ability to think clearly and perform simple tasks by as much as 25%.

Drink your water in 200-250ml amounts at a time, do not sip it!

The water is much more valuable in your body than in your water bottle.

Dehydration

If you are reasonably hydrated, you should be producing at least 1 litre of clear to straw coloured urine per day. The more dehydrated you are, the darker the urine colour and the output less.

Thirst is not a good indicator of dehydration. By the time you are thirsty, you are already dehydrated so drink before you get thirsty.

Other causes of dehydration include: the environment, moisture loss through perspiration and breathing (2-3 litres per day can be lost this way), vomiting and diarrhoea and failing to drink enough.

Signs and symptoms of Dehydration

Thirst, headaches, dizziness, tingling in limbs, irritability, reduced urine and saliva output, dark urine, reduced good decision making, muscular aches and pains, nausea. If these symptoms are left unchecked, they can further deteriorate and lead to heat exhaustion then turn into heat stroke which is a life-threatening condition.

Avoiding Dehydration

Drink enough (200-250ml at a time), avoid extra strong diuretics such as espresso coffee (normal strength tea and coffee are ok in moderation), carry sufficient water and a means of purification, fill up when you wake up, have adequate salt in your food, take advantage of all good water sources.

Conserve your sweat, not your water. Do not sip water, drink in 200-250ml amounts.

Water indicators and finding water

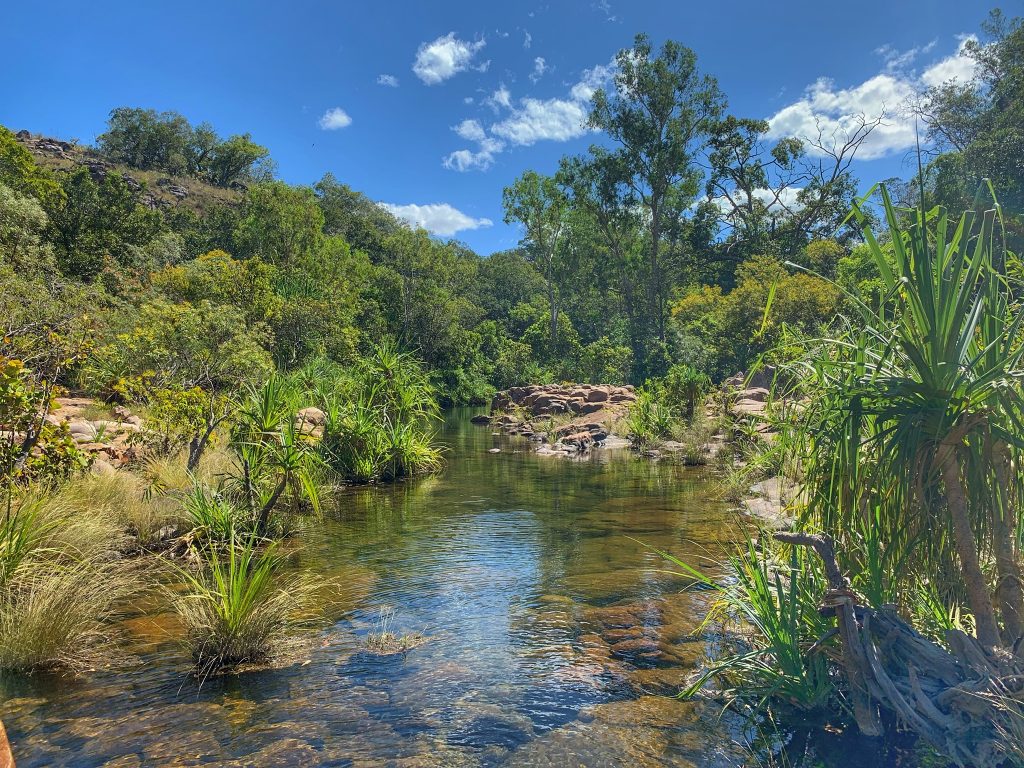
Other than the water that falls from the sky and other obvious water sources such as rivers, creeks and streams, finding water in an otherwise arid dry environment is another story, far too detailed for these few pages.

Terrain: The shape of the land can be a help when finding water. Water runs down hill so any low lying areas are going to be a possibility.

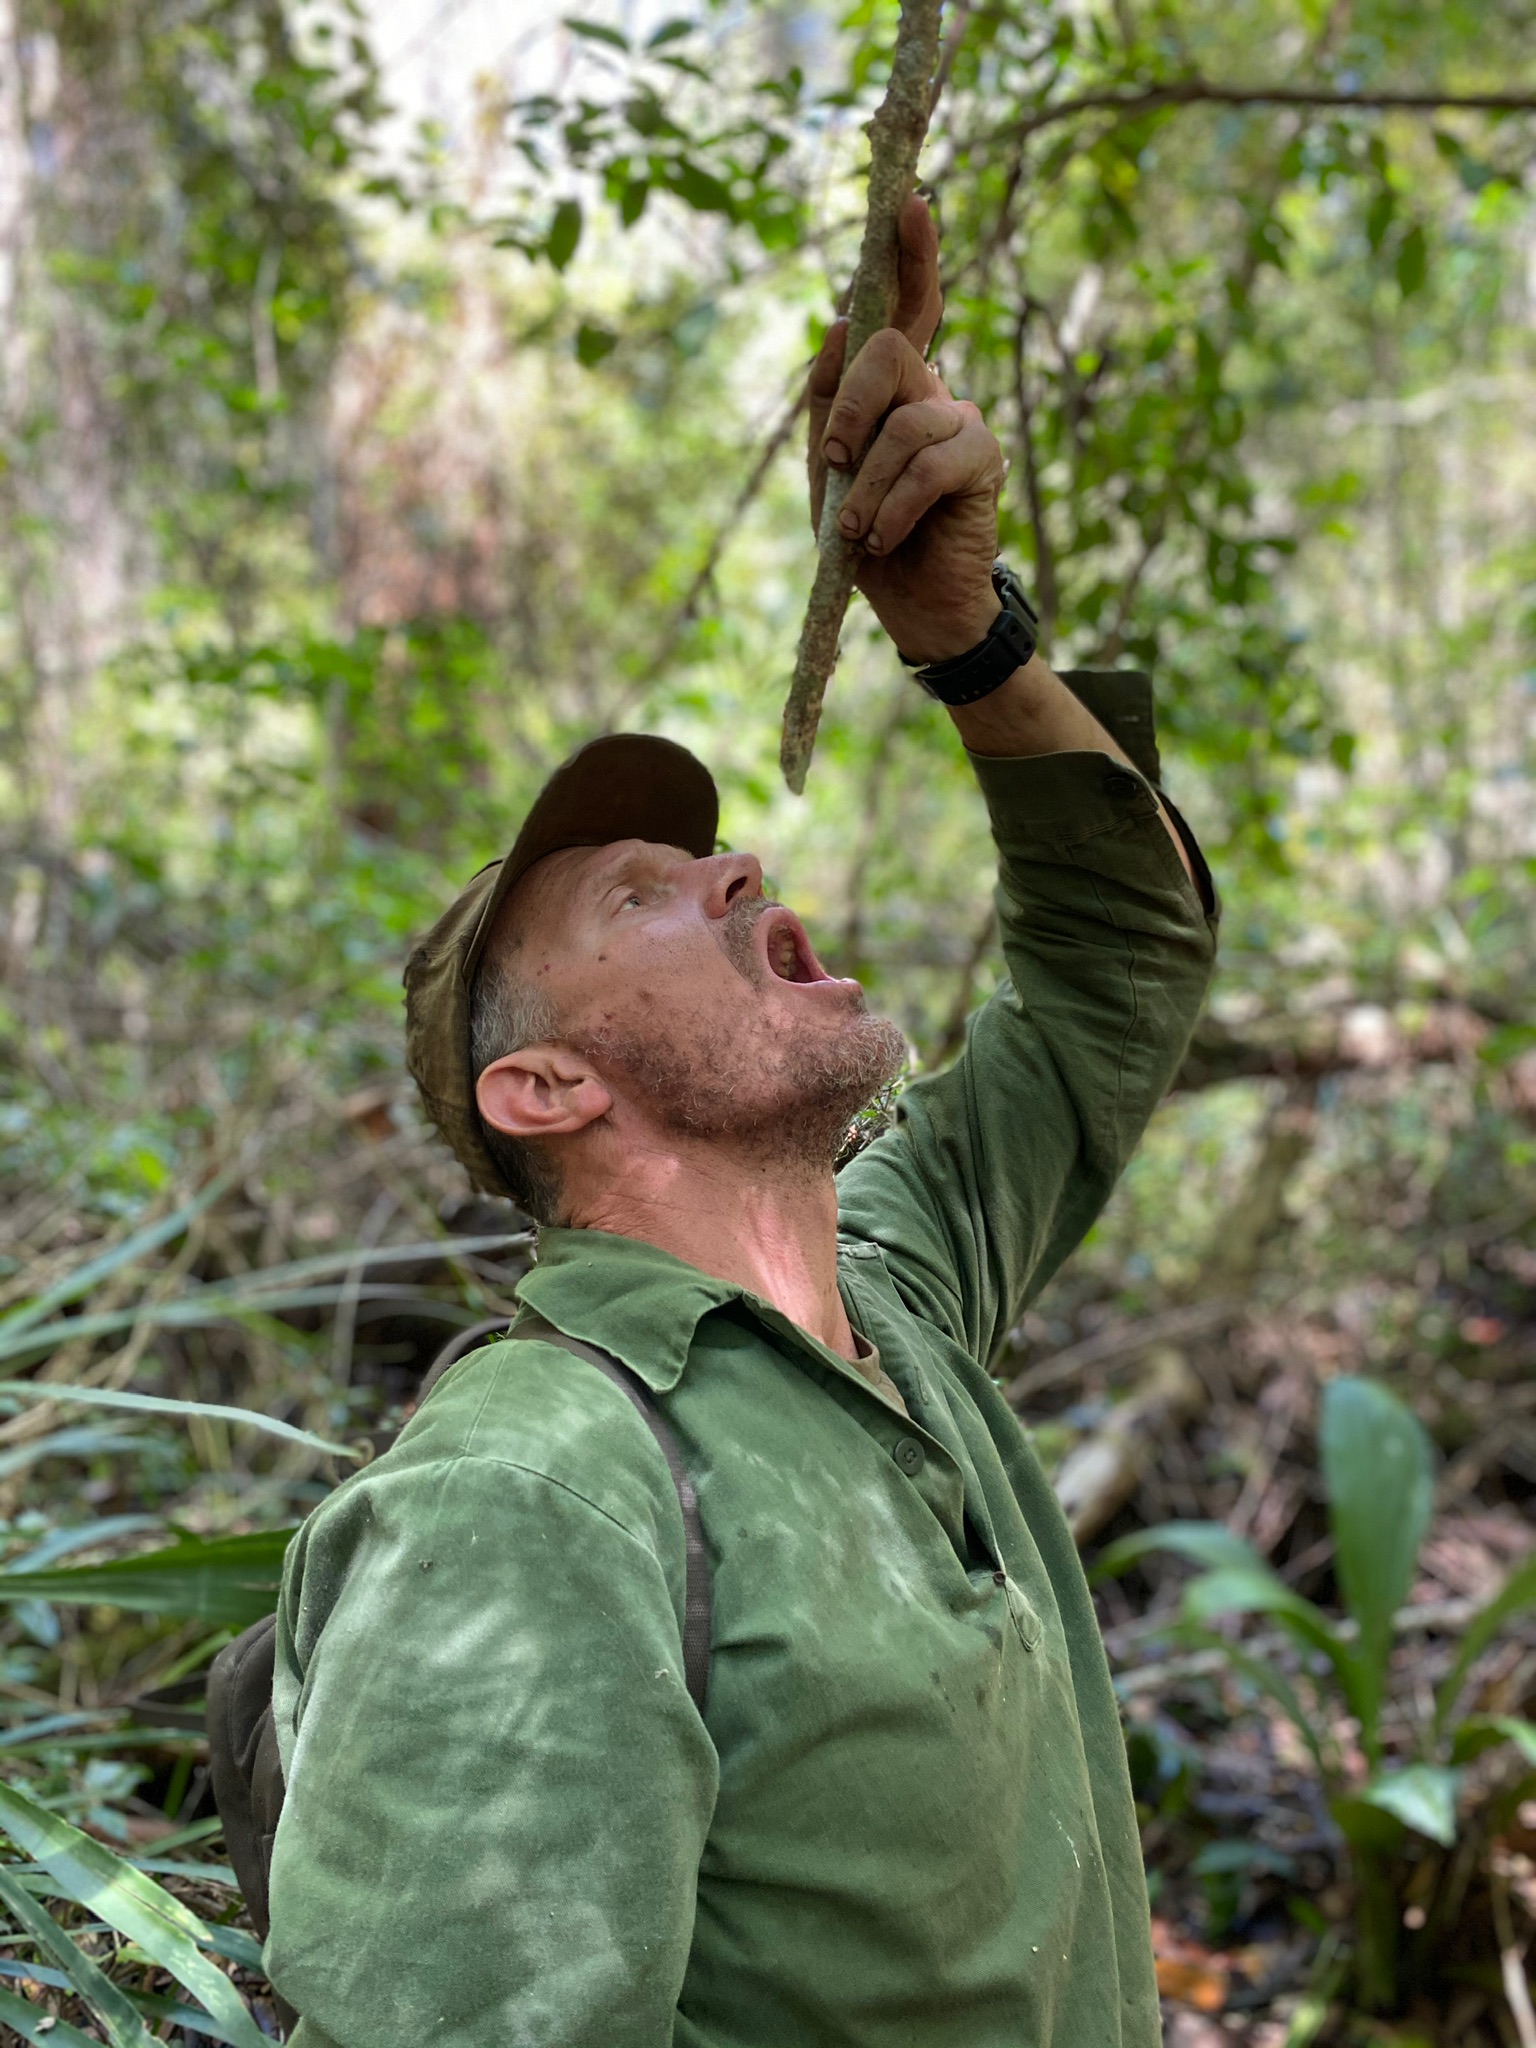
Vegetation: Verdant green vegetation in an otherwise dry area could be an indicator that water may be underground particularly if it is a low lying one. Certain trees that only grow in areas where there is usually fresh water are also clues eg. Pandanas, Melaleucas, Casuarinas. Some jungle vines such as the native 5 leaved grape  (Cissus hypoglauca) can be cut and the water drunk as is. The water must be clear, odourless and not milky.

Insects: Insects such as bees, wasps and dragon flies never stray too far from water. Observing their behaviour, such as wasps building a mud home could be a clue that water is in the area.

Birds: Grain eating birds such as finches never stray too far from water. I have personally used this when in the Pilbara on an army exercise where we were low on water after a long stomp and made camp after dark. The next morning I heard finches, followed the sound and found a small soak hole 200m away.

Animals: All animals need to drink just like us. Animal tracks converging on one another to form larger tracks that lead down hill are a sure sign that water could be in that direction.

Drinking water from the native 5 leaved grape vine (Cissus hypoglauca). The water must be clear, odourless and not milky for it to be safe to drink.

Water Collection Methods

There are various ways of collecting water, each requiring some form of receptacle or sponge to collect it or soak it up. These include various sized water bottles, containers and cups to collect water from obvious sources such as rivers, streams and water holes. Plastic sheets, garbage bags or tarps to collect run off from rainwater and cloth or clothing to be stuck into hard to access holes or cracks to soak up water which in turn can be rung out into a container. Cloth can also be used to collect early morning dew from vegetation and smooth surfaces.

If you don’t have a receptacle or method to soak water up you are going to have to find or produce something from nature which requires some ingenuity and also can be quite time consuming.

Once you have collected your water, you now need to make it safe to drink.

All water sources should be considered as polluted.

A poncho used to catch rain water
Input vs Output

It is also important to note that when you are low on water you do not want to exert more energy and water loss through perspiration than you need to in order to obtain water.

Some methods of obtaining water such as the “Solar or Desert Still” which is well documented in many survival books in my opinion is one of the most ineffective methods of obtaining water as you use up more water constructing the apparatus than you get back from it.

Water Transpiration Bag

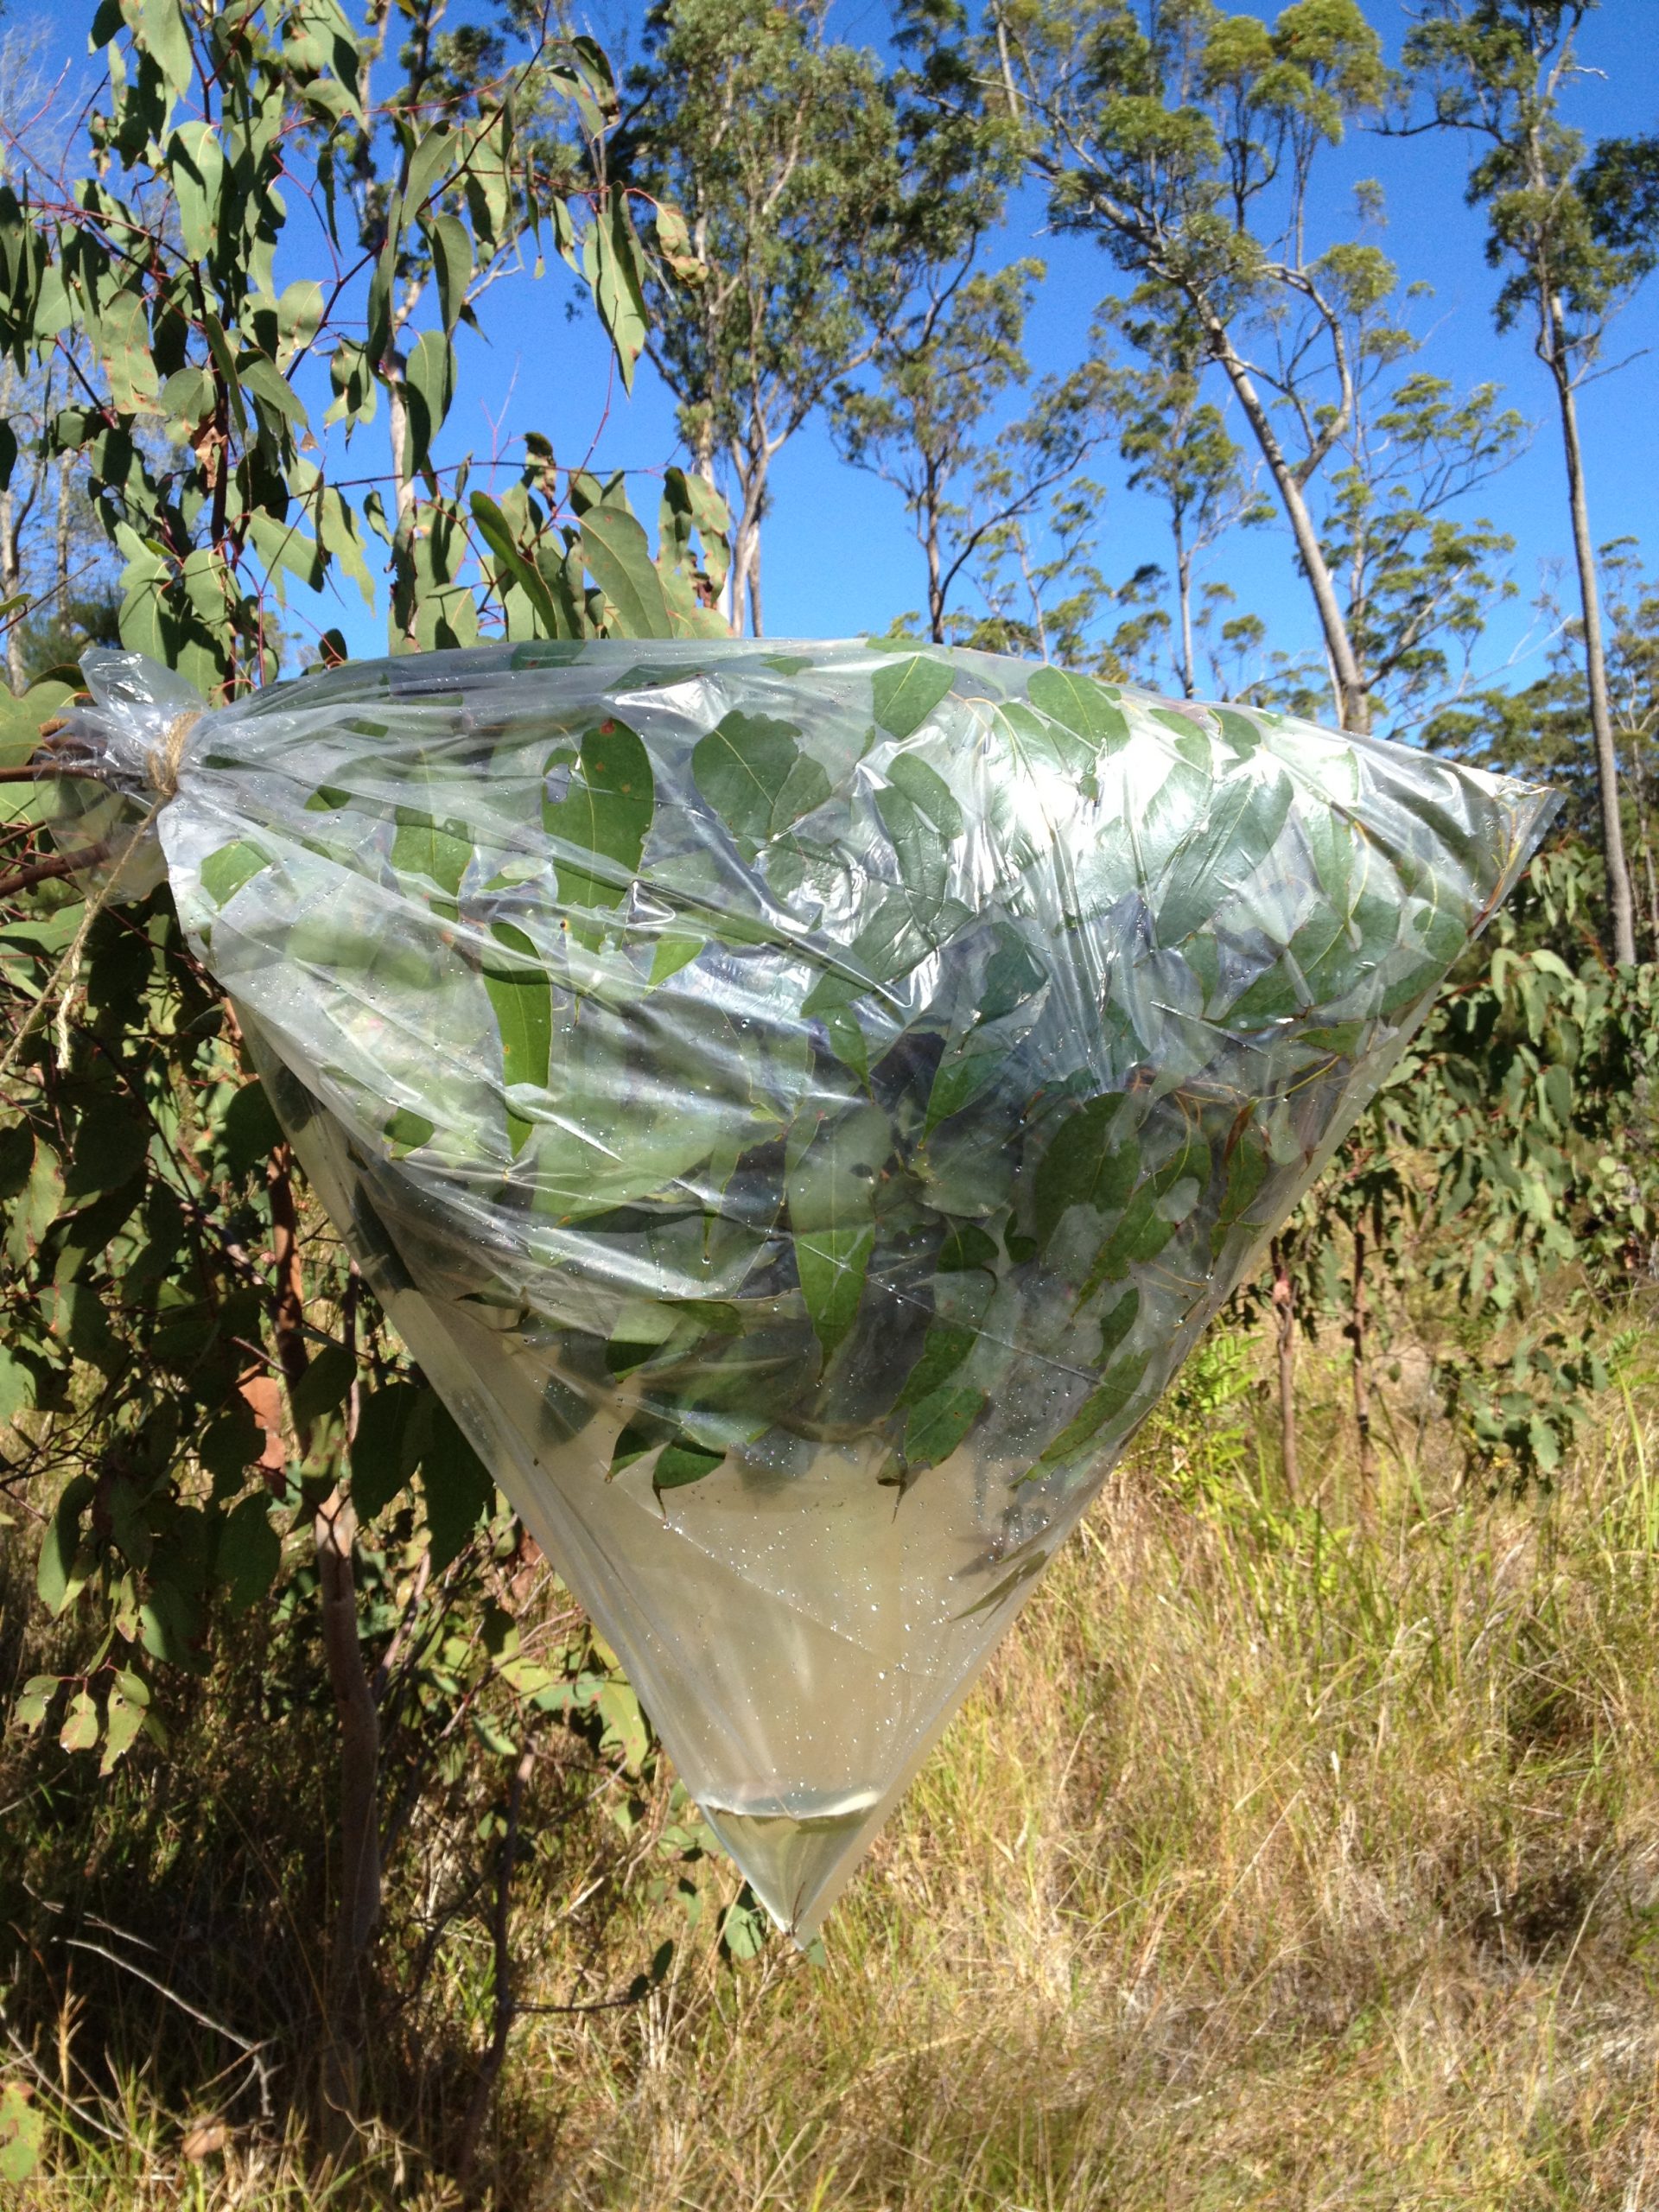
One of the most effective and energy efficient methods of obtaining water in Australia and one I use often is the Transpiration bag.

Take a large heavy duty “clear” plastic bag (a black plastic bag will not work) and place it over a leafy branch or sapling of a non-toxic tree. All Wattles (Acacias) and gum trees (Eucalypts) are safe choices in Australia and are widespread and common. Select a branch that is predominantly in the sun all day (north facing below the Tropic of Capricorn). Tie the bag off at the mouth, creating an airtight seal and ensuring a corner of the bag is at the bottom.

Plants and trees draw up moisture from their root system and disperse the moisture into the air through their leaves. We are capturing this dispersal of moisture inside the bag where it condenses. As the water vapour and droplets get heavier, they run to the bottom of the bag. It’s possible to collect up to 700ml of water from one bag in a day. It all depends on the aspect, size of sapling/branch and area. Every tree will be different. The water produced may have a slight discolouration to it caused by the tannins in the leaves but it tastes great and is drinkable straight away. It is best to consume the water produced through this method within 24 hours and to change branches after 48 hours so as not to damage the tree.

Transpiration bag over a Eucalyptus    

Collecting the yield. This is immediately drinkable and does not need to be purified.

The 5 Water Contaminants

There are 5 contaminants that pollute water that you need to know about in order to make your water safe to drink.

Turbidity – is the measure of relative clarity of a liquid. Cloudy, hazy or muddy suspended particulate matter such as sand mud, silt or other decomposing organic material must be removed first through filtering for all water purification methods to be able to work. Even if there are no pathogenic (disease causing) organisms in the water, turbid water can still irritate your stomach.

Parasites – are microscopic organisms that live on or in another host organism. They can be either single cell organisms such as protozoa and cysts or multicellular organisms such as worms.

Protozoa are parasitic or free-living organisms that are able to multiply in humans and other animals causing disease. Eg. Cryptosporidium and Giardia.

Bacteria – much smaller than parasites, bacteria are single celled organisms found almost everywhere on earth (in the soil, water, in the air or in the tissues of plants and animals). Some bacteria cause disease while others don’t. The ones that do, produce a wide range of infections, some of which are potentially lethal. Eg. Typhoid Fever

Viruses – a virus is a sub-microscopic infectious agent (not a cell) that replicates only inside the living cells of an organism. Still smaller than bacteria, viruses infect all types of life forms including animals, plants and other microorganisms. Eg Hepatitis A, Polio, travellers diarrhoea and viruses in the water from poor sanitation.

Chemical Pollutants – pesticides and heavy metals from man-made polluting sources such as mining and agriculture.

Filtration and Purification

Once you have collected your water you need to know how to filter it and purify it in order to make it safe for consumption.

There are many methods and gadgets on the market that either filter or purify your water, some do both. Not all methods treat everything, some treat some pollutants but not others and vice versa so you need to know what you are dealing with.

The main water treatment methods are: Coarse Filtration, Microfiltration, Chemical Sterilisation, Ultraviolet sterilization, Boiling and Activated Carbon.
Coarse Filtration/Pre filtering

Coarse filtration using a Milbank bag/Brown Bag, bandana or piece of thick cloth removes turbidity and sediment and is the first stage in treatment for all methods.

Coarse filtration potentially reduces the load of pathogenic organisms if attached to dirt etc, however It does not filter out even the largest pathogenic organisms directly.

Coarse filtration is needed to make water clear so that chemical methods work more efficiently.

Coarse filtration using a Milbank bag to get rid of any turbidity before sterilisation

Coarse filtration using a bandana or piece of cloth

Microfiltration

Microfiltration using a ceramic filter, pump or gravity system removes larger pathogenic organisms such as protozoa without having to resort to heat. It is not as effective for smaller bacteria and viruses.

Chemical Sterilisation

Chemical sterilization methods such as chlorine, iodine and chlorine dioxide have various pro’s and con’s.

Chlorine: pH sensitive, temperature sensitive, deactivates bacteria and viruses but needs clear water, does NOT kill protozoan cysts, inexpensive, no contraindications.

Iodine: works on turbid water, will kill most protozoa (not as effective on cryptosporidium) in addition to bacteria and viruses, limited shelf life, contraindications (don’t use longer than 28 days, don’t use if thyroid problems, do not use if pregnant).

Chlorine Dioxide: kills ALL pathogenic organisms but is expensive, unstable in solution and needs to be mixed prior to use as per instructions, needs to be used within allotted period of time.

Potassium Permanganate: Potassium permanganate (Condees Crystals) is widely used in the chemical industry as a strong oxidizing agent and is also used as a medication for dermatitis, for cleaning wounds general disinfection and treating water (used in wells to control iron bacteria and other biological growth. It also keeps well waters taste and smells under control). Place 4-5 crystals only per litre until the water is a very clear light pink, wait 30 mins. PP is on the World Health Organisation Model List of Essential Medicines. Sensitive to temperature extremes, performs best between 10-22 degrees celsius. Poisonous and irritates the skin.

Ultraviolet

Ultraviolet devices available can safely purify clear water and eliminate up to 99% of water born pathogens including protozoa, bacteria and viruses. Water must be filtered and clear for these methods to work. Any electronic device is also subject to battery life and breakage in the field.

Activated Carbon

Activated carbon filters are the only way of getting rid of most chemically polluted water.

They remove pesticides, herbicides and many other toxic chemicals such as dioxin, benzene and styrene. AC does not remove all chemicals or smaller pathogenic organisms.

Activated carbon also removes tannins and phenols which improves taste and smell. It also removes chlorine so use AC first!

Boiling

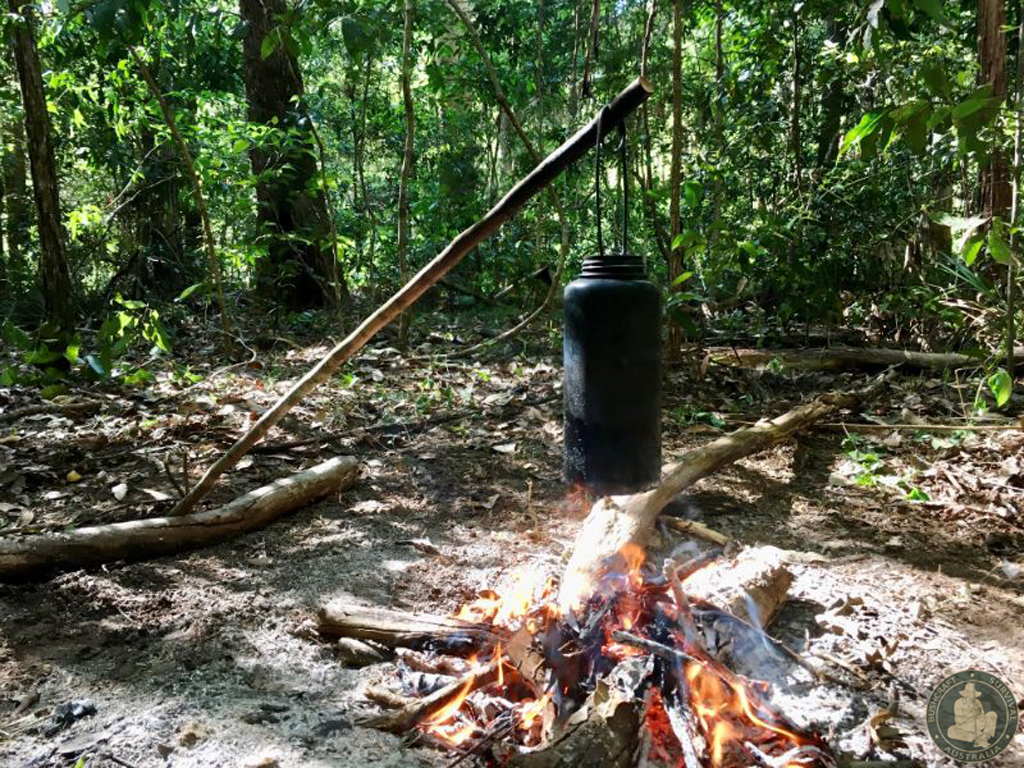
Boiling water is the simplest and most reliable way of making water safe to drink. Boiling kills all pathogenic organisms but does not remove chemicals. A rolling boil for 1 minute at sea level is all that is needed to make water safe to drink. Water boils at a lower temperature the higher you go in elevation so boil for an extra minute for every 2000ft. The only drawback of boiling is that it requires fuel and time.

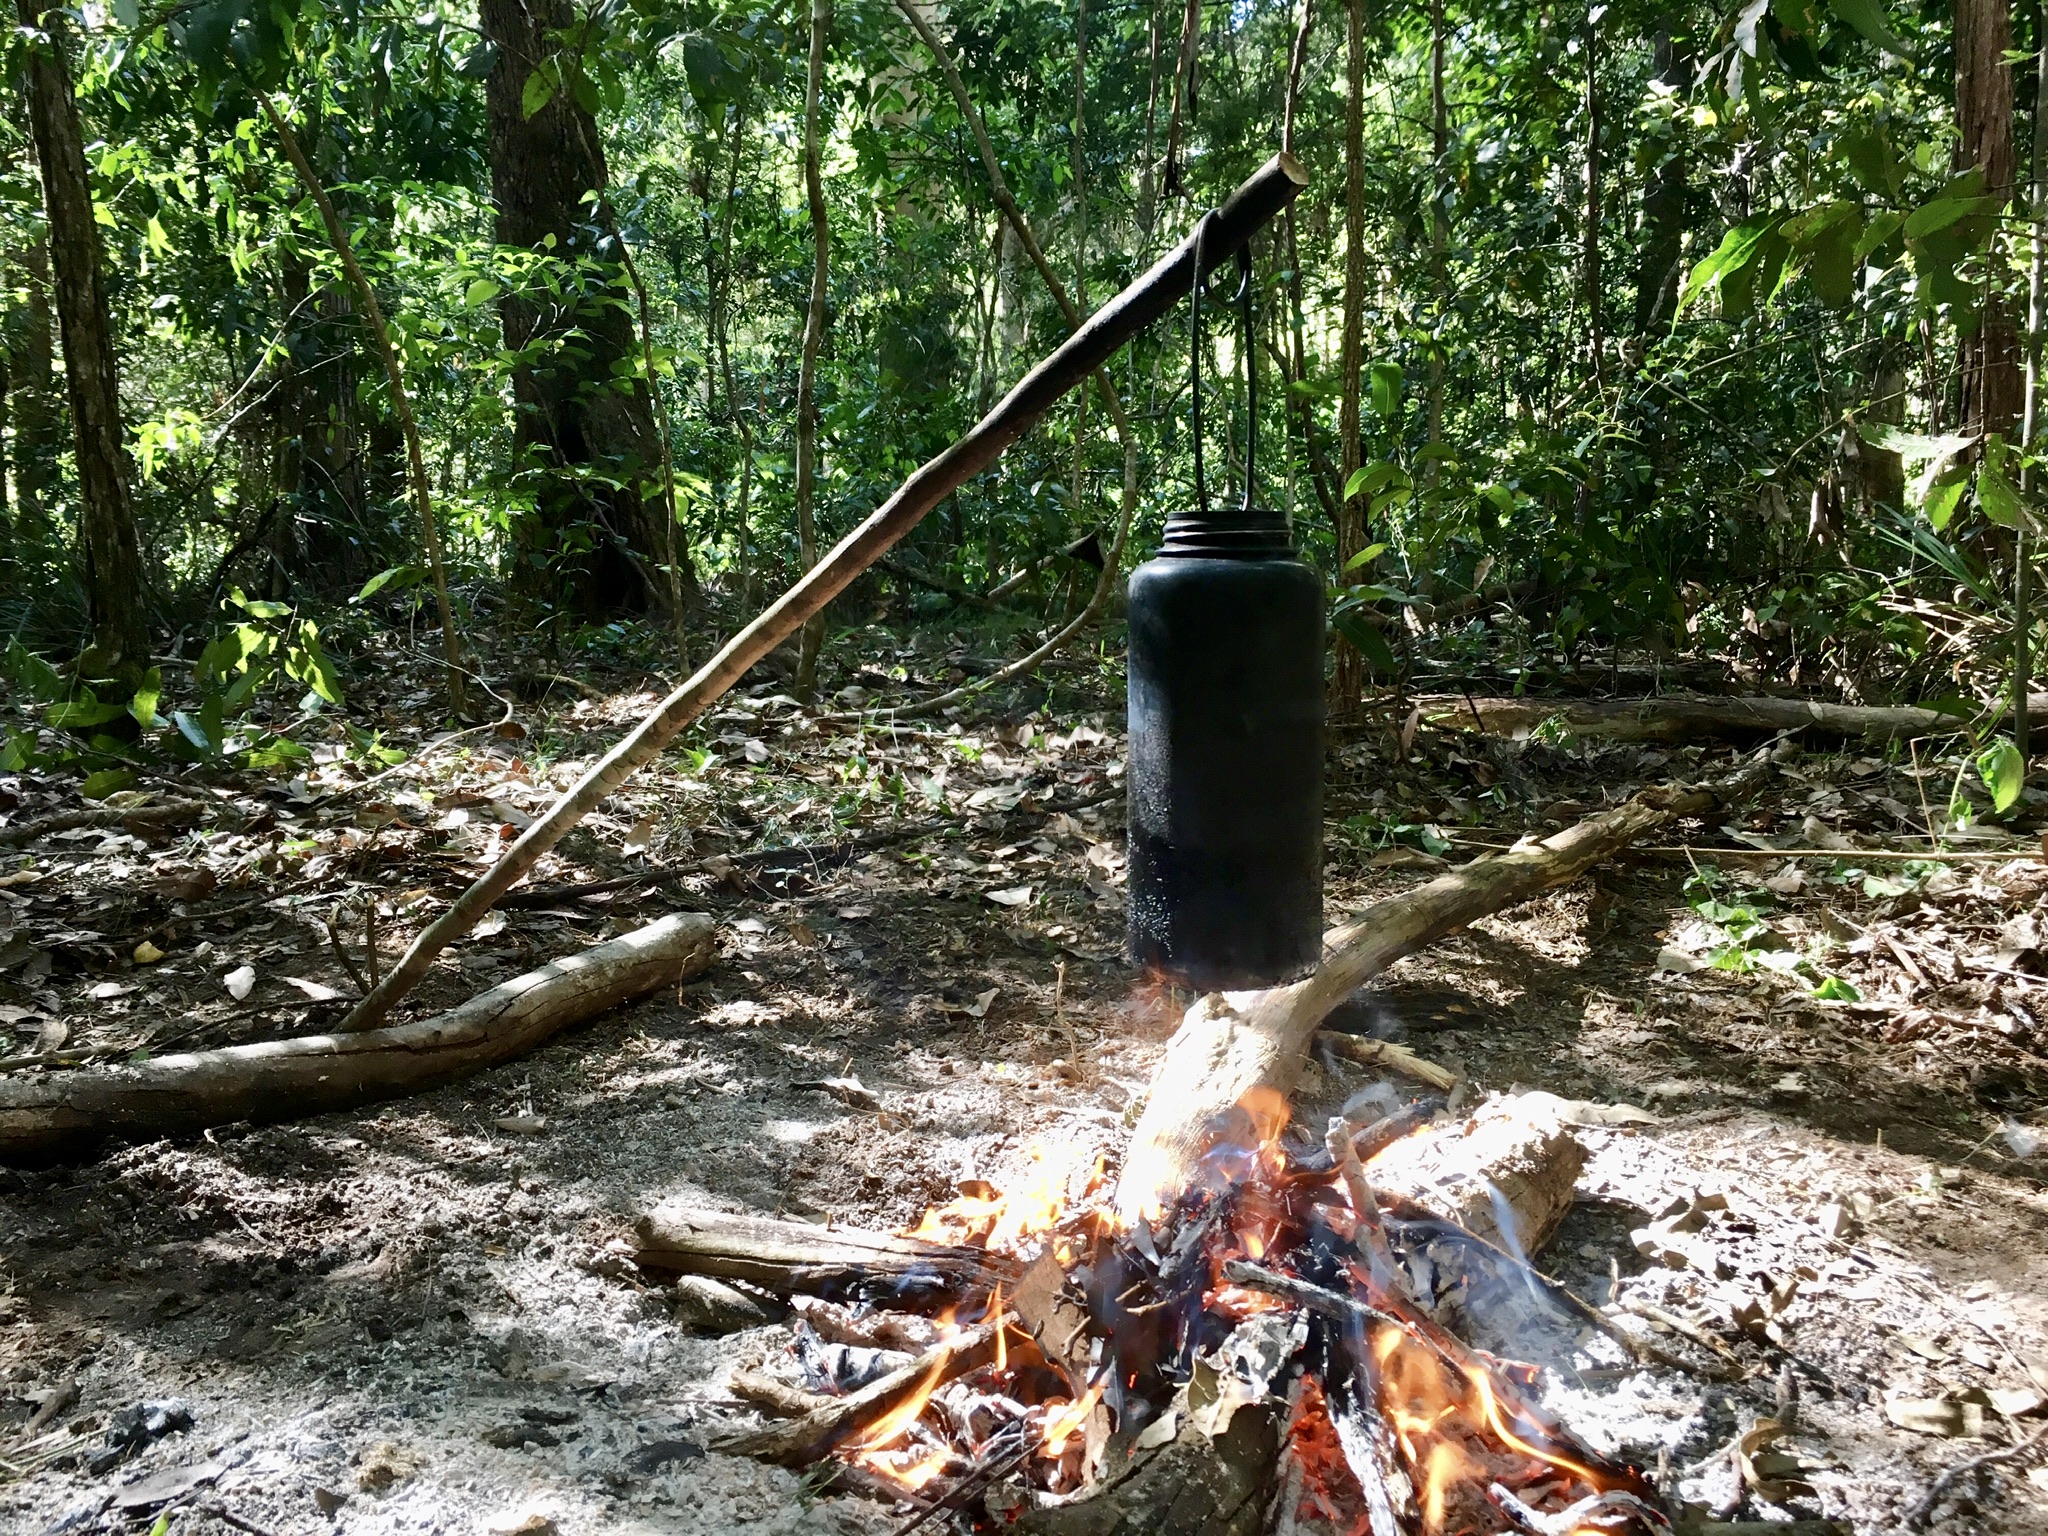
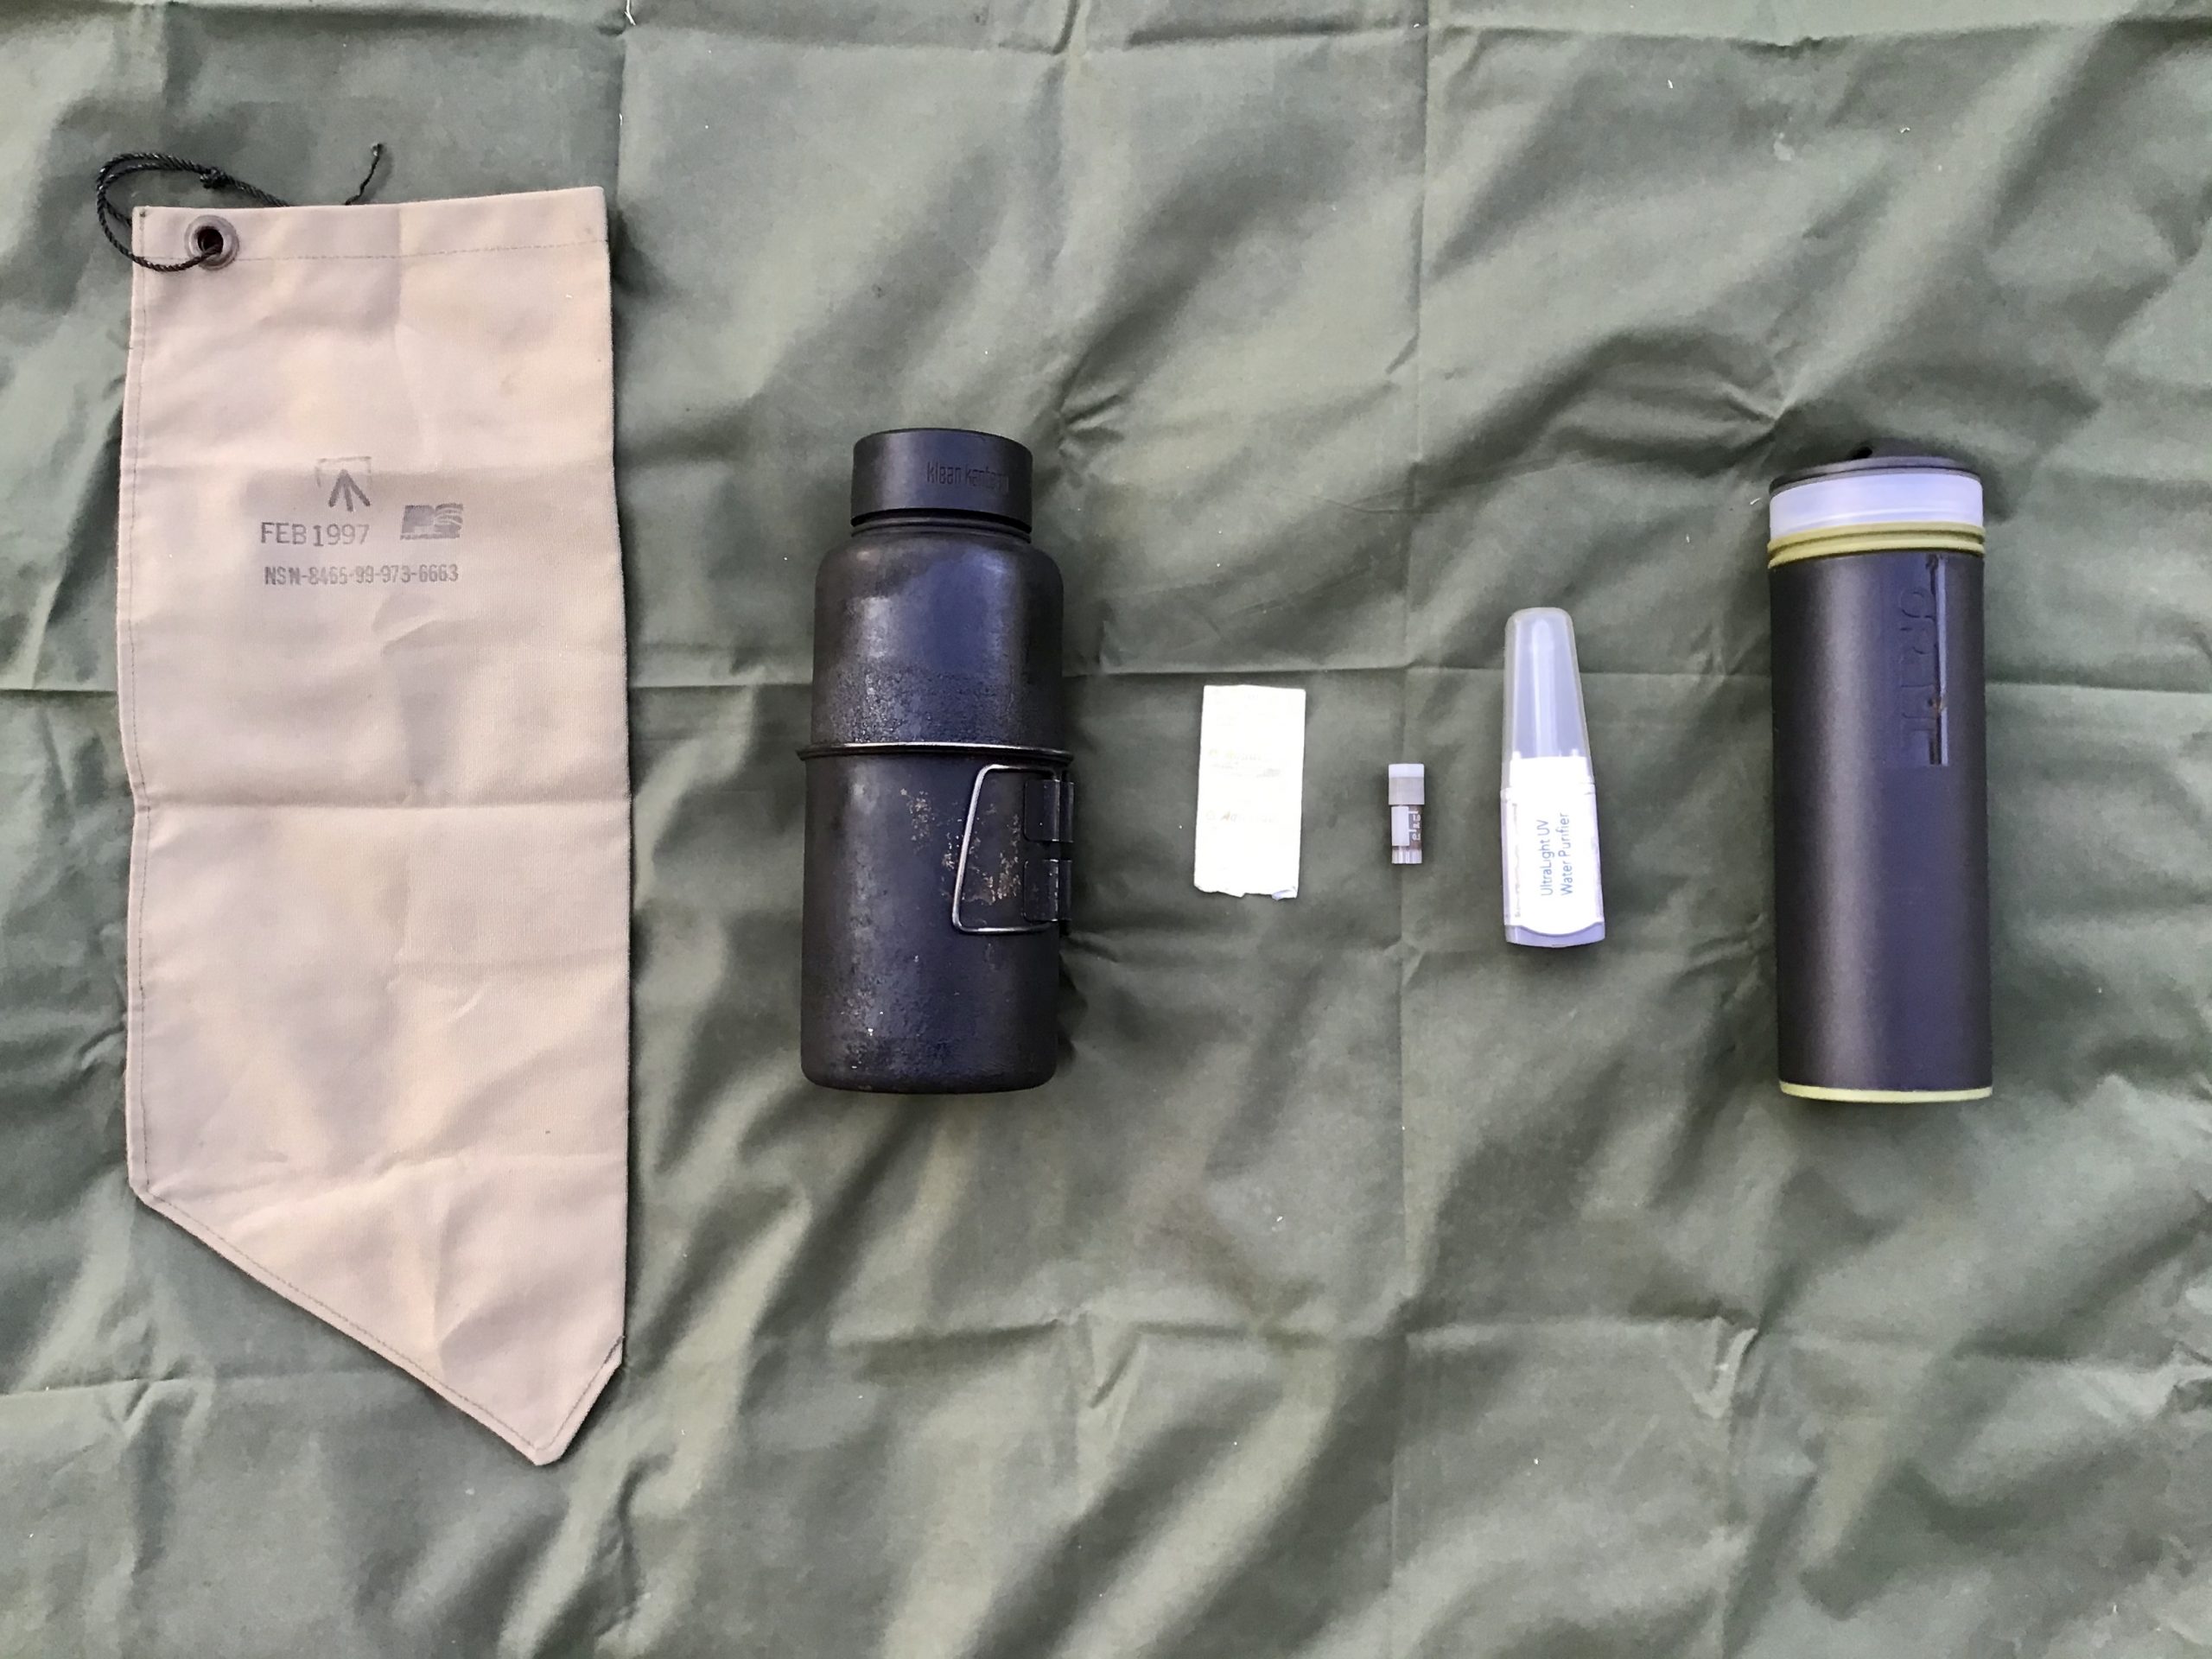
Having a metal container and nesting cup as part of your kit so that you can boil water is essential. Klean Kanteen make a good variety of stainless steel water bottles. Get the single walled variety, not the insulated bottles or you will burn a hole in it.

Another option is an army water bottle and metal cups canteen that fits onto the bottom.


A SS container and cup is an essential piece of kit. A rolling boil for 1 minute will kill 99% of water born pathogens

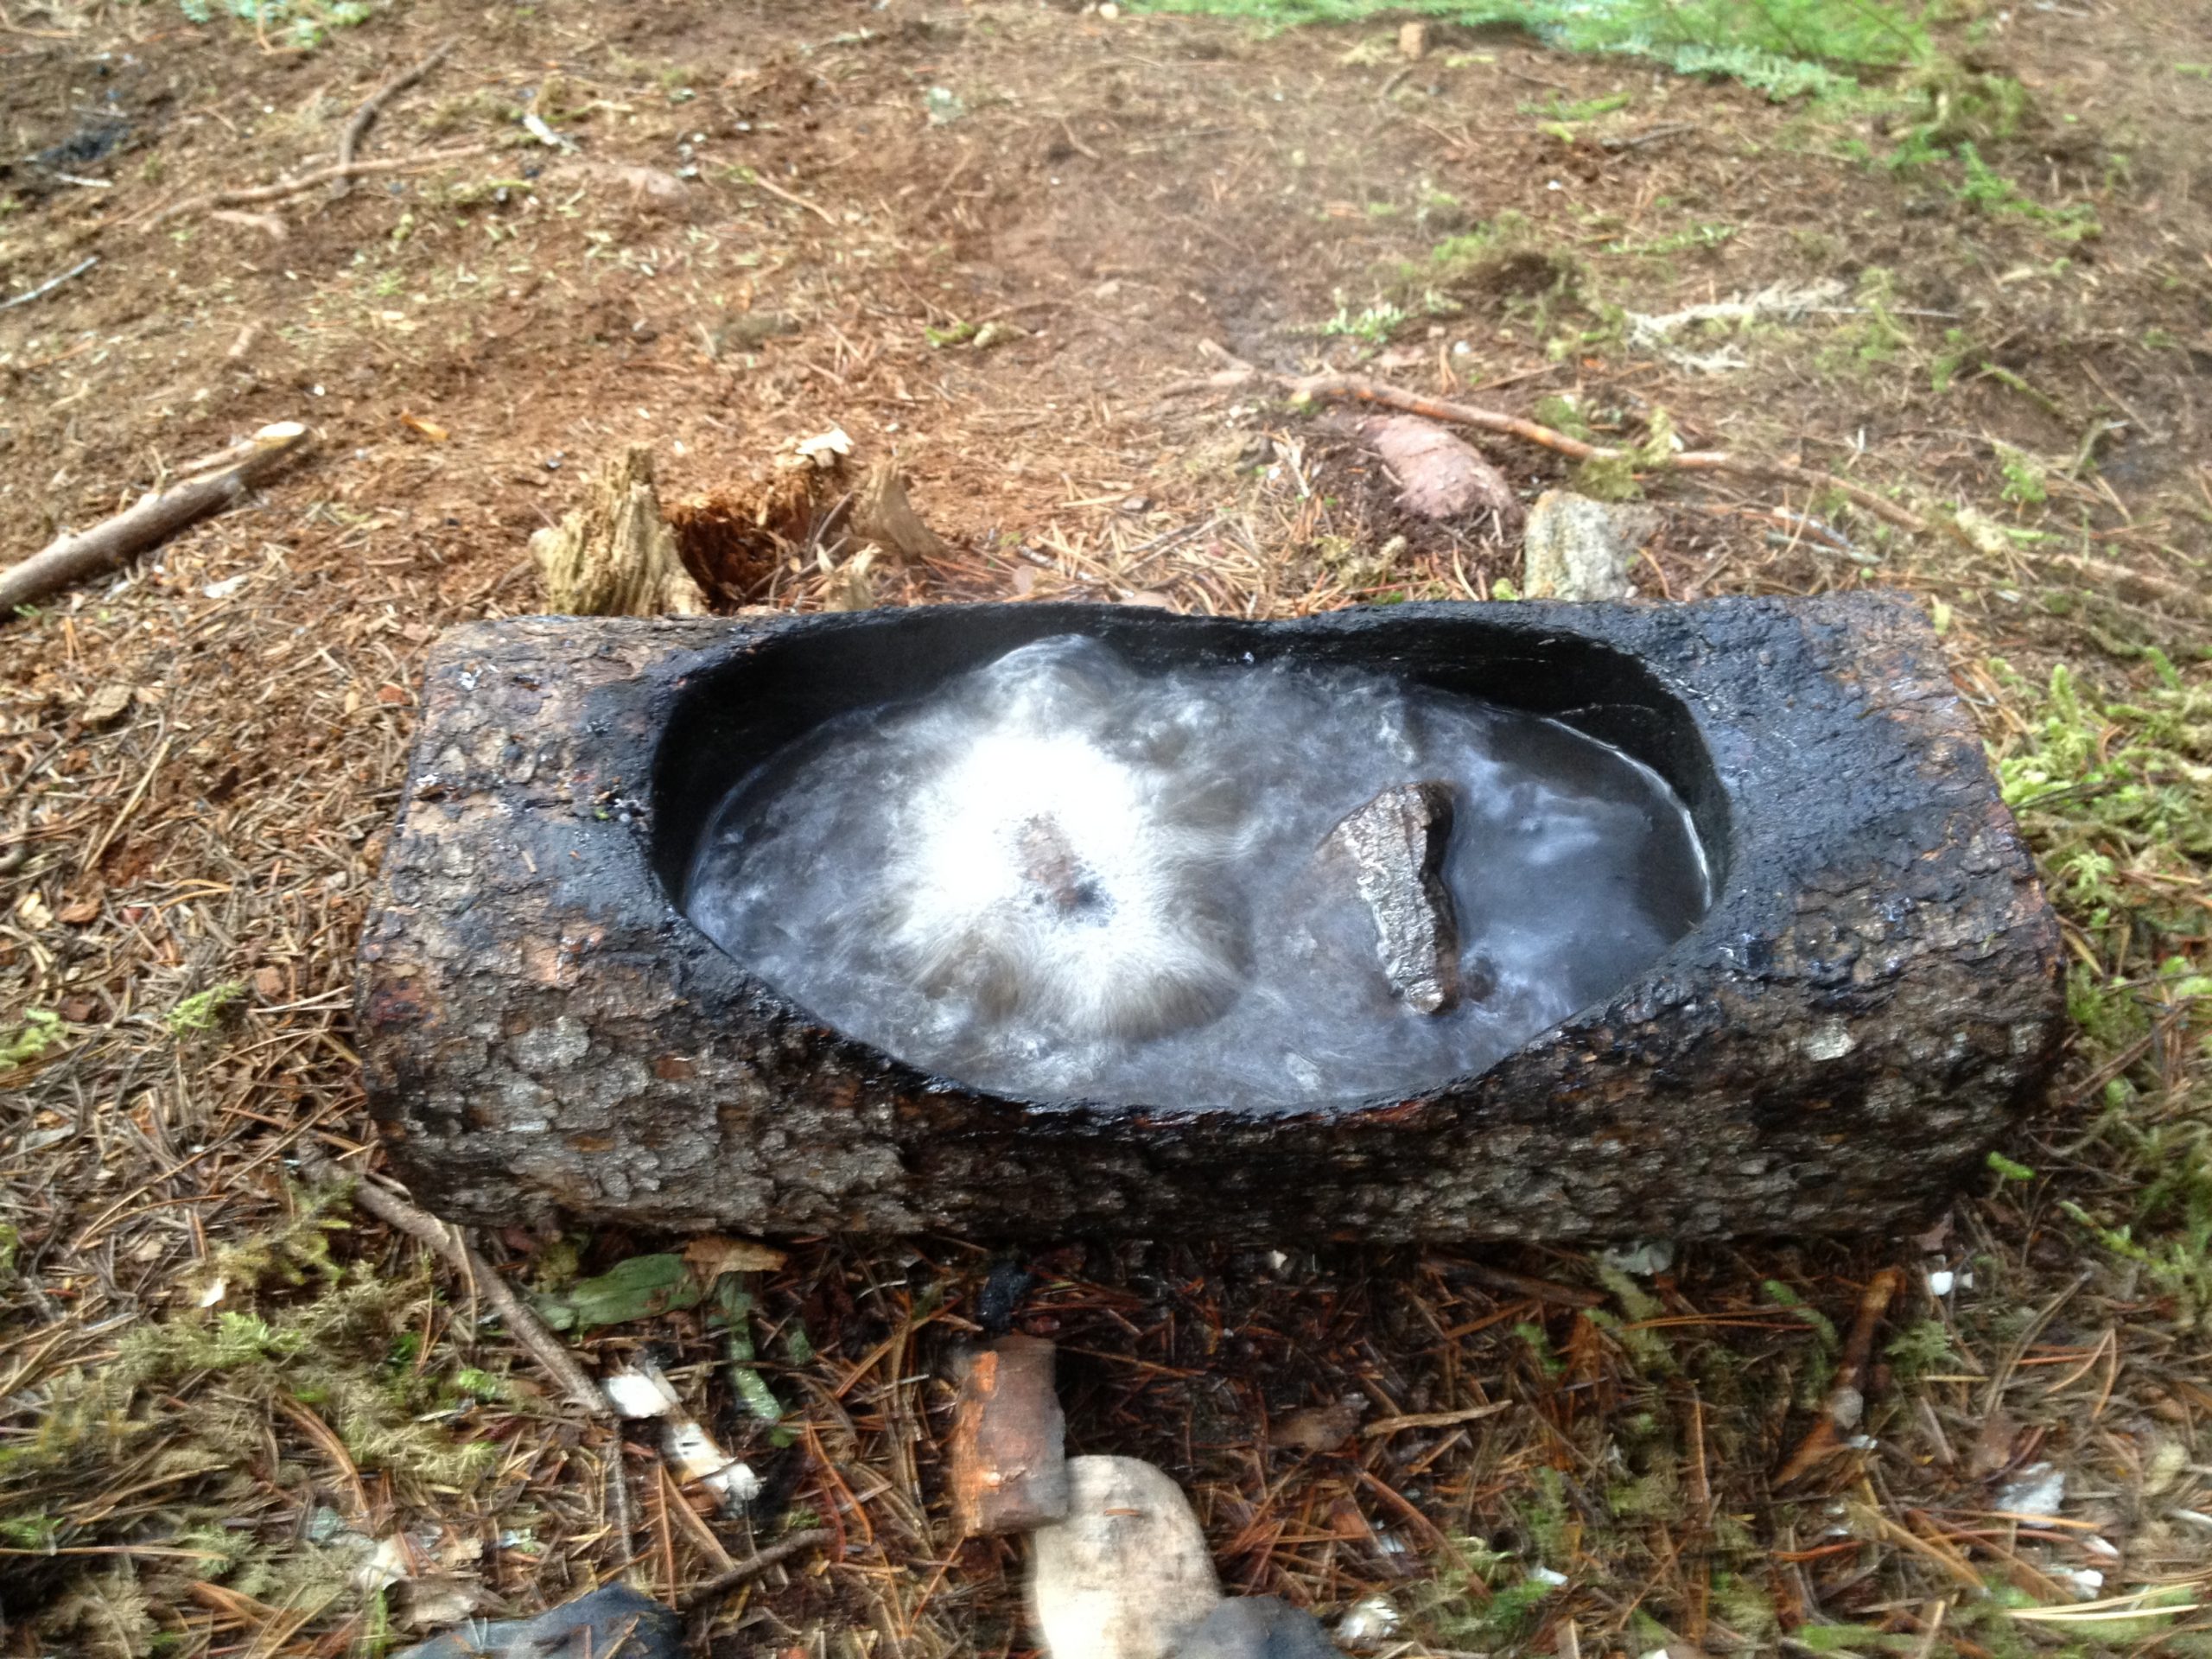
If you don’t have a metal container, you will have to make a vessel in nature that can hold water and allow you to boil water using hot rocks (hot rock boiling).

Boiling water in an improvised container using hot rocks

Water treatment options

  1. Coarse filtration → Boiling
  2. Coarse filtration → Microfiltration –> Chemical sterilization (chlorine, iodine or chlorine dioxide)
  3. Coarse filtration → Chlorine dioxide (1st choice) à Iodine (2nd choice)
  4. Coarse filtration → Ultraviolet device such as a SteriPen
  5. Coarse filtration → Microfiltration + Activated Carbon (chemical pollutants) à Chlorine


Milbank bag, SS container and cup, chlorine tablets, Vial of Potassium Permanganate, SteriPen, Grayl Water Purifier

Shelter & Covering

The purpose of shelter is to create a micro-climate where you can control your core body temperature. The clothing on your back and the material you surround yourself in both offer cover to protect you from the elements, both in a wilderness environment and in an urban one (your home).

In this issue we will be looking at heat loss/gain mechanisms, clothing, man made and natural shelters.

The Rule of 3’s

The military and many other organisations use the rule of 3’s (which could be a rule of 2’s) to highlight the order of what to prioritise in a survival situation (both wilderness and urban), what is important and what is not. The order is not set in stone and depends on the situation, the environment you are in, your condition and your resources.

  • 3 minutes without air (basic life support/first aid) if you are not breathing or bleeding out you’re dead!
  • 3 hours without shelter (clothing, shelter from the elements, core body temperature, fire)
  • 3 days without water (the human body on average can only go without water for 3 days)
  • 3 weeks without food (the human body can go without food for up to 3 weeks depending on the individual and is therefore the last of importance in a short term survival situation)

PLAN

The most common acronym used around the world by both military and civilian agencies to help describe the priorities of survival and the best order in which to do things in is PLAN (Protection, Location, Acquisition, Navigation). It helps to prioritise what is going to harm you first and to address those things first. Like the rule of 3’s, it is adaptable to your condition, environment and your resources.

Protection (first aid, clothing, shelter, fire)

Location (attracting, holding and directing attention, being found)

Acquisition (acquiring water then food)

Navigation (travel, orientating yourself to your surroundings)

Heat Loss/Gain Mechanisms

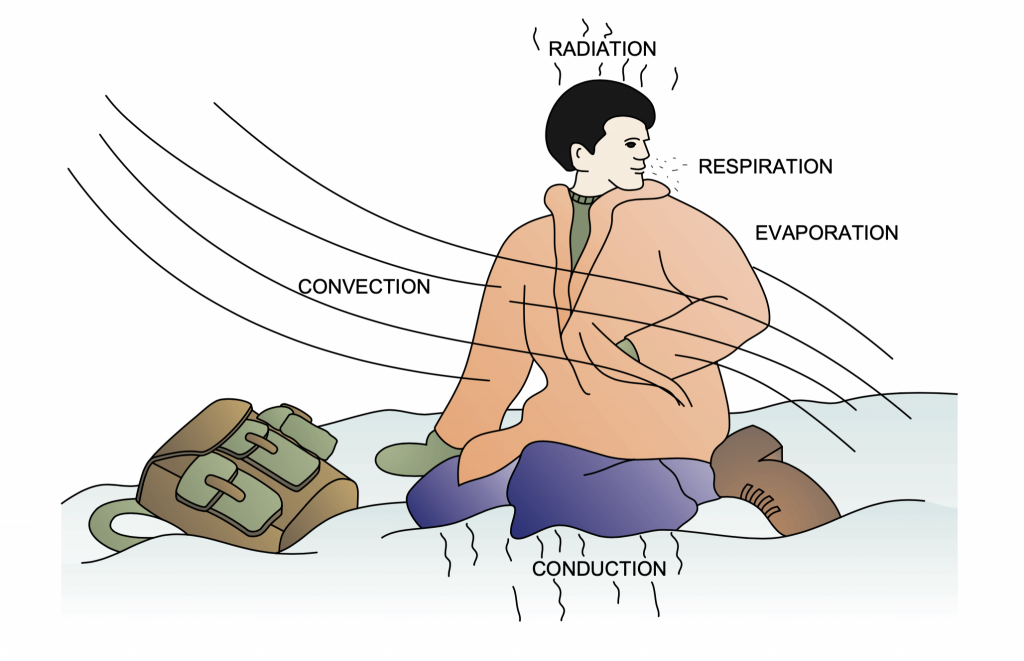
There are five ways that the body loses heat to the environment, they also work in reverse to gain heat.

Conduction

The direct transfer of heat from one object to a colder object. Without an insulating layer such as a foam mat, a person will quickly lose heat to the cold ground or a large rock.

Water conducts heat away from the body 25 times faster than air. Wet clothing will also conduct heat away from the body at a fast rate.

Convection

The continuous movement of air or water over the body stops it from being able to equalise to the same temperature of the body so the body keeps losing heat. Eg. wind chill.

Radiation

Direct heat loss from the body to its surroundings. If the surroundings are colder than the body, the net result is heat loss. We lose 60-70% of our body heat through our head and neck. The naked human body starts losing heat to the environment at 28 degrees celsius. In hot climates we gain heat in the same way from the sun.

Evaporation

Occurs when water (sweat) on the surface of the skin is turned into water vapour. This process requires energy in the form of heat from the body. This is how our body cools itself. One quart of sweat will take approximately 600 calories of heat away from the body. In hot climates, conserve your sweat, not your water.

Respiration

When you breathe in (inhalation), air is warmed by your body and saturated with water vapour. When you breathe out (exhalation), this heat is lost. E.g. in cold air your breath can be seen.


Heat loss/gain mechanisms

Clothing

Clothing is your first line of defence against the elements. Your choice of clothing is dependent upon the activity that you are undertaking, what environment you are going into and being prepared for unexpected changes in the weather.

Cold and wet climates

What your clothing is made from is very important. Wools and synthetics should be your first choice in a cold, wet environment. Wool retains approximately 70% of its insulative value when wet, is moderately fire retardant and smells less making it your first choice, particularly for a base layer. Sheep like it too.

Synthetic/polyester moisture wicking materials are light and dry very quickly so if conditions are wet this is important. Your clothing can also become wet through sweating which is something you need to avoid in cooler environments or if the temperature suddenly drops in a warm one e.g. the desert.

Generally speaking you want to avoid wearing cotton near your skin in cold wet environments as cotton stays wet and is hard to dry, causing you to lose heat through conduction to the damp clothing.

A useful acronym is COLD

Clean – keep your clothing clean. If it becomes dirty it stops breathing and doing its job.

Overheating – avoid overheating. If you sweat in a cold environment you can die if you can’t get your clothing dry. Avoid cottons.

Loose and in Layers – it’s the air trapped between the different layers that keep you warm. If your clothing is too tight those air pockets will be compressed and you will be colder.

Dry – keep your clothing dry.

Layering for colder climates

  • Base layer of wool
  • Warm intermediate layer (wool or synthetic)
  • Optional thicker warm middle layer (wool or synthetic)
  • Waterproof and wind proof outer layer that is breathable.

Remember to include a warm head covering and wool socks.

Hot Climates

In warm to hot climates the focus is keeping yourself cool. Loose fitting cotton material is ideal for this. Take a look at what people in Arab nations wear to keep themselves cool.

During the day in very hot climates you want your clothing to retain moisture (sweat) to keep you cool through evaporation so in this case cotton is good. Synthetic moisture wicking garments are not good in hot climates as they wick the moisture away from you when you need it to keep you cool, making you feel hotter.

However when the temperature drops at night as it does in the desert you don’t want to be wet from sweat so you need to make sure you are dry before that happens and have a warm layer at hand.

Activity

You need to also select your clothing based on the activity you are undertaking. For example, if you are doing strenuous trekking in an alpine environment above the tree line, your choice might be to wear clothing that is synthetic, lightweight, waterproof, wind proof and breathable. However, this same clothing in a woodland or close bushland environment will get ripped and torn so something more durable and tough would be needed.

The Swedish company Fjallraven make a line of clothing that is specifically designed for outdoor use. It is made using Fjallraven’s durable wind and water resistant G-1000 fabric. Their clothing is functional, very durable and comfortable and is designed and manufactured with a number of different outdoor activities in mind.

Some of the garments I use regularly that are great for bushcraft and use in the Australian bush are the Vidda Pro Trousers, Singi Trekking shirt, Vidda Pro jacket, Keb wool shirt and Pine micro fleece top.

Man made shelters

There are many different kinds of man made shelters on the market including various kinds of tents, lightweight tarps, hammock systems, emergency blankets and swags. Some are designed to be used with vehicle camping such as swags (which are too bulky to possibly carry) and some are designed for lightweight hiking. Below are a selection of systems that in my opinion are the best for emergencies, bushcraft and lightweight hiking.

“No matter what kind of man made shelter you choose with the exception of a swag, you will need some form of insulation mat (either blow up up or closed cell foam) to sleep on to prevent heat loss through conduction to the cold ground. 3/4 size is all that is necessary”

Garbage Bag/Drum liner

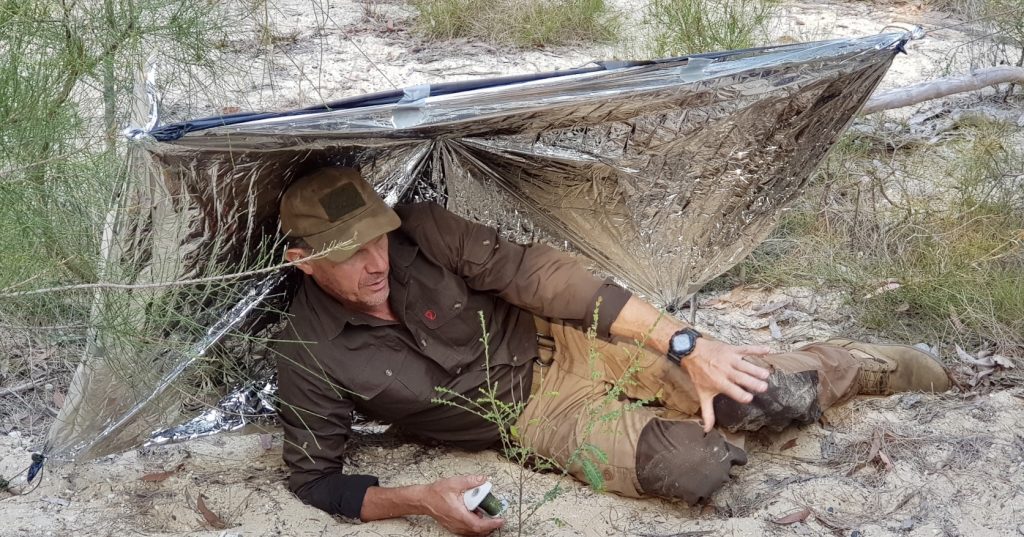
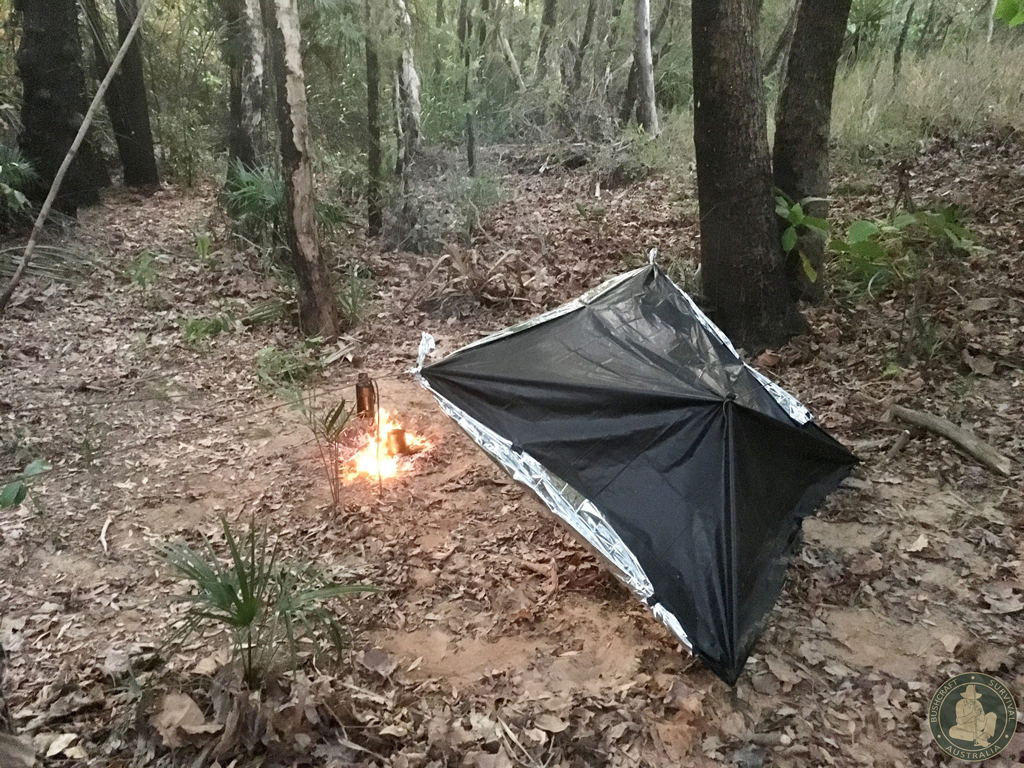
Large, un-pleated heavy duty garbage bags (hard to find in Australia) are one of the most versatile pieces of kit you can have with you. Uses include: a raincoat (a hole cut in it for your head), a moisture barrier or ground sheet, water carrier, filled with leaves for insulation to stop conduction to the ground, water proofing, a flotation device or cut open and made into a lean-to shelter using a few simple knots and hitches. This can also be combined with a disposable space blanket to make a heat reflective lean-to to keep you warm and dry.

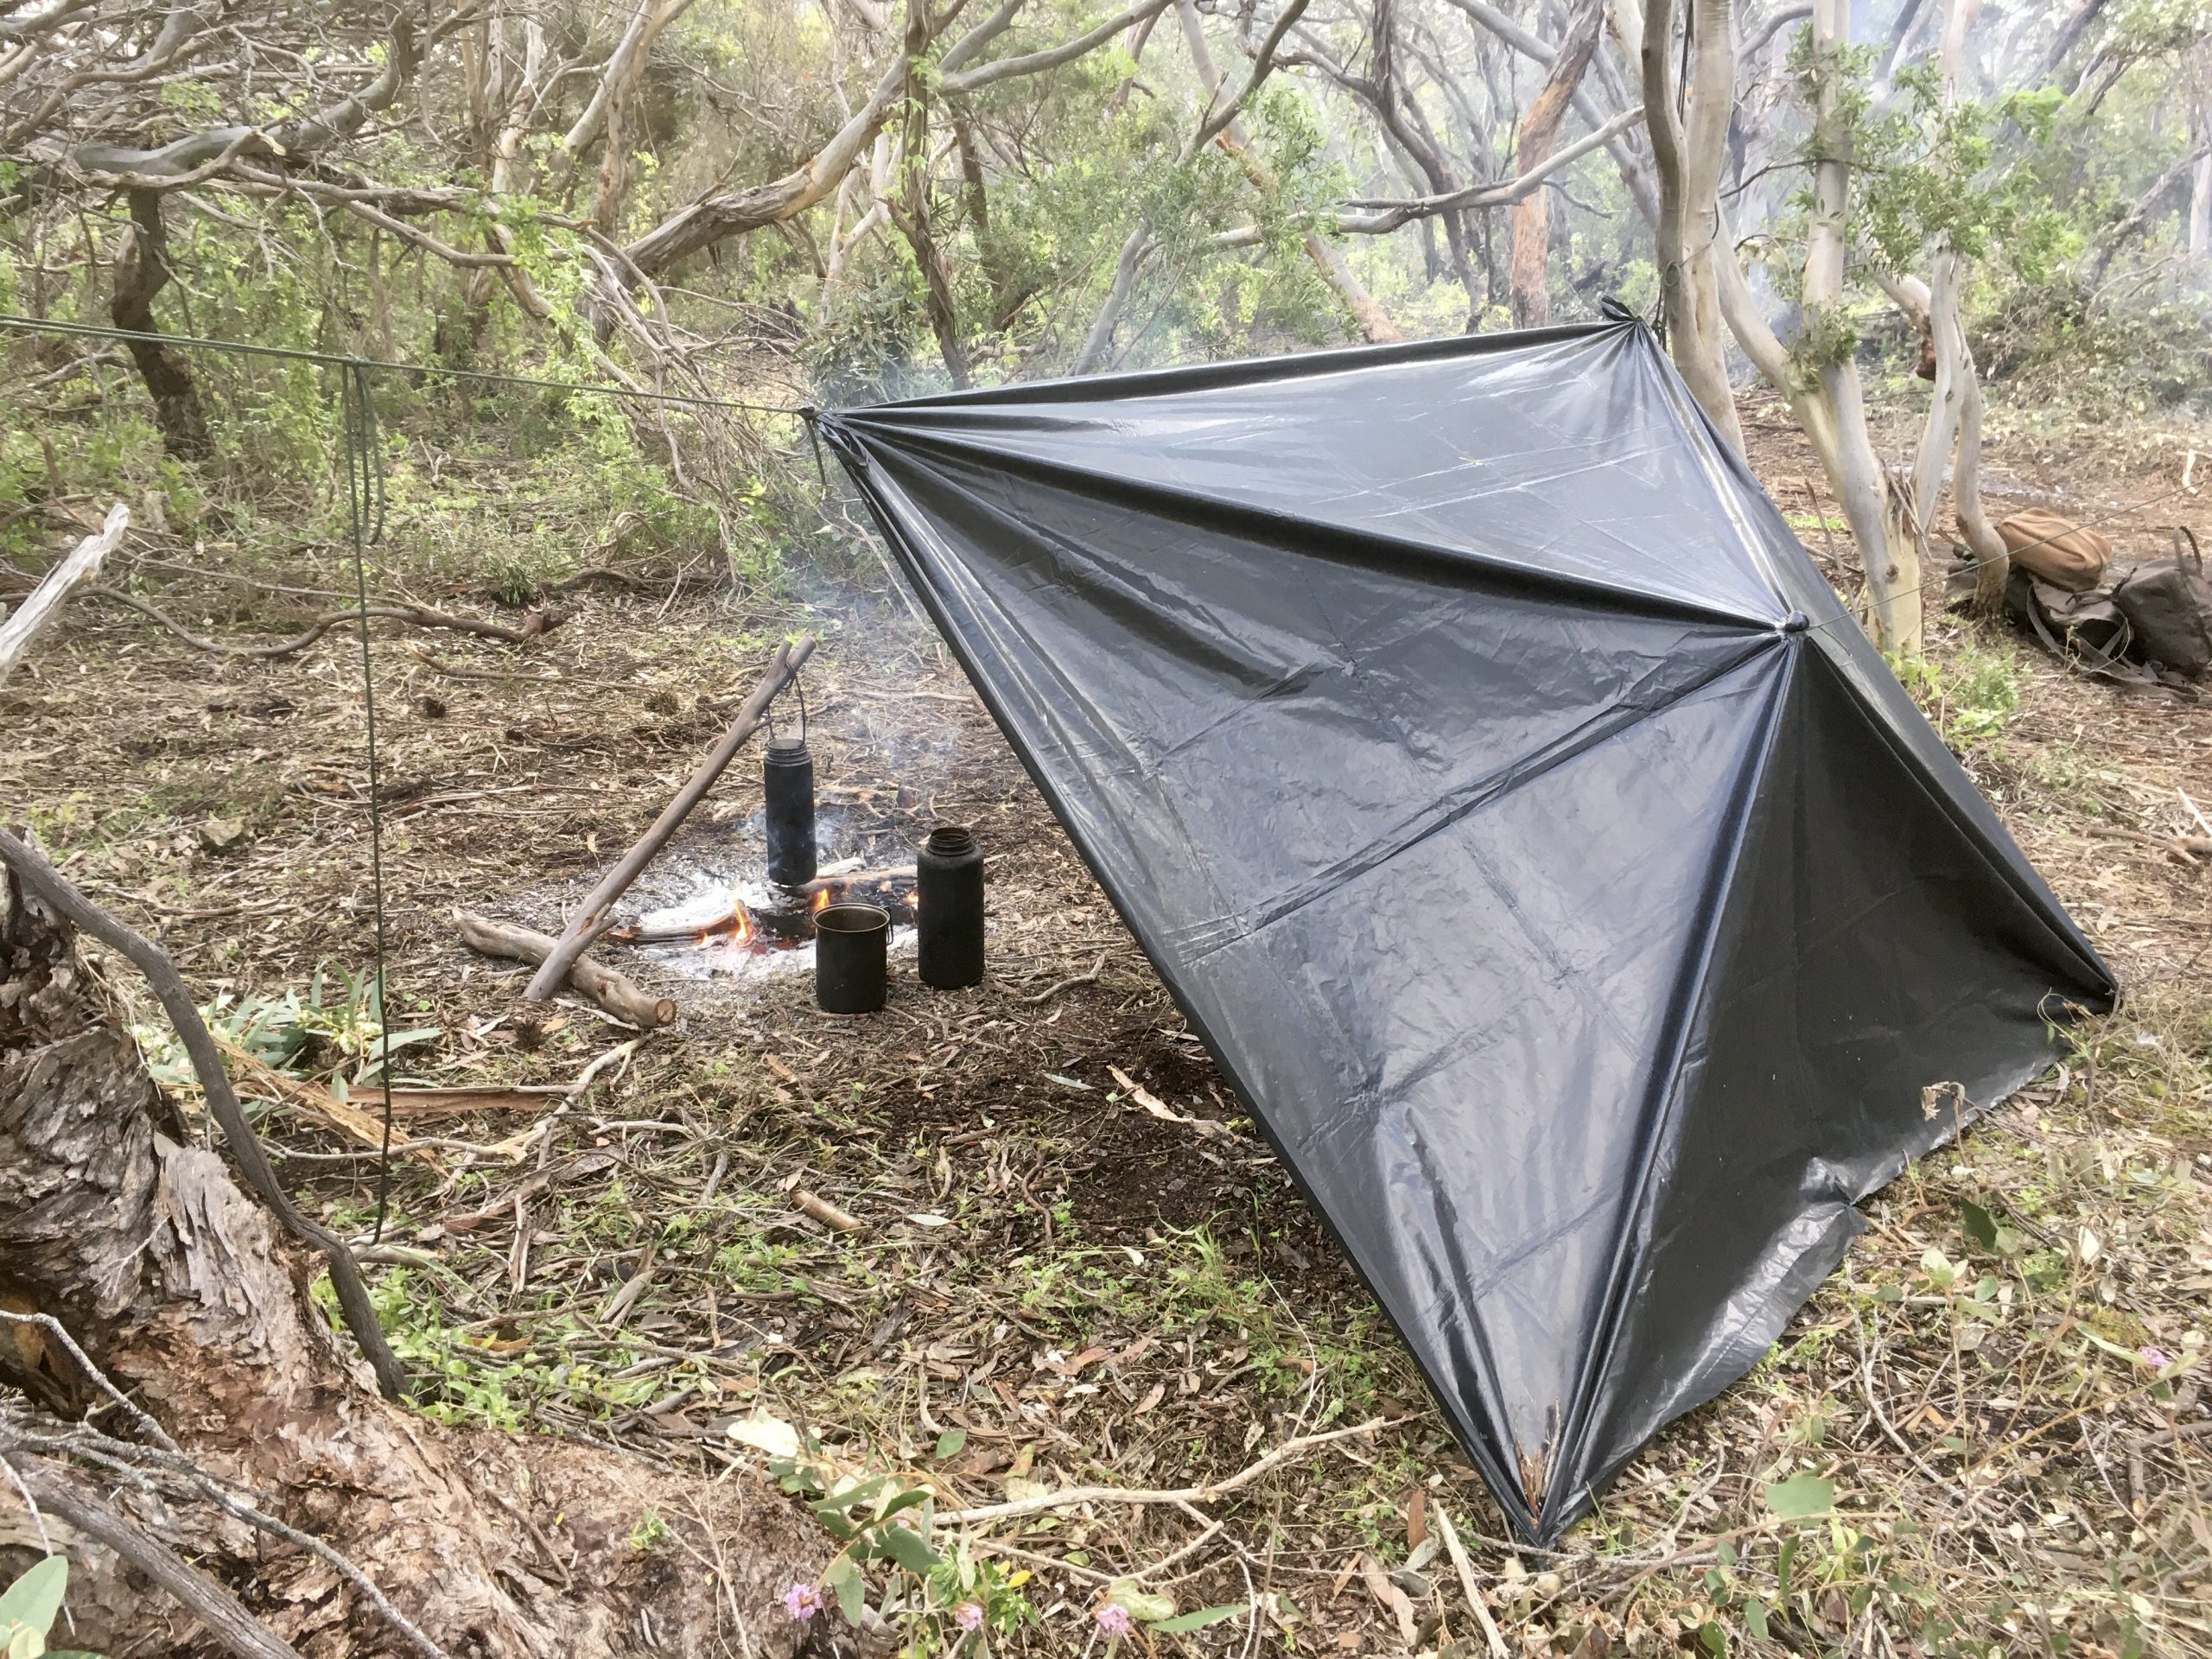
Emergency shelter using a 260L garbage bag and disposable space blanket

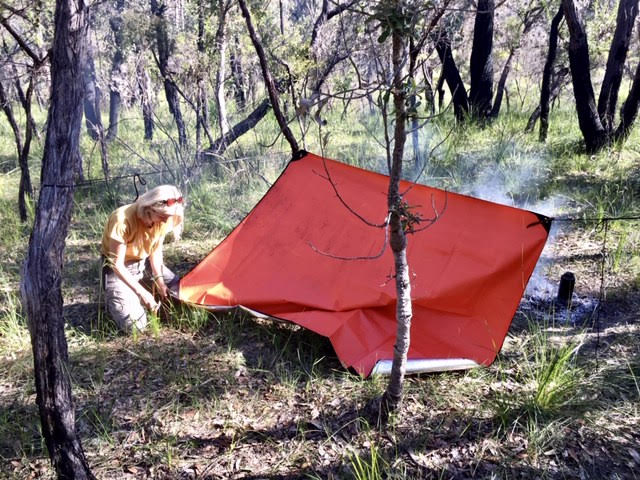
Re- useable Space Blanket/All weather blanket

These are much more durable than the flimsy disposable space blankets and can be used as a heat reflective blanket, a ground sheet or configured into a couple of different types of shelters as they have built in grommets and eyelets in the corners. The shiny aluminised Mylar side can be turned out to reflect the sun in hot weather or turned in to reflect your body heat or the radiated heat from a fire. They also come in a range of colours so you can also use them as a signalling device to attract attention.

A student on a course erects an emergency all weather blanket

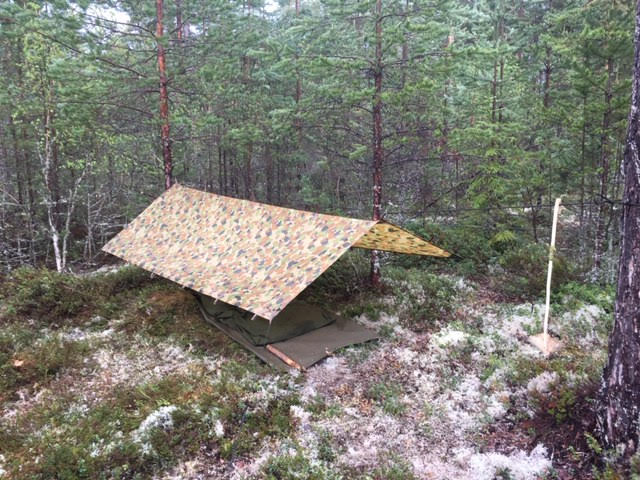
Hootchie/Light Weight Tarp

A lightweight tarp or hootchie as we call them in the Australian Army is arguably the most versatile light weight shelter there is. Suitable for most climates (not windy), they can be configured into a range of shelter types (A frame, lean-to, pup tent etc) or connected with others (of the same type) to make a larger shelter. A few simple knots and hitches are needed to use them effectively. In wet weather you just set them lower and in clear weather you can raise them.

A light weight tarp shelter allows you to connect with nature in a way that an enclosed tent does not and if you have not tried sleeping under a lightweight tarp than you are really missing out.

To sleep under a lightweight tarp you will also need: a ground sheet, 3/4 insulation mat, sleeping bag and a bivvi bag (water proof sleeping bag cover).

Australian Army hootchie/tarp

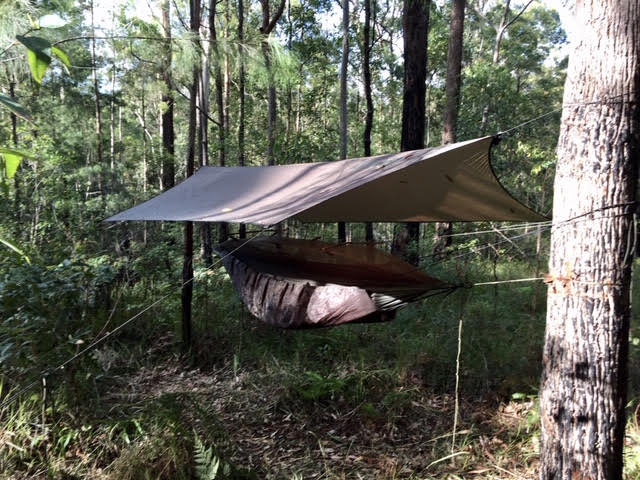
Hammock and tarp

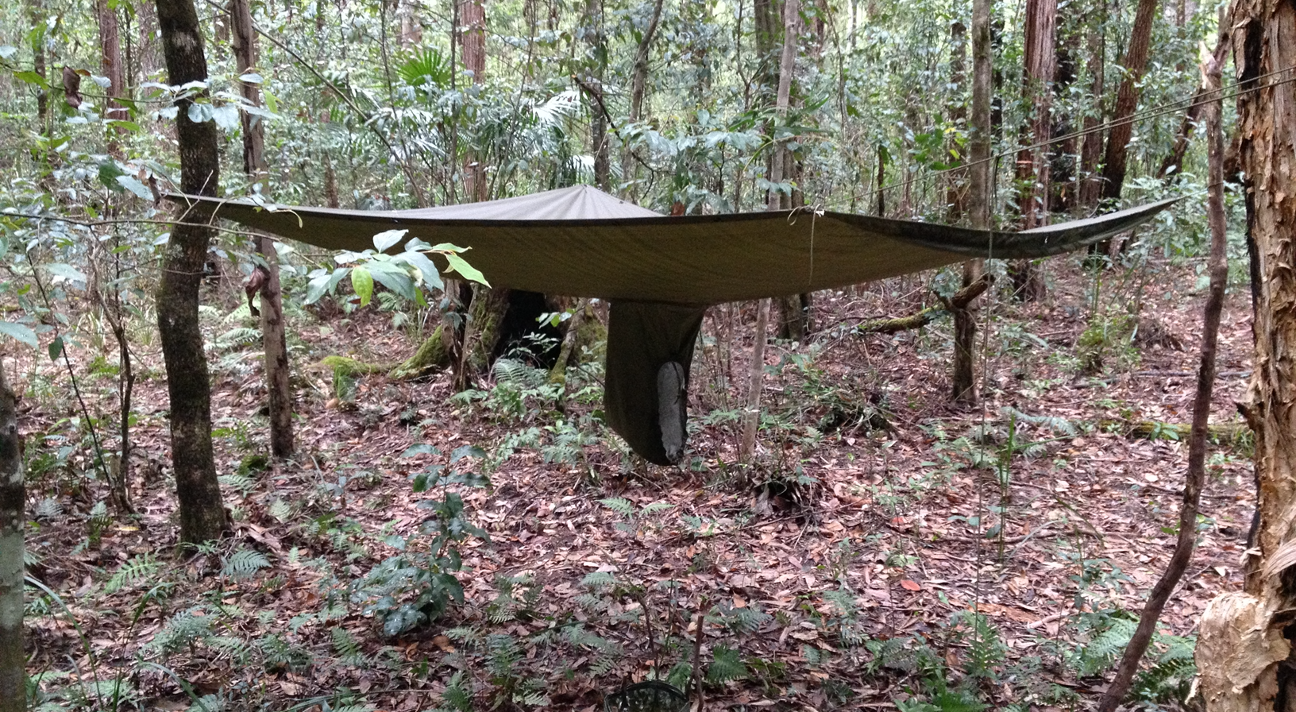
Hammocks are designed to get you off the ground which is preferable in hot wet tropical areas where there are lots of creepie crawlies. A built in bug net is also advisable in these areas. Hammocks are also preferable in areas of uneven ground like the side of a hill. You will still need some form of insulation under you such as a half inflated sleeping mat to prevent cold spots and heat loss through convection. In recent years there has been a surge in interest in cold weather hammock camping with a number of elaborate cold weather cocoons and sleeping systems available. Personally I find many of these over complicated and impractical to carry because they are too bulky.

Hammock and tarp


Natural Shelters

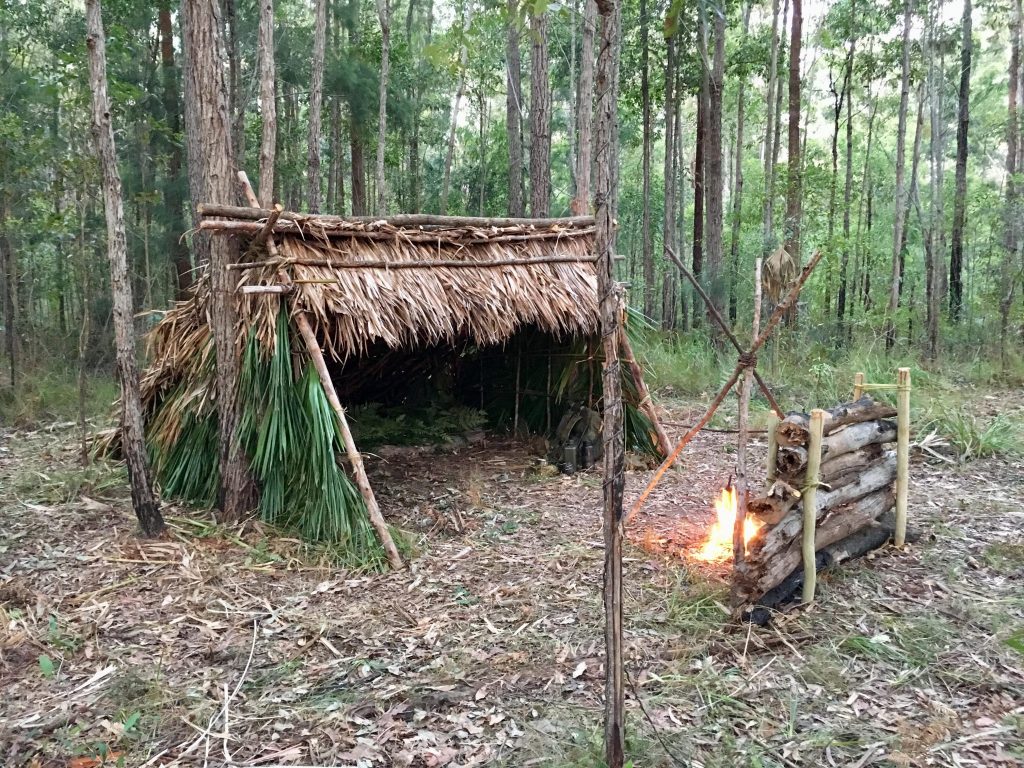
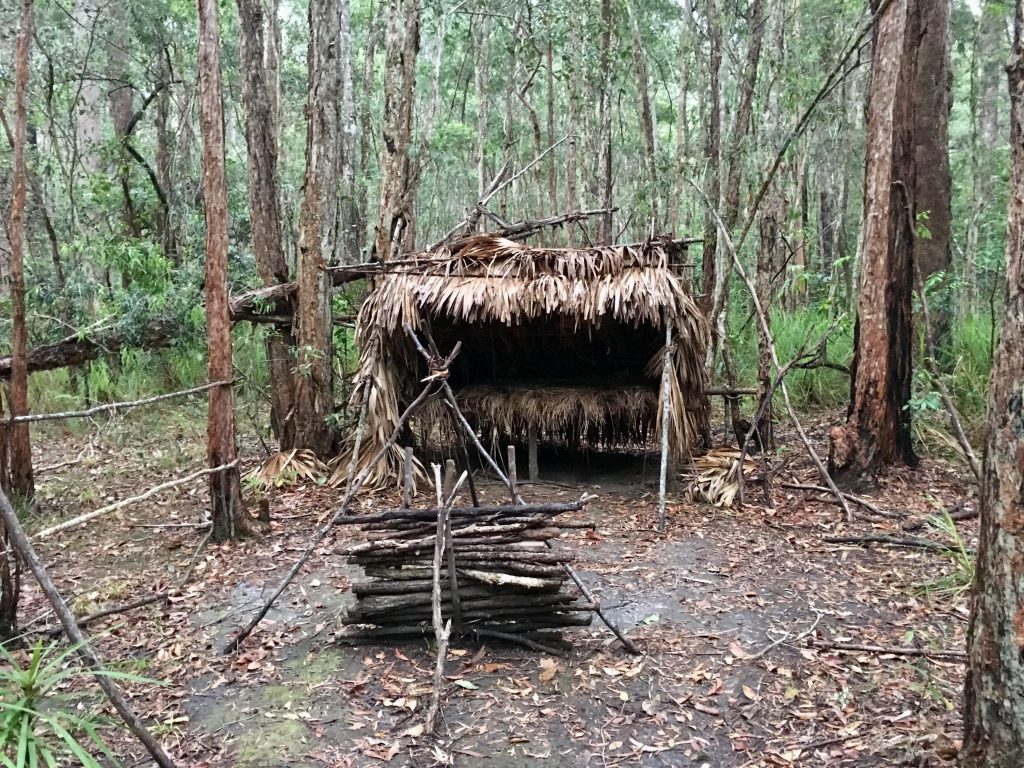
If you don’t have a manufactured man made shelter with you, you will have to build one using the resources you find around you in nature. There are many different natural shelter types which can all be thatched with an array of different natural materials. Some of these include: lean-to, wickiup, dome huts, various group shelters, debri huts, A-frame shelters, raised jungle shelters etc. Unlike what the reality TV shows portray, building a natural shelter is time consuming and can take anywhere from 3 hours to 3 days to build depending on the thatching material and resources you have at your disposal and the type of shelter you are building.

A few general principles include:

  • correctly siting your shelter
  • sturdy framework to support thatching
  • 45 degree roof angle to achieve water run off
  • thatched in rows from bottom to top with 1/3 overlap to achieve proper watershed without leaks…similar to roof tiles.
  • when thatching with palm fronds, use dead ones as they will not shrink and leave holes
  • an improvised bed to get you off the ground to prevent heat loss through conduction


Having the skills and knowledge to make what you need makes you more self-reliant and is incredibly rewarding
Lean-to thatched with cabbage tree palm fronds (NSW)


Group shelter thatched with moss (Scotland)


Raised Jungle Shelter thatched with cabbage tree palm fronds (NSW)

Siting your shelter

No matter what kind of shelter you have or need to make whether it be man made or natural, it must be safely and correctly sited. Here are some guidelines:

  • Look up, look down, look all around
  • DO NOT site your shelter under dead fall, a branch that could come crashing down or a sick looking tree. These are known as widow makers for obvious reasons!
  • Do not site your shelter at the very bottom of a hill a valley or a localised low spot if possible. Cold air sinks and those areas will be significantly colder.
  • Do not site your shelter on a game trail or ants nest. You may get a surprise in the middle of the night.
  • Site your shelter on flat even ground so that you get a comfortable nights sleep.
  • Allow for water run off if heavy rain. Where will the water go or pool?
  • Do not site your shelter in dried up creek or river beds. Rain a long way away can cause flash flooding and is very dangerous.
  • In hot climates, try to site your shelter in the shade to allow for extra cooling.
  • Do not site your shelter too close to water as many insects breed in water. Running water will also prevent you from hearing predators or someone looking for you.
  • Site your shelter with any breeze blowing across the front (90 degrees) to blow any smoke away.

12 Essential items people should have with them when they venture outdoors

Australia is a vast country and many Australians like to travel off the the beaten track to see wild “untouched” places in order to experienced that feeling of being at one with nature.

However, many people go into these places ill equiped and with insufficient planning in case something goes wrong, often resulting in people getting lost, injured or worse, death! Many people in urban environments are also ill equipped and lack basic knowledge of what to do should an urban crisis or emergency occur.

The most common group of people who seem to get themselves into trouble are the “day hiker or visitor”. This group of people generally think… “She’ll be right, I’ll only be gone for a short time…” These people don’t tell anyone where they are going or when they will return. They don’t take a hat or enough water, don’t take a warm layer, a shelter or have the ability to make a fire.

If you are going into a wilderness area on a planned trip or even a local bushwalk for only a couple of hours, there are two key things you should do first.

1. Tell someone where you are going and when you expect to be back. Even if you are only going on a short day hike for a couple of hours! Have a game plan if you are not back!
2. Dress appropriately. Dress for the environment you are going into. Wear long sleeves and a hat to protect against the sun and have warm layers and a head covering for the evenings.

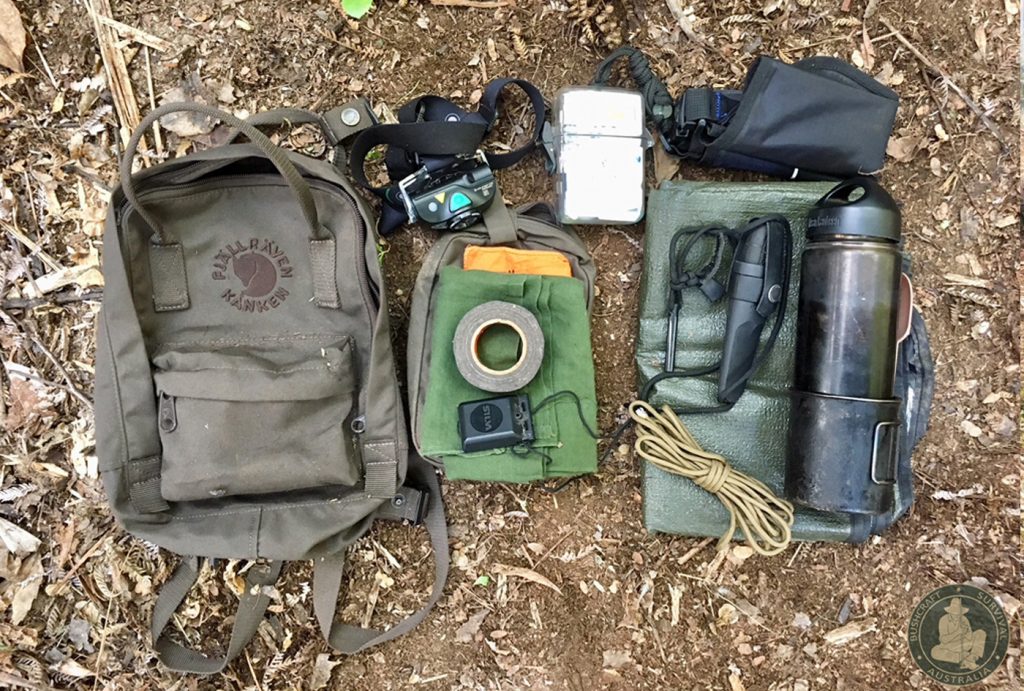
Below are 12 important items that everyone should have in their daypack when venturing into a wilderness area. Every item should be durable, portable and have multiple uses. The first five items are the most crucial as they are the items that are the most difficult and time consuming to produce in nature if you don’t have them.
Knowing what these items are will help you prioritise what is important and also what to manufacture from nature should you find yourself without them.
These same items and priorities are what you also need in an urban crisis or emergency, only the resources change.

12 IMPORTANT ITEMS

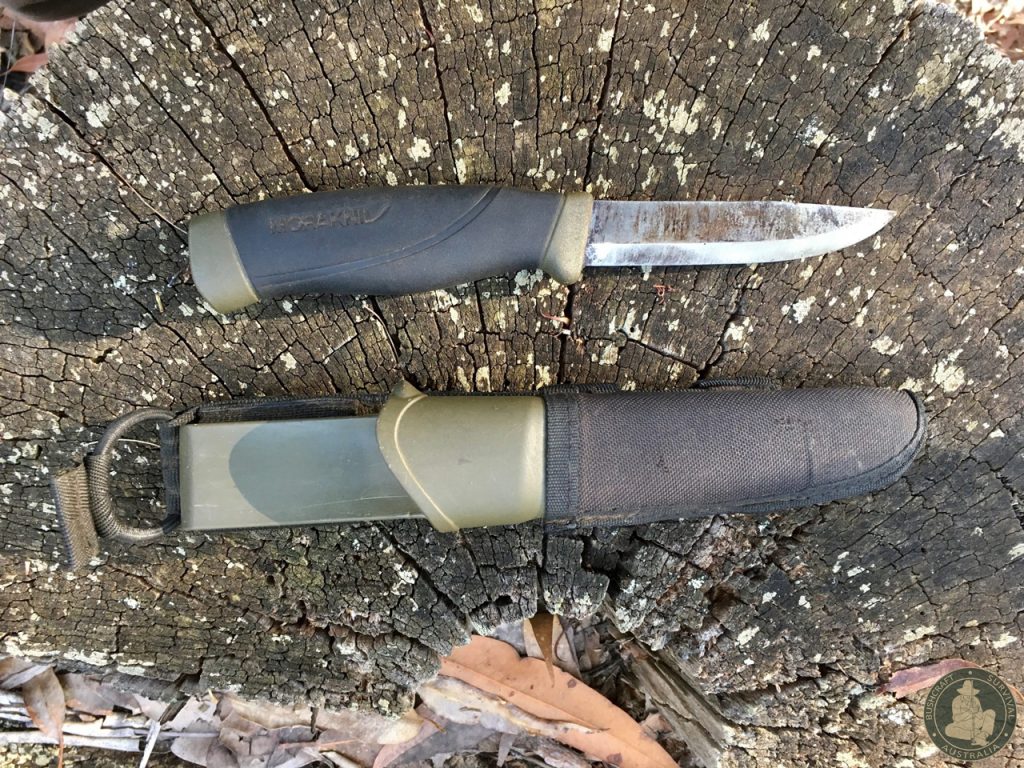
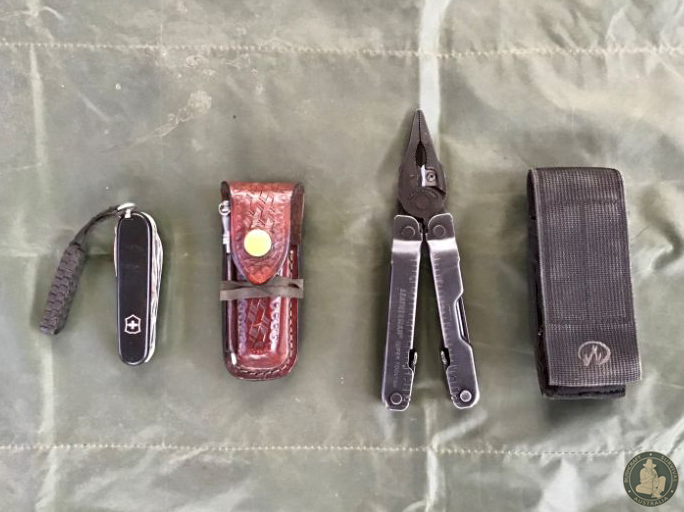
1. Cutting tool ( knife) This is probably the most important tool. Ideally it should be a full tang 5” (11cm) carbon or stainless steel knife without serrations or saws built in to it as these inhibit its practical us. Morakniv make good affordable general purpose knives for the outdoors including the HD Companion, Bushcraft Black, Edris and Garberg. A Leatherman multitool or Victorinox pocket knife is also a good smaller option. To make a cutting tool in nature requires flint and a knowledge of flint knapping.

Morakniv HD MG Companion
Victorinox “Huntsman” and Leatherman “Supertool”

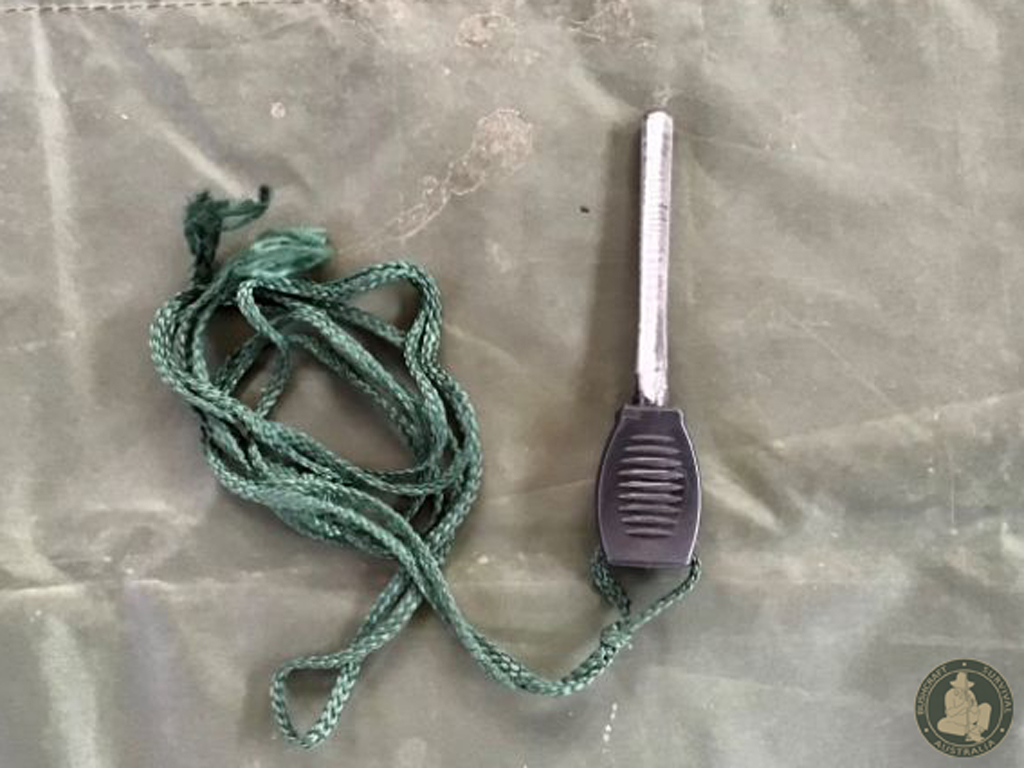
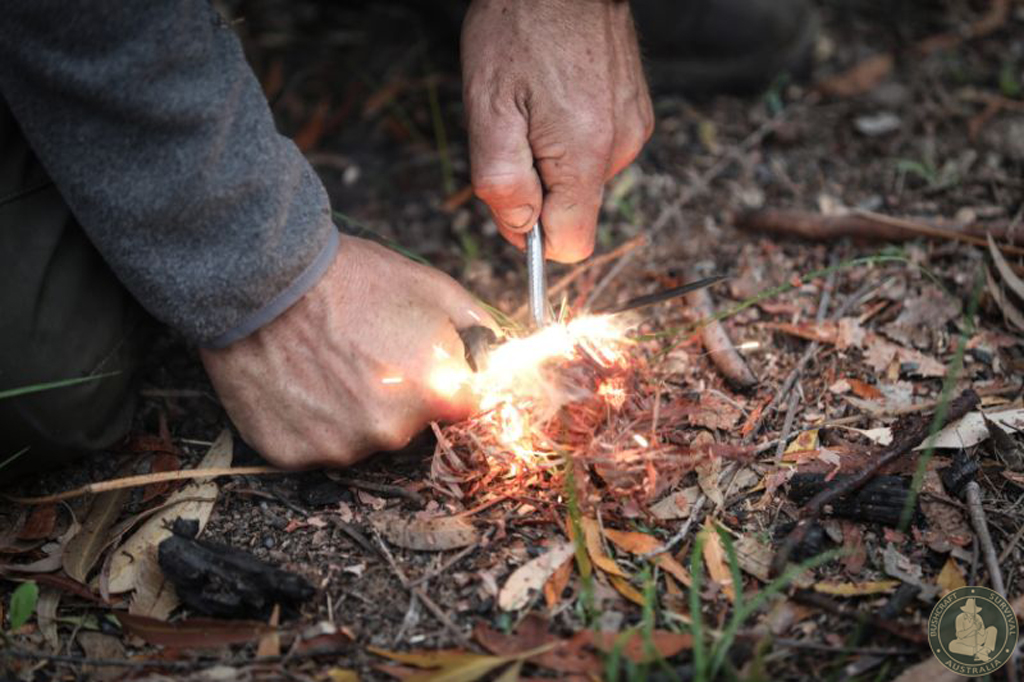
2. Combustion device (Ferrocerium Rod) If you don’t have a cigarette lighter or matches, the best thing you can have with you is a sparking tool such as a Ferro Rod, also known as a metal match or fire flash. This is a mixture of magnesium and different alloys that produces a hot shower of sparks when struck with an object that has a sharp 90 degree angle (eg. the back of a knife). It doesn’t give you guaranteed flame so you will have to learn how to find and prepare tinder in nature. To make fire from nature you will have to learn fire by friction.

Ferrocerium Rod
Produces a hot shower of sparks. Your tinder needs to be prepared appropriately

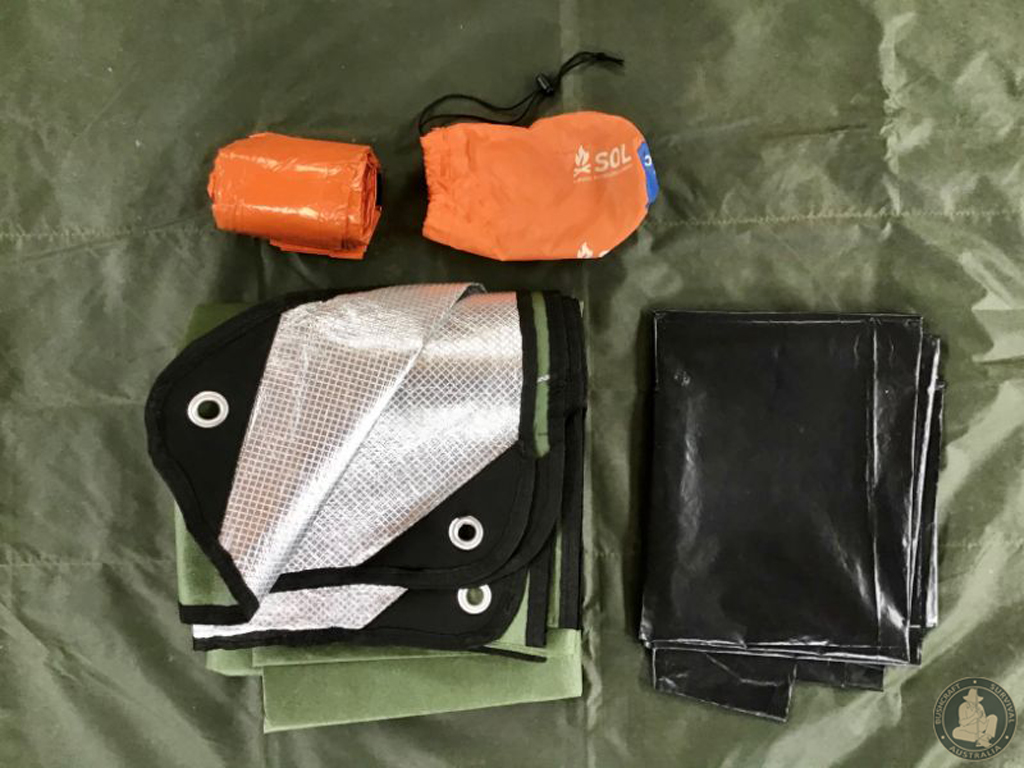
3. Covering or shelter. This could be a re-usable space blanket/tarp which reflects up to 70-80% of your body heat back to you or a large heavy duty garbage bag which can be used as a raincoat, moisture barrier, ground sheet, water carrier, filled with leaves for insulation, cut open and tied into a shelter. To make a shelter from natural materials (lean-to, wickiup, A-frame etc) is very time consuming and requires a lot of resources.

Reuseable space blanket, SOL Emergency Bivvi Bag, 52 Gallon Garbage bag
Emergency shelter using a 260L garbage bag and disposable space blanket

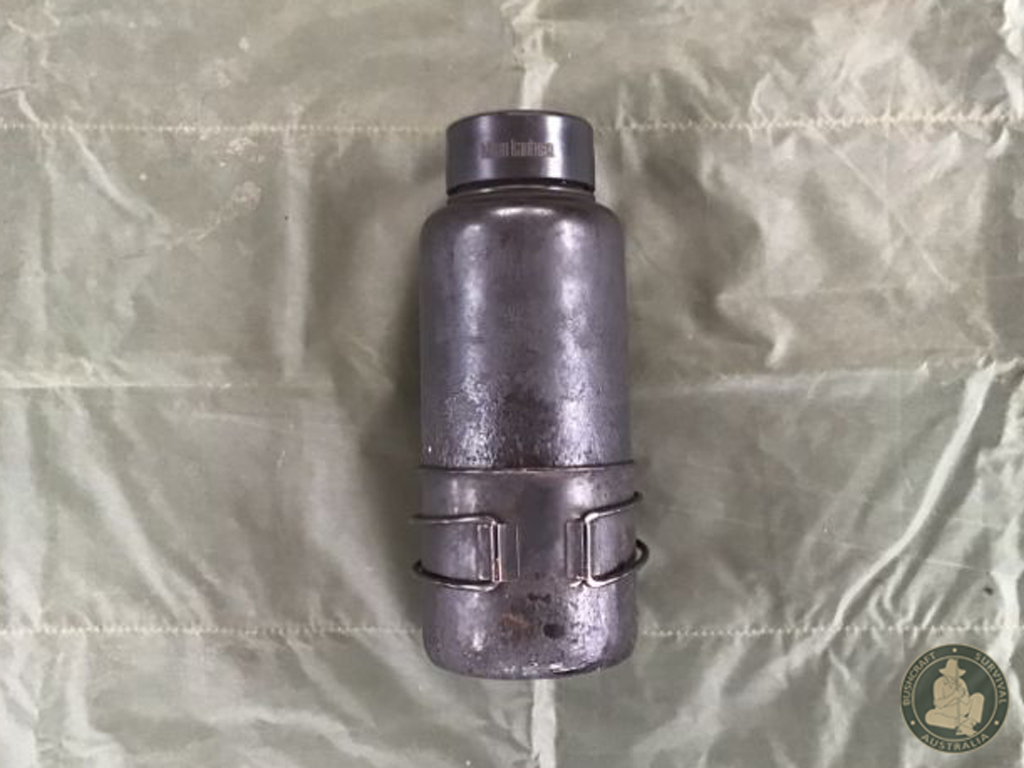
4. Metal container. Ideally pack a metal container and a nesting cup, as you need a way of carrying water as well as heating water. Boiling is the best way to ensure water is safe to drink. If you don’t have both, you should at least have a metal nesting cup to boil water in.
Kleen Kanteen make an assortment of good metal containers. To make a container from natural materials requires a knowledge of how to make a coal burned bowl, a folded paperback coolamon or bark containers, all which you can boil water in using hot rocks.

Klean Kanteen 40oz SS Container with nesting cup
Boiling water is the best way to get rid of water born pathogens.

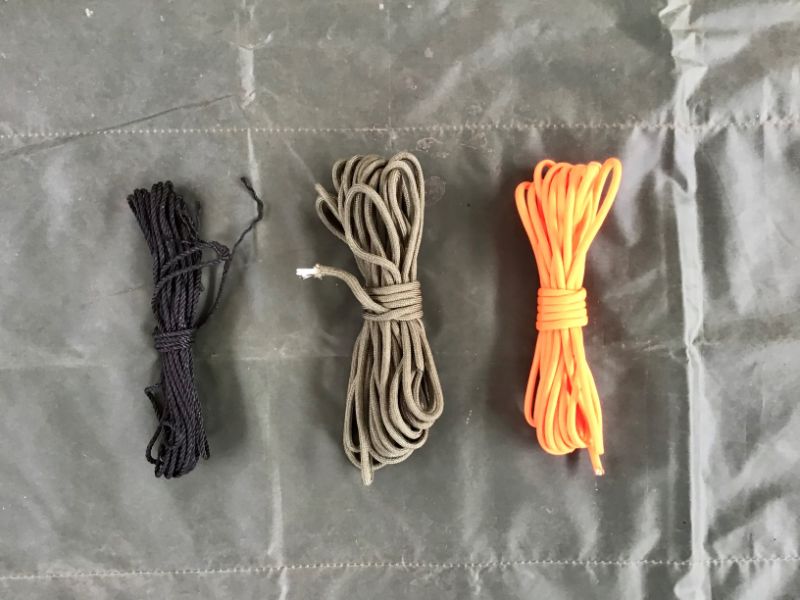
5. Cordage Parachute cord is the best as it has 7 inner strands and each one of these 7 strands can be broken down into 2 smaller fibres. If you break the cord down to these fibres, you can use them for fishing line, trap making and repair cord etc. To make cordage or string in nature is very time consuming and requires a knowledge of plant resources and string making.

Mariners 3 ply bank line and Parachute cord in 10m hanks

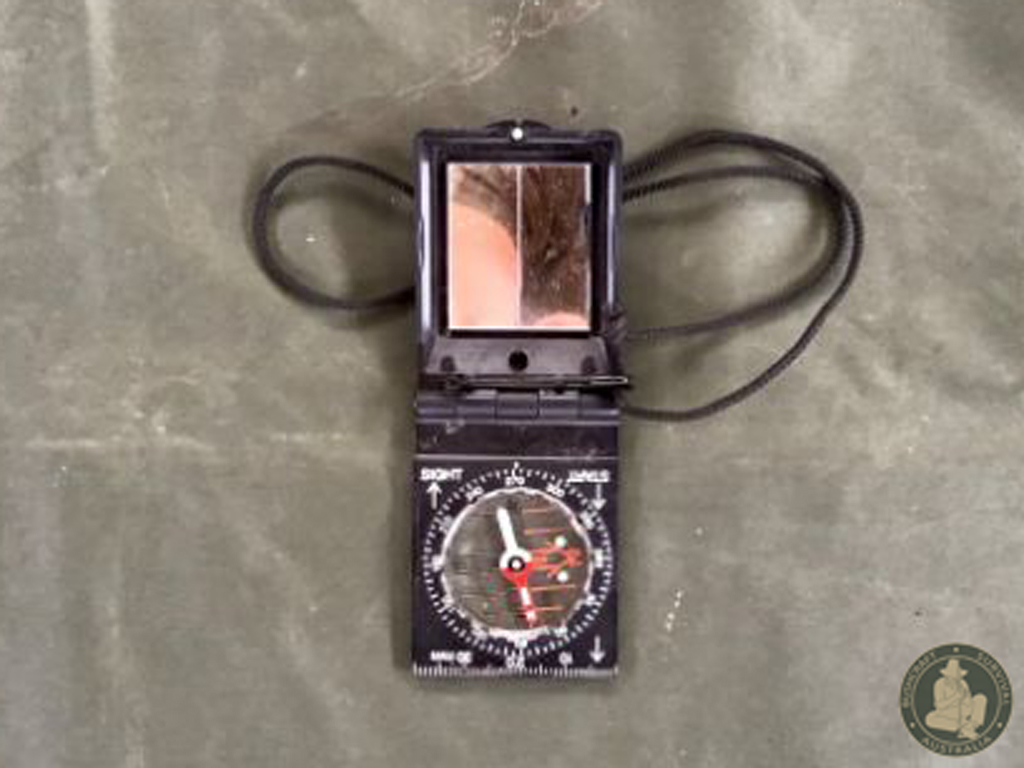
6. Compass This allows you to stay on course when moving from A to B and aids in direction finding. A “sighting compass” also has a mirror that can be used as a heliograph or for first aid. “Silva” make good quality compasses. If you don’t have a compass you will need to learn about natural navigation and finding direction from the sun, stars and other means.


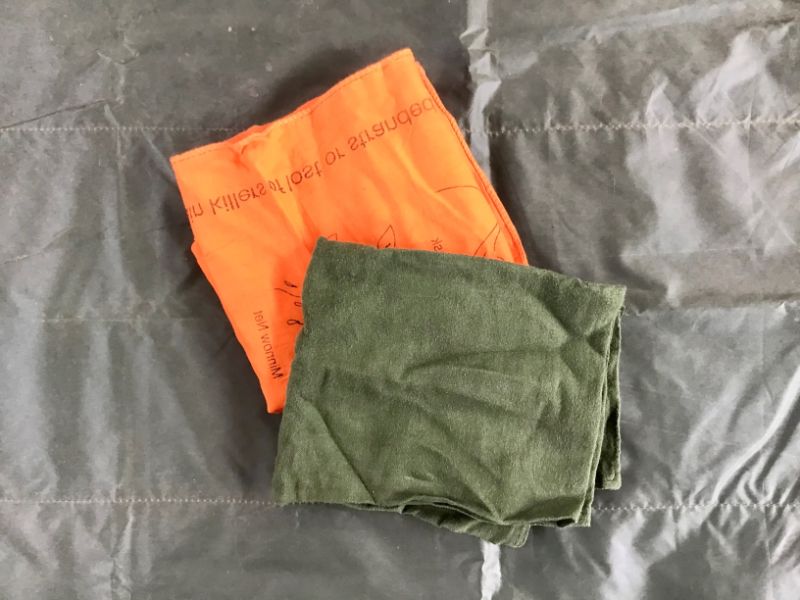
7. Cloth Bandanna This has multiple uses: head/neck scarf, filtering device, triangular bandage, sling, cordage, improvised bag, net, if 100% cotton can be used to make char cloth etc. An orange bandanna can also be used as a signalling device.

Green and Orange 100% cotton bandanas 3ft X 3ft

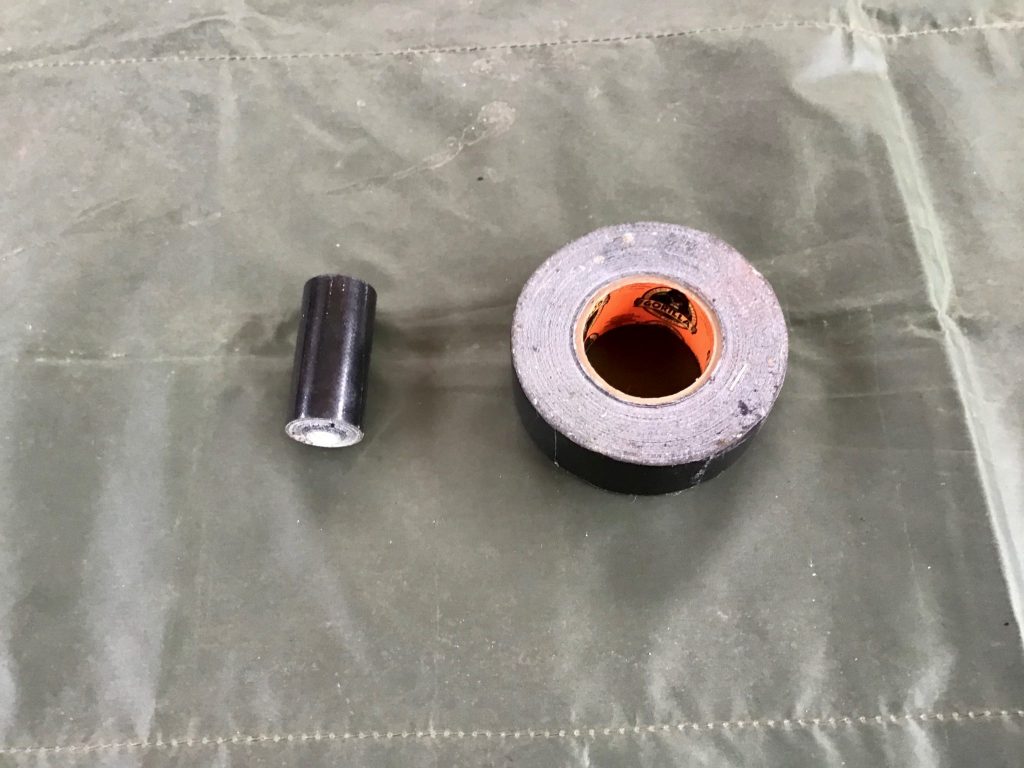
8. Duct tape used for mending things, water proofing, cordage, first aid, even to make an improvised water proof cup. A small roll of Gorilla tape is a good choice.

Roll of Gorilla tape. Roll can be made smaller by putting it onto a smaller spool

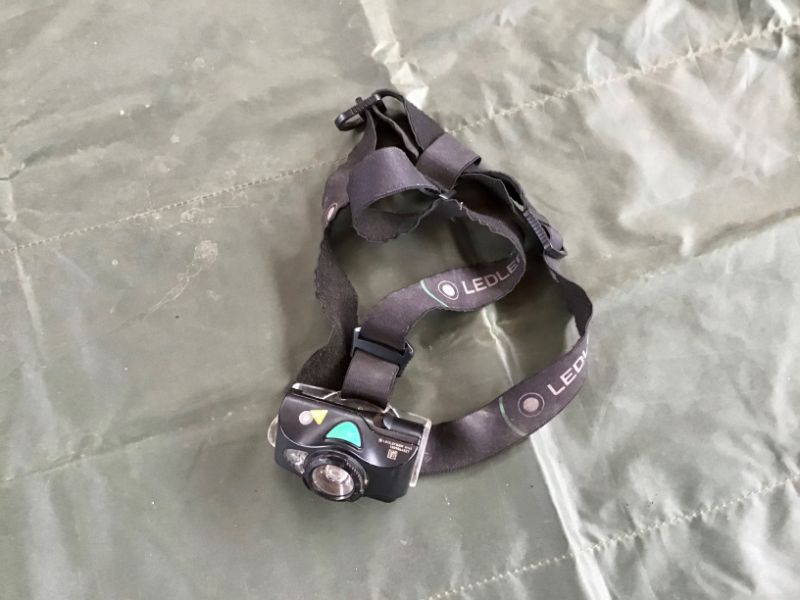
9. Head torch Used mainly as a light source but can also be used to make fire using the batteries and a piece of steel wool. “Ledlenser” make excellent head torches and portable lights.

Ledlenser MH8 head torch

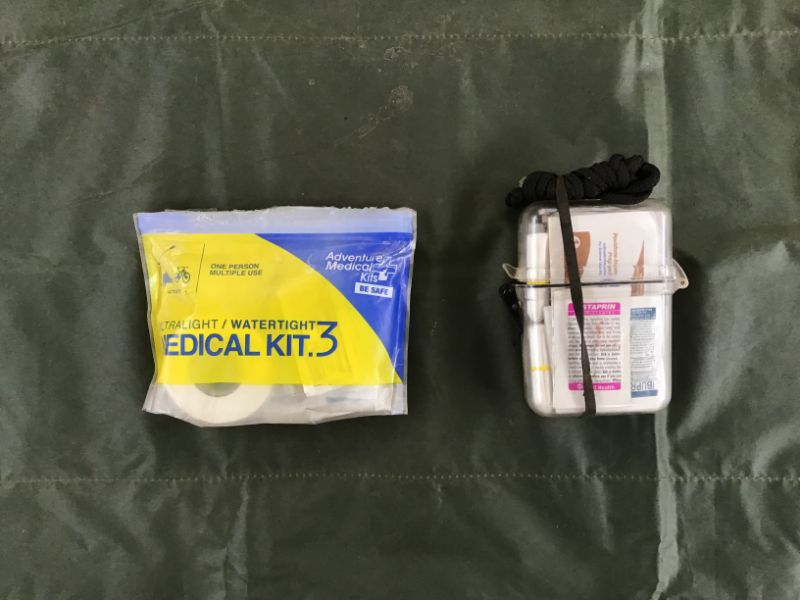
10. Small first aid kit This is personal choice but should have any prescribed medicines, items to deal with small cuts, scratches, bites and stings, iodine and alcohol preps, antiseptic ointment, small vial of Condees Crystals (Potassium Permangenate) and an assortment of needles including a cloth sail needle for kit repairs.

Small “Adventure Medical Kit“ and my own put together first aid kit in waterproof case

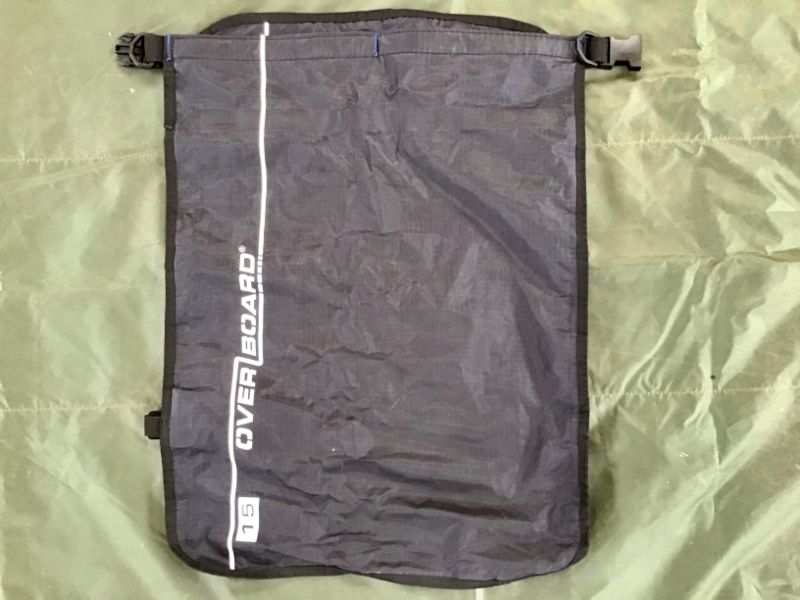
11. 5 Litre dry bag This can be used for water proofing, an extra water container or carry bag. “Overboard” make good quality dry bags.

“Overboard” 15L Dry Bag

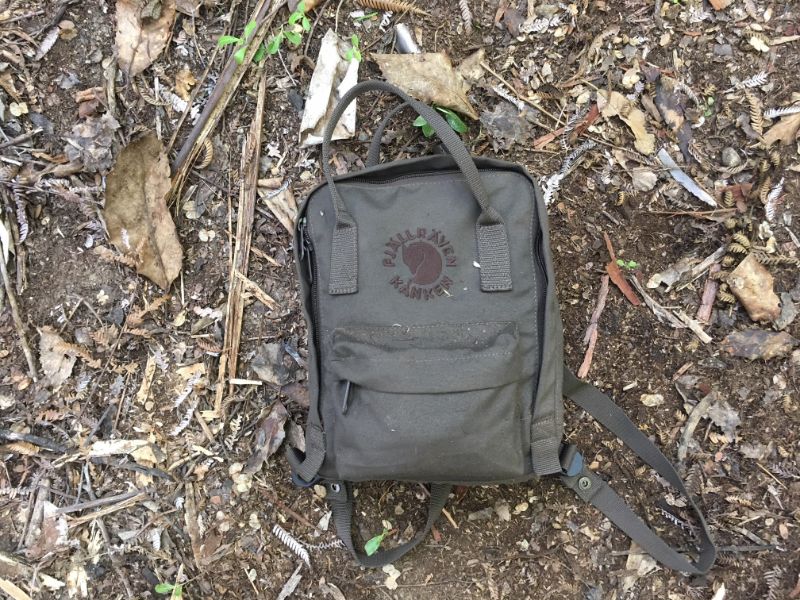
12. Small bag/pack A small day pack or bag to carry your items in. “Fjallraven” make durable small bags and mini packs that these items will fit into nicely.

Fjallraven “Mini Kanken”backpack

These 12 items are only suggestions and a base to build from and can be found in miniature in most military survival kits around the world.

Equipment is no substitute for knowledge which weighs nothing! The more you know, the less you have to carry!